Halloween baking is one of the most magical parts of the season. The house fills with the scent of butter and sugar, while little hands wait eagerly to decorate spooky treats. Ghost cookies have always been a favorite in our home. They bring smiles to kids and adults alike, and they add a playful charm to any party table. Baking these cookies is more than just following a recipe, it is a tradition that turns an ordinary evening into a memory.
What makes these ghost cookies stand out is their buttery taste and tender bite. The dough holds its shape well, so every ghost looks neat and polished after baking. Decorating is simple, even for beginners, thanks to a smooth royal icing that flows easily and dries with a glossy finish. Whether you bake them for a school party, a family movie night, or as a fun weekend project, these cookies are sure to delight.
Table of Contents
Why You’ll Love This Ghost Cookie Recipe
When it comes to Halloween baking, this ghost cookie recipe checks all the boxes. It is simple, fun, and delivers cookies that taste as good as they look. Whether you are an experienced baker or just starting out, you will find this recipe easy to follow and rewarding to make. Here is why it deserves a spot in your kitchen this season:
- No-Spread Dough: The dough is designed to keep its shape in the oven. Every ghost comes out looking sharp and defined, so you get perfect cookies every time.
- Amazing Flavor: These cookies are more than just a pretty design. They are buttery, tender, and lightly sweet, making them as delicious as they are cute.
- Perfect for Beginners: Clear step-by-step instructions guide you through the process. You do not need advanced baking skills to create cookies that impress.
- Fun to Decorate: With smooth royal icing, decorating becomes a joyful activity. Kids love adding faces to the ghosts, and adults enjoy the creative process too.
This ghost cookie recipe is a blend of reliable results and festive fun. It gives you no-spread dough, fantastic taste, and plenty of opportunities to get creative in the kitchen.
Ingredients You’ll Need
Before you start baking ghost sugar cookies, gather everything you need. Having your ingredients ready will make the process smoother and more enjoyable.
For the Cookies
- 2 sticks (8 ounces) unsalted butter, softened
- 1/4 cup cream cheese (2 ounces), softened
- 1 cup granulated sugar
- 1 large egg
- 1 1/2 teaspoons vanilla extract
- 3 cups all-purpose flour
- 1 1/2 teaspoons baking powder
- 3/4 teaspoon kosher salt
For the Royal Icing
- 3 1/2 cups powdered sugar (1 pound), sifted
- 4 large pasteurized egg whites (or 1/2 cup liquid egg whites)
- 1 teaspoon vanilla extract
- Black food coloring
Ingredient Notes
- Butter: Brings richness and that classic sugar cookie flavor. Using softened butter ensures the dough blends evenly.
- Cream Cheese: Adds tenderness to the dough and helps the cookies keep their shape, which is important when cutting out ghost shapes.
- All-Purpose Flour: Provides the right structure without making the cookies tough.
- Baking Powder: Gives just enough lift for soft, tender cookies without puffing too much.
- Pasteurized Egg Whites: Essential for safe royal icing, especially if children will enjoy the cookies. They whip into a glossy base that hardens beautifully.
- Powdered Sugar: Creates a smooth icing texture perfect for flooding and decorating.
- Black Food Coloring: Used in small amounts to give the ghosts expressive eyes and mouths.
With these ingredients, you are set to make ghost sugar cookies that not only look festive but also taste delightful with every bite.

Step-by-Step Instructions to Make Perfect Ghost Cookies
Learning how to make ghost cookies is simple when you follow each step carefully. From mixing the dough to decorating with royal icing, every stage ensures cookies that taste as amazing as they look.
1. Make the Cookie Dough
Start by placing softened butter, cream cheese, and sugar in a stand mixer. Beat on medium speed until the mixture looks light and fluffy, about 2 minutes. This step adds air, which gives the cookies a tender bite. Add the egg and vanilla extract, mixing until smooth. In a separate bowl, whisk together flour, baking powder, and salt. Slowly add the dry mix to the wet ingredients. Stir until a soft dough forms, but do not overmix. Overmixing can make the cookies tough.
2. Roll and Chill the Dough
Divide the dough into two portions and press each into a rectangle. Place each piece between two sheets of parchment paper. Roll the dough to about 1/8-inch thick. Keeping the parchment on both sides prevents sticking and keeps the dough smooth. Transfer the rolled dough to a baking sheet and chill for at least 1 hour. Chilling is key because it helps the dough firm up, so the ghost cookies hold their shape while baking.
3. Cut and Bake Your Ghosts
Preheat your oven to 350°F (175°C). Using a 3-inch ghost-shaped cookie cutter, cut out cookies from the chilled dough. Place them on a parchment-lined baking sheet, leaving a little space between each. Bake for 8 to 12 minutes. The edges should look set and just slightly golden, while the centers remain pale. This ensures soft, tender ghost cookies. Let them cool completely on a wire rack before decorating.
4. Prepare the Royal Icing
In a stand mixer, beat pasteurized egg whites until foamy. Add half of the sifted powdered sugar and beat until smooth. Slowly add the rest of the sugar and mix until the icing turns glossy and thick, about 4 to 5 minutes. Stir in vanilla extract. For decorating, divide the icing into two parts. Keep one portion thick for outlining. Thin the other with a few drops of water until it is pourable for flooding. Tint a small amount with black food coloring for eyes and mouths. Cover the icing bowls with plastic wrap to prevent drying.
5. Decorate Your Ghost Cookies
Place the thick white icing into a piping bag fitted with a small round tip. Outline each ghost cookie and let it sit for a few minutes. This creates a barrier for the thinned icing. Flood the center with the thinner icing, spreading it evenly with a toothpick. Allow the base layer to dry for at least 15 minutes before adding details. Using the black icing, pipe two small dots for eyes and a larger oval or circle for the mouth. Let the decorated cookies dry fully for at least 24 hours before stacking or storing.
With these steps, you will master how to decorate ghost cookies with ease. The result is a batch of cookies that look spooky yet adorable, perfect for Halloween parties or cozy nights at home.

Pro Tips for the Best Ghost Cookies
Baking the best ghost cookies is all about a few simple but important techniques. Follow these pro tips to make sure your cookies turn out perfect every time.
- Don’t Overmix the Dough: After adding the dry ingredients, mix just until the dough comes together. Overmixing develops gluten, which can make your cookies tough instead of tender.
- Chill, Chill, Chill: Never skip the chilling step. Cold dough bakes more evenly and holds its ghost shape without spreading in the oven. For best results, chill at least one hour or overnight.
- Icing Consistency is Key: Royal icing should be thick for outlining and slightly thinned for flooding. To test flooding icing, drag a spoon through the bowl. If the surface smooths out in about 10 seconds, it’s ready.
- Let Them Dry Completely: Patience pays off. Allow decorated cookies to dry for 24 hours before stacking or storing. This keeps the icing smooth, glossy, and crack-free.
With these expert tips, your ghost cookies will look polished and taste amazing, making them a hit at any Halloween gathering.
No Ghost Cookie Cutter? No Problem!
You don’t need a special cutter to bake these spooky treats. If you want to make ghost cookies without a cutter, try these easy methods that deliver the same fun results.
- Round Cookie Cutter Method: Start with a simple round cookie cutter. After cutting the circle, use a sharp knife to trim the bottom into a wavy edge that looks like the bottom of a ghost. Then pinch the top slightly to create a rounded “head.” With a little shaping, each circle transforms into a ghostly figure.
- DIY Paper Template: Draw a ghost shape on thick paper or cardboard and cut it out. Place the template on your rolled dough and use a paring knife to cut around it. This method takes a few extra minutes, but it guarantees unique, custom-looking ghosts.
These creative tricks mean anyone can enjoy DIY ghost cookies without a cutter. Whether you improvise with a round cutter or design your own template, your cookies will still capture that spooky, playful Halloween spirit.

Variations & Fun Ideas
Ghost cookies are already a Halloween classic, but you can easily add your own twist to make them even more fun. Try these simple variations to keep things exciting:
- Add a Hint of Flavor: Swap part of the vanilla extract with almond or lemon extract for a subtle but refreshing flavor. A touch of citrus in the icing can also brighten the taste.
- Colorful Ghosts: Who says ghosts have to be white? Use gel food coloring to tint the icing in shades like purple, green, or orange. Kids especially love decorating a tray of rainbow ghosts.
- Add Sprinkles: While the icing is still wet, sprinkle on Halloween-themed decorations such as black sugar crystals, orange nonpareils, or candy eyeballs. They add texture, sparkle, and extra festive charm.
These creative ideas keep your ghost cookies playful and unique. Whether you add flavor, color, or sprinkles, they’ll stand out on any Halloween dessert table.
Storage Instructions
Knowing how to store ghost cookies ensures they stay fresh and delicious long after baking. Follow these simple methods to keep them at their best.
Room Temperature
Once decorated cookies are completely dry, place them in a single layer inside an airtight container. If stacking, add a sheet of parchment paper between each layer to protect the icing. Stored at room temperature, ghost cookies stay fresh for up to one week. Keep them in a cool, dry place, away from direct sunlight or heat, which can soften the icing.
Freezing
If you want to prepare ahead, you can freeze ghost cookies with great results. For undecorated cookies, bake and cool them fully, then store in a freezer-safe bag or container for up to three months. When ready, thaw at room temperature before decorating. For decorated cookies, freeze them in a single layer until the icing is firm, then transfer to an airtight container with parchment between layers. They will last for about two months. Always thaw slowly at room temperature to avoid condensation on the icing.
With these methods, you’ll never wonder again, “Can I freeze ghost cookies?” The answer is yes, and they’ll be just as delightful after storing.
FAQs About Ghost Cookies
Why did my cookies spread?
If your ghost cookies spread in the oven, the dough was likely too warm. Always chill the rolled dough for at least one hour before cutting and baking. Overmixing can also cause spreading, as it activates too much gluten and softens the structure. To prevent this, mix only until the dough comes together.
Is royal icing safe to eat with raw egg whites?
Yes, as long as you use pasteurized egg whites. Pasteurization removes harmful bacteria, making them safe for use in royal icing. Many grocery stores sell cartons of pasteurized liquid egg whites, which are perfect for this recipe. Avoid using raw, unpasteurized eggs.
How long does it take for the royal icing to dry?
Royal icing takes time to harden properly. While the surface may look set after 15 minutes, full drying requires about 24 hours. Allowing this time ensures your ghost cookies can be stacked or stored without smudging the design.
Can I make the dough ahead of time?
Yes, this dough is very freezer-friendly. You can prepare it up to three days in advance and keep it wrapped in plastic in the fridge. For longer storage, freeze the dough for up to three months. Let it thaw in the fridge before rolling and cutting.
The Best Ghost Cookies for Halloween
These ghost cookies bring together everything you want in a Halloween treat. The dough is buttery and tender, yet strong enough to hold its shape without spreading. The royal icing is smooth, glossy, and easy to work with, making decorating fun for both kids and adults. Whether you use a cutter or try a DIY method, the results are always festive and delicious.
Now it’s your turn to bake a batch of these ghost cookies. Share them at a party, gift them to friends, or enjoy them with family on a cozy fall evening. Don’t forget to leave a comment below to let me know how your cookies turned out. For more recipes and inspiration, follow me on Facebook, Instagram, and Pinterest, you’ll find plenty of ideas to keep your holiday baking exciting.
More Spooky Treats to Try
If you loved making ghost cookies, you’ll enjoy trying a few more festive recipes that are just as fun and delicious. For another sweet treat, check out these Spider Cookies with their chocolate chip “spiders” that kids adore. And for a main dish with a spooky twist, these Halloween Monster Chicken Sliders are perfect for parties and family dinners.
Each recipe is simple, creative, and guaranteed to add charm to your Halloween spread. Pair them with ghost cookies for a full menu of spooky delights that guests will remember long after the night is over.
Print
Ghost Cookies
- Total Time: 25 hours
- Yield: 24 cookies 1x
- Diet: Vegetarian
Description
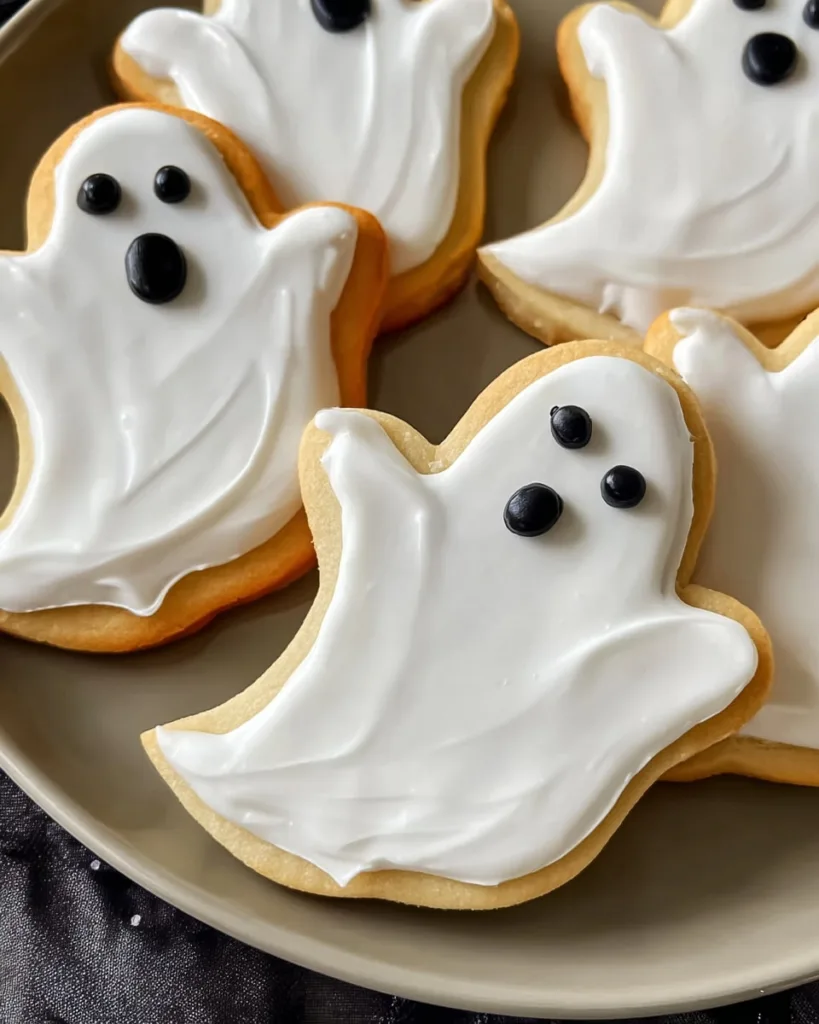
These adorable Ghost Cookies are buttery, tender, and decorated with smooth royal icing for a spooky Halloween treat. Perfect for parties, gifting, or decorating with kids, they hold their shape beautifully and taste as good as they look.
Ingredients
For the cookies:
- 2 sticks (8 ounces) unsalted butter, softened
- 1/4 cup cream cheese (2 ounces), softened
- 1 cup granulated sugar
- 1 large egg
- 1 1/2 teaspoons vanilla extract
- 3 cups all-purpose flour
- 1 1/2 teaspoons baking powder
- 3/4 teaspoon kosher salt
For the icing:
- 3 1/2 cups powdered sugar (1 pound), sifted
- 4 large pasteurized egg whites (or 1/2 cup liquid egg whites)
- 1 teaspoon vanilla extract
- Black food coloring
Instructions
- Make the Cookie Dough: In a stand mixer, beat butter, cream cheese, and sugar until light and fluffy, about 2 minutes. Add the egg and vanilla, mixing until smooth. In another bowl, whisk flour, baking powder, and salt, then gradually add to the wet ingredients until a soft dough forms.
- Roll and Chill: Divide dough in half, shape into rectangles, and roll between two sheets of parchment until 1/8-inch thick. Chill for at least 1 hour, or overnight.
- Cut and Bake: Preheat oven to 350°F (175°C). Cut ghost shapes with a 3-inch cookie cutter and place on lined baking sheets. Bake 8-12 minutes until just set and lightly golden at edges. Cool completely on a wire rack.
- Prepare the Royal Icing: In a mixer, beat egg whites until foamy. Add half the powdered sugar and mix until smooth, then add the rest and beat until glossy and thick, 4-5 minutes. Stir in vanilla.
- Tint and Thin: Reserve 1/2 cup icing and tint with black food coloring for eyes and mouths. Cover to prevent drying. Place some white icing in a piping bag for borders. Thin the rest with small amounts of water until pourable for flooding.
- Decorate: Outline cookies with border icing and let set for a few minutes. Flood centers with thinned icing, spreading evenly with a toothpick. Let dry for 15 minutes. Pipe black icing for eyes and mouths.
- Dry Completely: Allow cookies to dry at least 24 hours before stacking or storing.
Notes
For best results, let cookies dry uncovered at room temperature. To speed up decorating, you can use store-bought royal icing or edible markers for the eyes and mouths.
- Prep Time: 1 hour (plus chilling)
- Cook Time: 10 minutes
- Category: Halloween
- Method: Baking
- Cuisine: Halloween Treats
Nutrition
- Serving Size: 1 cookie
- Calories: 180
- Sugar: 18g
- Sodium: 95mg
- Fat: 7g
- Saturated Fat: 4g
- Unsaturated Fat: 2g
- Trans Fat: 0g
- Carbohydrates: 27g
- Fiber: 0g
- Protein: 2g
- Cholesterol: 25mg
Keywords: ghost cookies, halloween sugar cookies, halloween royal icing cookies


