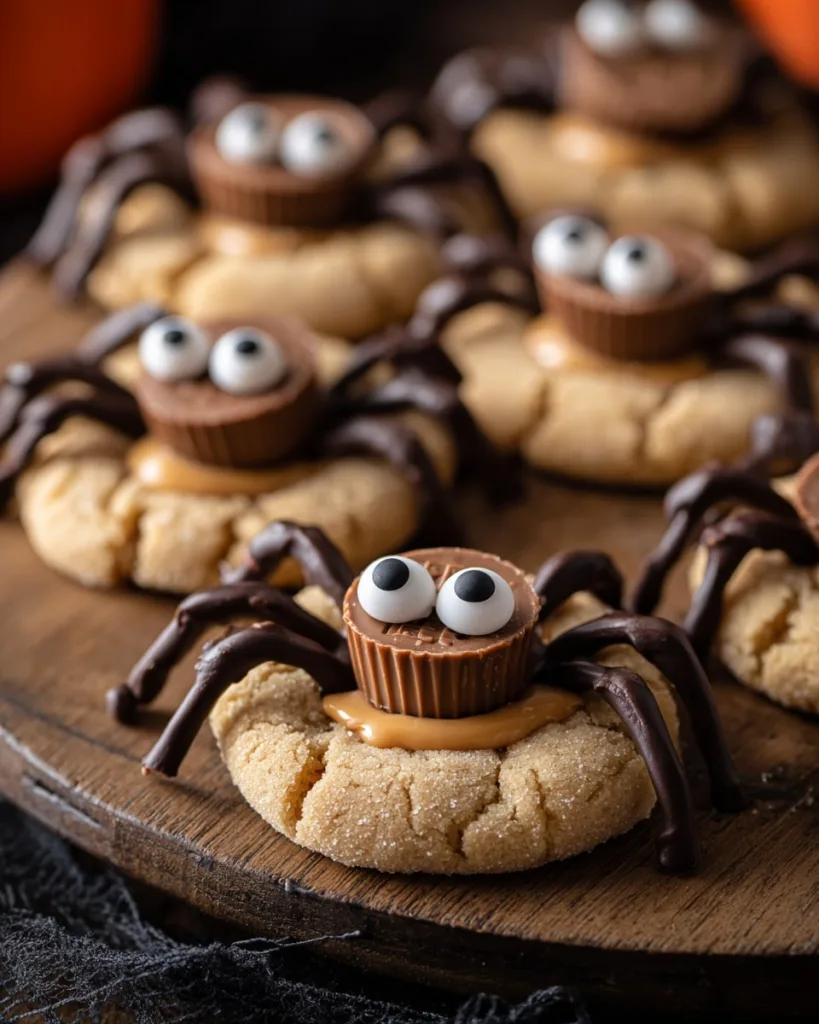
There’s nothing more fun on a crisp October day than baking up a batch of spooky treats that bring smiles to everyone’s face. These Peanut Butter Spider Cookies are our family’s absolute favorite Halloween tradition, and they never fail to make both kids and adults laugh with delight. Picture a tray of soft, chewy peanut butter cookies fresh from the oven, each topped with a chocolate peanut butter cup, candy eyes, and little chocolate legs that transform them into playful spiders.
What makes this recipe stand out is how simple and foolproof it is. You don’t need advanced baking skills to whip up these cookies, yet the results look like something from a bakery display. They’re soft, rich in flavor, and just the right mix of cute and creepy, making them the perfect easy Halloween treat. Whether you’re hosting a party or baking with your kids, these Peanut Butter Spider Cookies are guaranteed to steal the show.
Table of Contents
Why You’ll Love This Spider Cookies Recipe
When it comes to Halloween baking, these Peanut Butter Spider Cookies check every box. They’re festive, delicious, and surprisingly easy to make, which is why they’ve become a go-to treat for so many families. If you’re looking for a recipe that is fun for kids, impressive for parties, and comforting enough to enjoy with a cup of milk on a chilly night, this is the one. Here are a few reasons you’ll love baking them:
- The Perfect Texture: Thanks to the mix of peanut butter and shortening, the cookie base bakes up soft, chewy, and rich. Even after a couple of days, the cookies stay moist and fresh.
- Simple and Fun to Decorate: Kids love pressing on the peanut butter cups and adding candy eyes, while adults enjoy piping on the chocolate legs. It feels more like a craft project than baking.
- Classic Flavor Combination: Peanut butter and chocolate are a timeless pair. The salty-sweet peanut butter cookie paired with a Reese’s cup makes these irresistible.
- A No-Fail Recipe: This recipe has been tested many times, and the steps are clear and easy to follow. Even first-time bakers will feel confident making them.
These cookies are more than a dessert, they’re a Halloween memory in the making.
Ingredients You’ll Need
Before you start baking, gather all your ingredients so the process flows smoothly. Each component plays an important role in making these Peanut Butter Spider Cookies soft, chewy, and fun to decorate. Here’s what you’ll need:
- Shortening and Peanut Butter: Shortening helps create a tender cookie that stays soft for days. Pair it with creamy, no-stir peanut butter like Jif or Skippy for the best texture and flavor. Avoid natural peanut butter, as the oil separation can change the dough.
- Brown Sugar and White Sugar: Using both adds balance. Brown sugar keeps the cookies chewy and moist, while white sugar gives the edges a light crisp. Together, they create the perfect bite.
- Miniature Reese’s Cups: These form the “body” of your spiders. Pro tip: unwrap the cups while the cookies are baking and place them in the freezer. Pressing a frozen Reese’s cup into a hot cookie keeps it firm and prevents melting.
- Candy Eyes: You can find candy eyes at most grocery stores around Halloween or in the baking aisle year-round. They instantly bring your spiders to life.
- Chocolate Chips: Melted chocolate chips are perfect for piping legs around each Reese’s cup. They not only look spooky but also taste delicious with the peanut butter base.
With these simple ingredients, you’ll be ready to bake cookies that are as fun to make as they are to eat.
How to Make Peanut Butter Spider Cookies (Step-by-Step)
Baking these Peanut Butter Spider Cookies is easier than you might think. Follow these simple steps, and you’ll have a tray of spooky treats ready in under an hour.
Step 1: Prepare the Oven and Dry Ingredients
Preheat your oven to 375°F (190°C) so it’s ready when your dough is mixed. In a medium bowl, whisk together the flour, baking soda, and salt. This step ensures your leavening agents are evenly distributed, giving you cookies that rise properly and bake evenly.
Step 2: Mix the Wet Ingredients
In a large mixing bowl, beat together the shortening, creamy peanut butter, brown sugar, white sugar, egg, milk, and vanilla extract until the mixture is light and fluffy. Mixing thoroughly at this stage creates a smooth base that blends easily with the dry ingredients.
Step 3: Combine and Form the Dough
Slowly add the dry mixture into the wet ingredients, stirring until just combined. Avoid overmixing, as this can make the cookies tough. Once the dough comes together, roll it into 1-inch balls. This size is perfect for holding the Reese’s cup later without spreading too much.
Step 4: Roll and Bake the Cookies
Pour a small amount of white sugar into a shallow dish. Roll each dough ball in the sugar until coated, then place them about 2 inches apart on an ungreased cookie sheet. Bake for 10 to 12 minutes until the tops are set and lightly golden. The sugar coating adds a subtle crunch and sparkle to each cookie.
Step 5: Create the Spider Bodies (Pressing in the Reese’s)
As soon as the cookies come out of the oven, press a frozen miniature Reese’s cup upside down into the center of each one. Freezing the cups ahead of time keeps them from melting and losing their shape. Transfer the cookies carefully to a wire rack to cool while the chocolate softens slightly.
Step 6: Decorate the Spiders (Adding Eyes and Piping Legs)
While the Reese’s cups are still soft, press two candy eyes onto each one. Then, melt your chocolate chips in a microwave-safe bag or piping bag, microwaving in short bursts and kneading between each until smooth. Snip off a small corner of the bag and pipe eight legs around each Reese’s cup. Refrigerate the cookies for about 10 minutes so the chocolate legs set firmly.
Now your Peanut Butter Spider Cookies are ready to serve. They’re equal parts spooky and sweet, making them the ultimate Halloween party treat.
Pro Tips for Perfect Cookies
Even simple recipes benefit from a few expert tricks. These Peanut Butter Spider Cookies come out best when you follow these extra tips:
- Don’t Overbake: The cookies may look slightly soft in the center when you pull them from the oven. That’s exactly what you want. They’ll continue to set on the hot pan, giving you chewy centers instead of dry cookies.
- The Freezer Trick: Keep those miniature Reese’s cups in the freezer until the moment you press them into the hot cookies. This prevents melting and helps the chocolate hold its shape.
- Piping the Legs: For clean, detailed spider legs, snip the smallest corner possible from your plastic or piping bag. You can always cut more if needed. Pipe four neat “V” shapes on each side of the Reese’s cup for a spooky but cute look.
- Room Temperature Ingredients: Use room temperature egg, butter, and shortening when mixing the dough. This helps everything blend smoothly, giving you a consistent texture and a softer cookie.
These small details make a big difference in both the look and taste of your Halloween cookies.
Variations and Fun Substitutions
One of the best things about Peanut Butter Spider Cookies is how easy they are to customize. With just a few swaps, you can make these Halloween treats fit your personal taste or dietary needs. Here are some fun ideas to try:
- Spider Body Swaps: If you don’t have miniature Reese’s cups, try Rolos, chocolate kisses, or even small chocolate truffles. Each option creates a different look but still gives you that spooky spider body effect.
- Cookie Base Flavors: Want to switch up the flavor? Add ½ teaspoon of cinnamon to the dough for a warm fall twist, or make the base with a chocolate cookie dough for a double-chocolate spider cookie. Both options are perfect for chocolate lovers.
- Gluten-Free Option: Swap the all-purpose flour for a 1-to-1 gluten-free flour blend. This substitution works well without changing the texture, so everyone can enjoy these Halloween cookies.
- Ghost Spiders: For a spooky twist, use white chocolate Reese’s cups and melt white chocolate for the legs. Add the candy eyes, and you’ll have ghost spiders that look just as fun and taste just as delicious.
These variations are simple to make and bring extra creativity to your Halloween table.
Troubleshooting Common Issues
Even with a simple recipe like Peanut Butter Spider Cookies, small details can make a big difference. If something goes wrong, here are quick fixes to help you get back on track:
- Why did my cookies spread?
If your cookies spread too much, the dough was likely too warm or the butter was too soft when you started. Chilling the dough for 20–30 minutes before baking helps the cookies hold their shape. Also, check that your oven is fully preheated to the correct temperature. - Why are my cookies crumbly?
Crumbly cookies often mean too much flour or overbaking. Always use the spoon-and-level method when measuring flour: spoon it into the cup and level it off with a knife. Scooping directly from the bag packs in extra flour, which makes cookies dry. Also, remember to pull the cookies from the oven while the centers still look slightly soft. - Help! My Reese’s Cups are melting!
If the chocolate is sliding or losing shape, the cookie was too hot or the Reese’s weren’t frozen. Always freeze your candy before baking, and let the cookies rest for one to two minutes after coming out of the oven before pressing the cups into the center. This short wait keeps the chocolate intact.
With these solutions, your cookies will come out picture-perfect every time.
Storage and Freezing Instructions
These Peanut Butter Spider Cookies keep well, making them perfect for party prep or enjoying throughout the week. With the right storage, you can keep them fresh and delicious without losing their spooky charm.
- Storing at Room Temperature: Place the cooled cookies in an airtight container. Keep them at room temperature for up to 5 days. If stacking, place a sheet of parchment paper between layers to prevent the candy eyes or chocolate legs from smudging.
- Freezing Unbaked Dough: Roll the dough into 1-inch balls, then place them on a baking sheet to freeze until firm. Transfer to a freezer bag and store for up to 2 months. When ready to bake, roll in sugar and bake straight from frozen, adding 1–2 extra minutes to the bake time.
- Freezing Decorated Cookies: Let the chocolate legs and candy eyes set completely, then arrange the cookies in a single layer on a baking sheet to freeze. Once frozen, transfer to an airtight container with parchment between layers. They’ll keep for about 1 month. Thaw at room temperature before serving.
With these storage tips, you can prepare ahead and always have a batch of festive spider cookies ready.
Peanut Butter Spider Cookies FAQs
Can I make the cookie dough ahead of time?
Yes! You can prepare the dough in advance and refrigerate it for up to 3 days. When ready to bake, let the dough sit at room temperature for 10–15 minutes so it’s easier to roll into balls. This make-ahead step is perfect for busy schedules or party prep.
What is the best peanut butter to use?
For the best results, stick with a creamy, no-stir peanut butter such as Jif or Skippy. Natural peanut butters with separated oils can change the dough’s texture and make the cookies spread too much.
How do you get the candy eyes to stay on?
Press the eyes onto the Reese’s cup while it’s still slightly soft from the heat of the cookie. If they don’t stick, use a small dab of melted chocolate as “glue.” Once chilled, the eyes will stay in place.
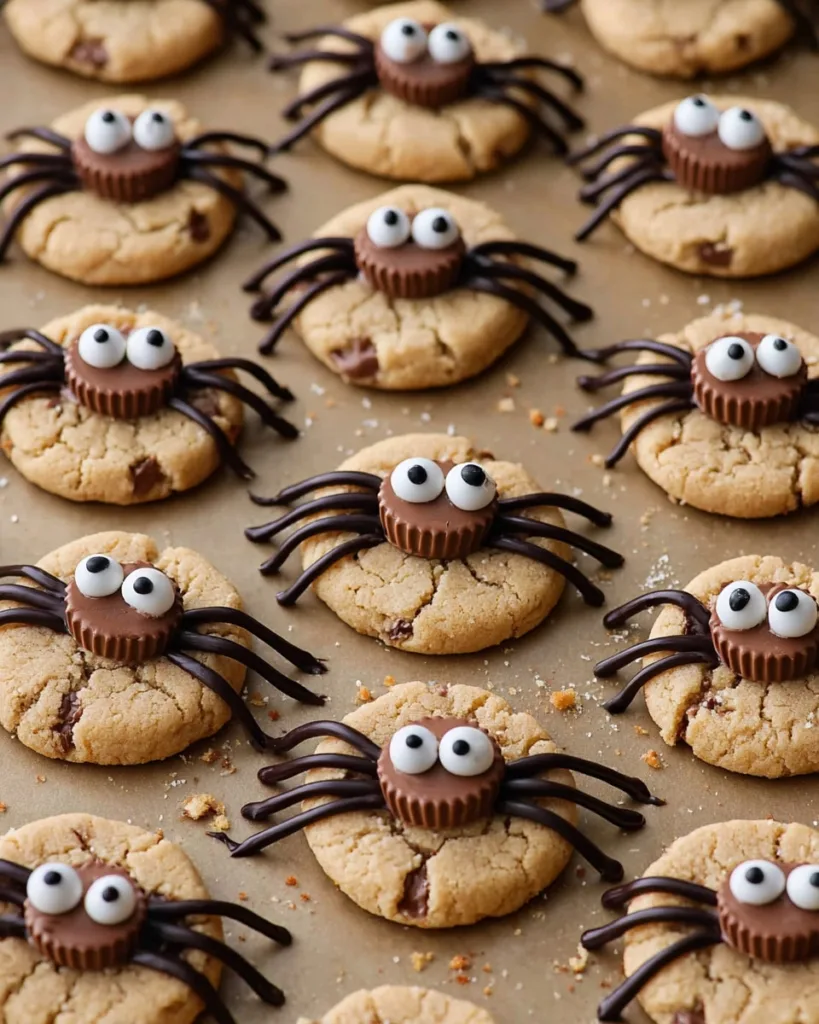
How many cookies does this recipe make?
This recipe yields about 48 cookies, depending on the size of your dough balls. The recipe card includes the yield so you can easily scale up or down for your needs.
What to Serve with Your Halloween Cookies
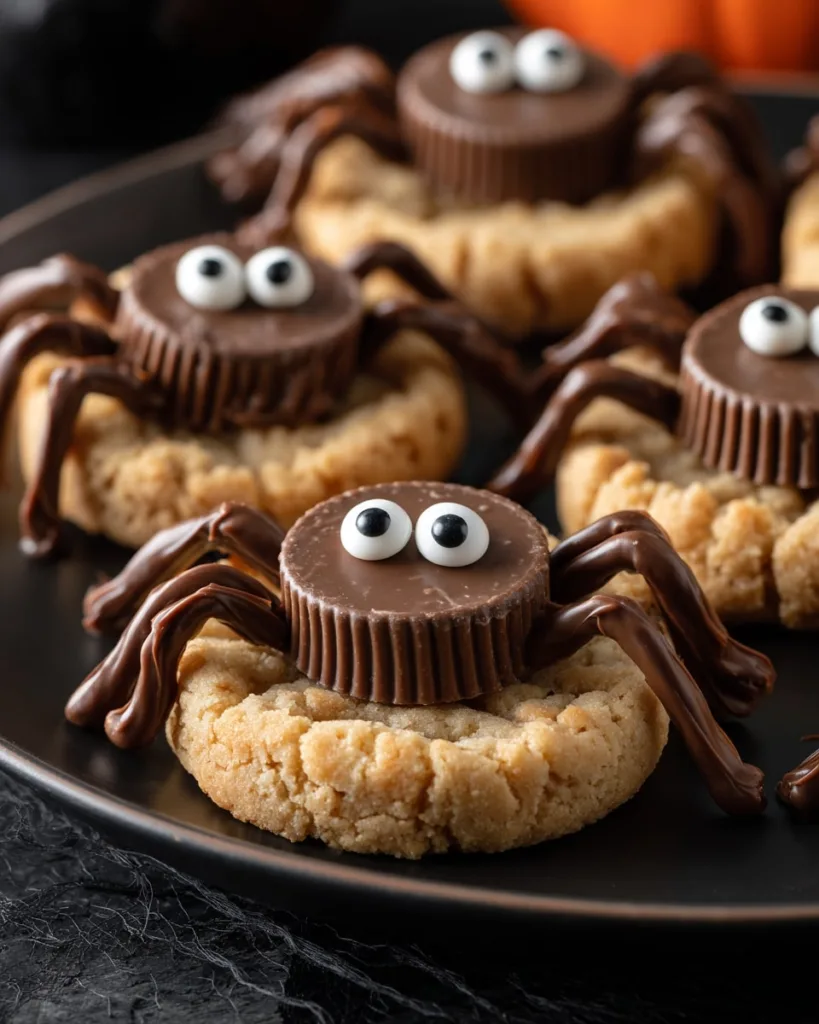
These Peanut Butter Spider Cookies taste amazing on their own, but they’re even better when paired with festive drinks and other spooky treats. Serve them with a cold glass of milk, a mug of rich hot chocolate, or a creamy pumpkin spice latte for the perfect cozy pairing. For parties, arrange them on a large Halloween dessert platter alongside other themed snacks for a show-stopping centerpiece.
If you’re building a full spread, try serving these cookies with other fun recipes like Mummy Pigs in a Blanket or Bloody Finger Cheese Sticks for a mix of savory and sweet. Your guests will love the variety and the playful presentation.
The Best Peanut Butter Spider Cookies for Halloween
These Peanut Butter Spider Cookies are the ultimate mix of fun, flavor, and festivity. With their soft peanut butter base, playful Reese’s cup centers, and spooky chocolate legs, they’re guaranteed to stand out on any Halloween dessert table. This recipe is simple enough for kids to help with, yet impressive enough to wow your party guests. Plus, the tried-and-true tips make it a no-fail treat you’ll want to bake every October.
Now it’s your turn! Bake a batch of these cookies, share them with family and friends, and see just how quickly they disappear. Don’t forget to leave a comment below to let me know how they turned out. For more fun seasonal recipes, follow along on Facebook, Instagram, and Pinterest so you never miss a new spooky favorite.
More Halloween Recipes You’ll Love
If you enjoyed these Peanut Butter Spider Cookies, you’ll love trying more spooky recipes. Add them to your party menu or bake them for a fun family night at home.
- Ghost Cookies: Buttery sugar cookies decorated with spooky white icing.
- Halloween Monster Chicken Sliders: A savory, kid-friendly main dish with a monster twist.
- Spider Cookies: These spider cookies are more than a sweet snack, they are a holiday experience.
These recipes will help you create a Halloween table filled with fun, flavor, and plenty of frightful charm.
Print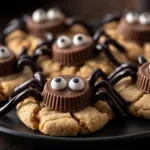
Peanut Butter Spider Cookies
- Total Time: 55 minutes
- Yield: 48 cookies 1x
- Diet: Vegetarian
Description
These Peanut Butter Spider Cookies are a cute yet creepy Halloween favorite. Soft peanut butter cookies are topped with Reese’s cups, candy eyes, and chocolate legs, making them the perfect treat for parties or spooky family fun.
Ingredients
- 1/2 cup shortening
- 1/2 cup peanut butter
- 1/2 cup brown sugar
- 1/2 cup sugar
- 1 egg
- 2 tablespoons milk
- 1 teaspoon vanilla extract
- 1 3/4 cups flour
- 1 teaspoon baking soda
- 1/2 teaspoon salt
- 1/4 cup sugar (for rolling)
- 48 miniature Reese’s cups, unwrapped and frozen
- 96 candy eyes
- 1/2 cup chocolate chips
Instructions
- Preheat the Oven: Preheat oven to 375°F (190°C).
- Make the Dough: In a large bowl, beat together shortening, peanut butter, brown sugar, sugar, egg, milk, and vanilla until smooth.
- Add Dry Ingredients: In another bowl, whisk together flour, baking soda, and salt. Gradually add to wet mixture until combined.
- Shape: Roll dough into 1-inch balls, then roll each ball in sugar. Place 2 inches apart on an ungreased cookie sheet.
- Bake: Bake 10–12 minutes until golden.
- Add Reese’s: Immediately press an upside-down frozen Reese’s cup into the center of each cookie. Transfer to a wire rack. While chocolate is still soft, press candy eyes onto each Reese’s cup.
- Chill: Refrigerate cookies for 10 minutes to firm.
- Make Legs: Melt chocolate chips in a sandwich bag by microwaving in 20-second bursts, kneading between each. Snip a small corner off the bag and pipe 8 legs around each Reese’s cup.
- Set: Refrigerate another 10 minutes until chocolate legs are firm. Serve and enjoy!
Notes
Freeze Reese’s cups before baking to keep them from melting too quickly. For variety, try using different flavored mini cups like dark chocolate or white chocolate Reese’s.
- Prep Time: 45 minutes
- Cook Time: 10 minutes
- Category: Halloween
- Method: Baking
- Cuisine: Halloween Treats
Nutrition
- Serving Size: 1 cookie
- Calories: 210
- Sugar: 18g
- Sodium: 120mg
- Fat: 12g
- Saturated Fat: 5g
- Unsaturated Fat: 5g
- Trans Fat: 0g
- Carbohydrates: 22g
- Fiber: 1g
- Protein: 4g
- Cholesterol: 10mg
Keywords: peanut butter spider cookies, halloween cookies, reese’s spider cookies


