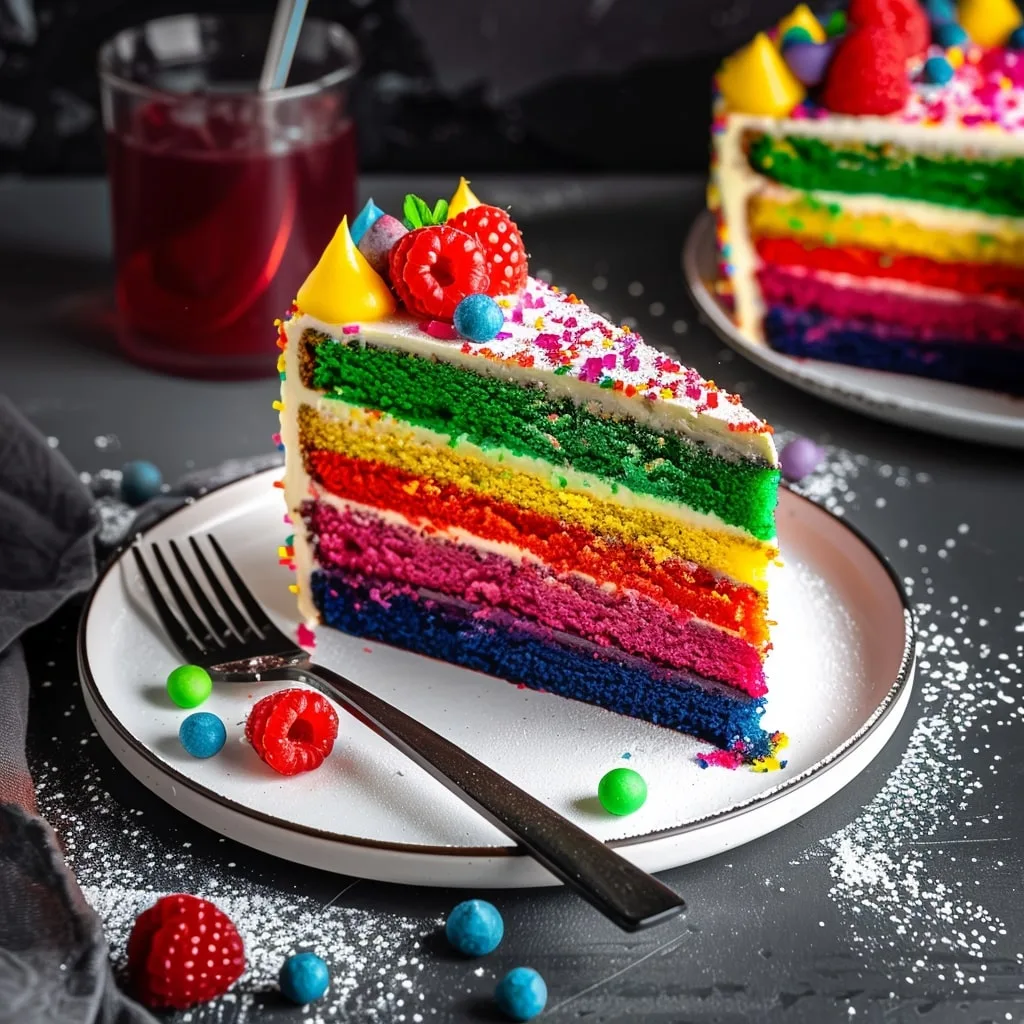
Nothing brings a party to life quite like slicing into a Rainbow Cake and watching everyone’s faces light up! I’ll never forget the first time I made this for my niece’s birthday – her gasp when she saw those bright layers was absolutely priceless. That’s the magic of this cake: it looks like a professional baker’s masterpiece, but trust me, it’s way easier to make than you’d think.

What I love most is how this simple vanilla cake transforms into something spectacular with just a few drops of food coloring. The colors bake up so vibrant, and when you stack those layers with fluffy buttercream in between? Pure happiness on a plate. Whether it’s a kid’s birthday, Pride celebration, or just because you need some extra cheer (we’ve all been there), this cake never fails to impress.
Rainbow Cake Ingredients
Okay, let’s gather our rainbow-making supplies! You’ll need:
- 1 cup (120g) all-purpose flour – spooned and leveled, please!
- 1 tablespoon (7.5g) cornstarch – our secret for extra tenderness
- 1 cup + 1 tablespoon (212g) granulated sugar – yes, that extra tablespoon matters
- 2 teaspoons baking powder – make sure it’s fresh
- ½ teaspoon salt – balances all that sweetness
- 6 tablespoons (85g) unsalted butter, softened – leave it out for about 30 minutes
- ½ cup (120mL) heavy cream, room temperature – cold cream won’t play nice
- 3 large egg whites, room temperature – save the yolks for custard!
- 1 ¼ teaspoons vanilla extract – the good stuff
- Gel food coloring in rainbow colors – trust me, gels work better than liquids
For that dreamy frosting:
- 4 cups (480g) powdered sugar – sifted if it’s lumpy
- 1 cup (227g) unsalted butter, softened – same as above
- 2 teaspoons vanilla extract – more vanilla goodness
- Pinch of salt – cuts the sweetness
- ⅓ cup (80mL) heavy whipping cream – makes it extra fluffy
See? Nothing too fancy – just quality ingredients prepped right. Now let’s make some magic!
How to Make Rainbow Cake
Alright, let’s dive into the fun part! Making this rainbow cake is like conducting a colorful science experiment – but with way tastier results. I’ll walk you through each step so your cake turns out as bright and beautiful as mine always does.
Preparing the Cake Batter
First things first – preheat that oven to 350°F (177°C). While it’s warming up, grease and flour two 6-inch round cake pans. Here’s my little secret: I like to trace the pan bottoms on parchment paper, cut out the circles, and line them too – makes removal foolproof!
Now for the batter: whisk together your dry ingredients (flour, cornstarch, sugar, baking powder and salt) in one bowl. In another, mix the wet stuff – cream, egg whites and vanilla. Cut in the softened butter with a pastry cutter or two knives until the mixture looks like coarse crumbs. Then pour in the wet ingredients and mix just until combined – don’t overmix or your cake will be tough!
Here comes the best part: divide the batter evenly between six small bowls (I use my trusty kitchen scale for precision). Now add your gel food coloring – a few drops at a time until you reach those vibrant rainbow shades. Pro tip: start with less color than you think you need – you can always add more!
Baking and Cooling the Layers
Pour each colored batter into its own prepared pan – you’ll bake them in batches unless you have six pans (who does?). Bake for 23-25 minutes until the edges pull away from the pan and a toothpick comes out clean. Don’t peek too early or they might sink!
This is crucial: let the layers cool in their pans for 10 minutes, then transfer to wire racks to cool completely. I know it’s tempting to frost them warm, but resist! Warm cakes make runny frosting disasters. Ask me how I know…
Frosting and Assembling the Rainbow Cake
While those beauties cool, make your frosting. Beat the butter until it’s light and creamy – about 2 minutes. Gradually add powdered sugar, then vanilla, salt, and cream. Whip it until fluffy – this is your edible “glue” between layers!
Now the grand assembly: if any layers domed while baking, gently level them with a serrated knife. Start with purple at the bottom (ROYGBIV order – remember the rainbow acronym from school?), spread a thin layer of frosting, then add blue, and so on up to red. Crumb coat the whole cake with a thin layer of frosting, chill for 15 minutes, then do your final frosting layer. Stand back and admire your edible rainbow masterpiece!
See? Not nearly as hard as it looks. The most difficult part is waiting to cut into it!
Tips for the Perfect Rainbow Cake
After making more rainbow cakes than I can count (some disasters, some triumphs!), I’ve picked up some foolproof tricks to make yours turn out stunning every time:
- Gel food coloring is non-negotiable – Liquid dyes water down your batter and give you sad, pastel colors. A tiny drop of gel packs serious vibrancy!
- Room temp ingredients are key – Cold eggs or butter make lumpy batter. Let everything sit out for 30 minutes before mixing.
- Weigh your batter – My kitchen scale ensures each color layer bakes up exactly the same height. About 150g per layer works perfectly.
- Bake on middle rack – Too high and the tops brown before centers cook. Too low and bottoms darken. Middle is Goldilocks-perfect.
- Freeze layers before frosting – 20 minutes in the freezer makes them easier to handle and prevents crumbs in your frosting.
- Use a turntable – Spinning the cake while frosting gives you that smooth, bakery-quality finish with zero stress.
Bonus trick: If colors bleed slightly between layers (it happens!), just call it an “ombre effect” – instant designer cake!
Rainbow Cake Variations
Once you’ve mastered the classic vanilla version, why not play with flavors? My favorite twist is swapping the vanilla for almond extract – just ½ teaspoon gives this cake such a lovely depth. Or try lemon zest in the batter with a citrusy cream cheese frosting for a bright, tangy contrast to all that sweetness.
For an elegant ombre effect, divide your batter into three bowls instead of six. Tint them light, medium and dark shades of the same color (I’m partial to pink!). Stack them from darkest at the bottom to lightest on top – it’s stunning and slightly easier than a full rainbow. The best part? You can’t mess it up because every variation looks intentional!
Serving and Storing Rainbow Cake
Here’s the fun part – slicing into your masterpiece! Always serve rainbow cake at room temperature so the flavors shine and the frosting stays creamy. Trust me, that first colorful slice revealing all the layers is pure magic. Use a sharp, warm knife (dip it in hot water and wipe dry between cuts) for clean slices that show off every vibrant hue.
Leftovers? (As if!) Store any uneaten cake in an airtight container at room temperature for up to 2 days, or in the fridge for 3-4 days. The colors might bleed slightly after day two, but it’ll still taste delicious. For longer storage, freeze unfrosted layers wrapped tightly in plastic – they’ll keep their rainbow brightness for up to a month!
Rainbow Cake FAQs
I’ve gotten so many questions about rainbow cakes over the years – here are the ones that pop up most often with my tried-and-true answers:
Can I use liquid food coloring instead of gel?
Oh honey, I wouldn’t recommend it. Liquid food coloring requires way too much (we’re talking tablespoons!) to get vibrant colors, and all that extra liquid throws off your batter consistency. Gel colors are super concentrated – just a tiny drop gives you those bright, bold layers we’re after. They’re worth tracking down!
How do I prevent colors from bleeding between layers?
Two secrets: First, make sure your cake layers are completely cooled before stacking – I mean cold-to-the-touch cooled. Second, apply a thin “crumb coat” of frosting between layers and chill the whole cake for 15 minutes before adding the final frosting layer. This creates a protective barrier that keeps those colors crisp!
Can I make this cake ahead of time?
Absolutely! You’ve got options: Bake the colorful layers up to 2 days in advance – just wrap them tightly in plastic and store at room temperature. Or freeze them for up to a month (thaw overnight in the fridge before assembling). The frosting also keeps beautifully in the fridge for a week – just let it come to room temperature and rewhip before using.
Why did my cake layers turn out different heights?
Been there! The culprit is usually uneven batter distribution. I religiously use my kitchen scale to weigh the batter into each bowl – aim for about 150g per color. Also, check your oven’s hot spots by rotating pans halfway through baking. Those small adjustments make all the difference!
Can I make this as cupcakes instead?
You bet! Just divide your colored batters into lined muffin tins (about 2 tablespoons per cup) and bake for 15-18 minutes. Stack two different colored cupcakes together with frosting in between for adorable “rainbow duo” treats!
Nutritional Information
Now, I’m no nutritionist, but I know folks like to have a general idea of what they’re enjoying. Keep in mind these numbers are just estimates – your actual rainbow cake might vary depending on the exact brands of butter, sugar, and other ingredients you use. (And let’s be real – when you’re serving up slices of pure joy, who’s counting calories anyway?)
The totals can change based on how thick you slice it too – my portions tend to get bigger when I’m really excited about sharing! Just remember, everything’s fine in moderation. This cake is meant to be a special treat for celebrations, not an everyday snack (though I won’t judge if you sneak an extra sliver…).
For those keeping track, a standard slice contains typical cake ingredients – flour, sugar, butter, eggs – with that magical rainbow twist. The bright colors come from just tiny amounts of gel food coloring, so no need to worry about that affecting the nutritional profile. Most importantly? The happiness factor is off the charts!
I’d Love to See Your Rainbow Creations!
Nothing makes me happier than seeing your colorful cake masterpieces – tag me on Instagram or drop a comment below with photos of your rainbow layers! And if this recipe brought some brightness to your celebration, I’d be over the moon if you left a star rating to let others know how it turned out.
Print
Rainbow Cake
- Total Time: 48 minutes
- Yield: 10 servings 1x
- Diet: Vegetarian
Description
A vibrant and colorful rainbow cake that’s perfect for celebrations. Easy to make with simple ingredients and a show-stopping result.
Ingredients
- 1 cup (120g) all-purpose flour
- 1 tablespoon (7.5g) cornstarch
- 1 cup + 1 tablespoon (212g) granulated sugar
- 2 teaspoons baking powder
- ½ teaspoon salt
- 6 tablespoons (85g) unsalted butter, softened
- ½ cup (120mL) heavy cream, room temperature
- 3 large egg whites, room temperature
- 1 ¼ teaspoons vanilla extract
- Food coloring in desired colors
- 4 cups (480g) powdered sugar
- 1 cup (227g) unsalted butter, softened
- 2 teaspoons vanilla extract
- Pinch of salt
- ⅓ cup (80mL) heavy whipping cream
Instructions
- Preheat oven to 350ºF (177ºC). Grease and flour two 6″ round cake pans.
- In separate bowls, combine dry and wet ingredients.
- Mix dry ingredients with butter until crumbly. Add wet ingredients and mix until smooth.
- Divide batter into bowls, color each batch, and bake for 23-25 minutes. Cool completely.
- Beat butter until creamy.
- Add powdered sugar, vanilla, salt, and cream; beat until fluffy.
- Trim cake layers if needed.
- Stack and frost layers in rainbow order.
- Frost and decorate the cake as desired.
Notes
- Use gel food coloring for vibrant colors.
- Ensure all ingredients are at room temperature for best results.
- Let cake layers cool completely before frosting to prevent melting.
- Prep Time: 20 minutes
- Cook Time: 28 minutes
- Category: Dessert
- Method: Baking
- Cuisine: American
Nutrition
- Serving Size: 1 slice
- Calories: 612
- Sugar: 60g
- Sodium: 180mg
- Fat: 32g
- Saturated Fat: 20g
- Unsaturated Fat: 10g
- Trans Fat: 0g
- Carbohydrates: 80g
- Fiber: 1g
- Protein: 4g
- Cholesterol: 85mg
Keywords: rainbow cake, colorful cake, celebration cake, easy cake recipe


