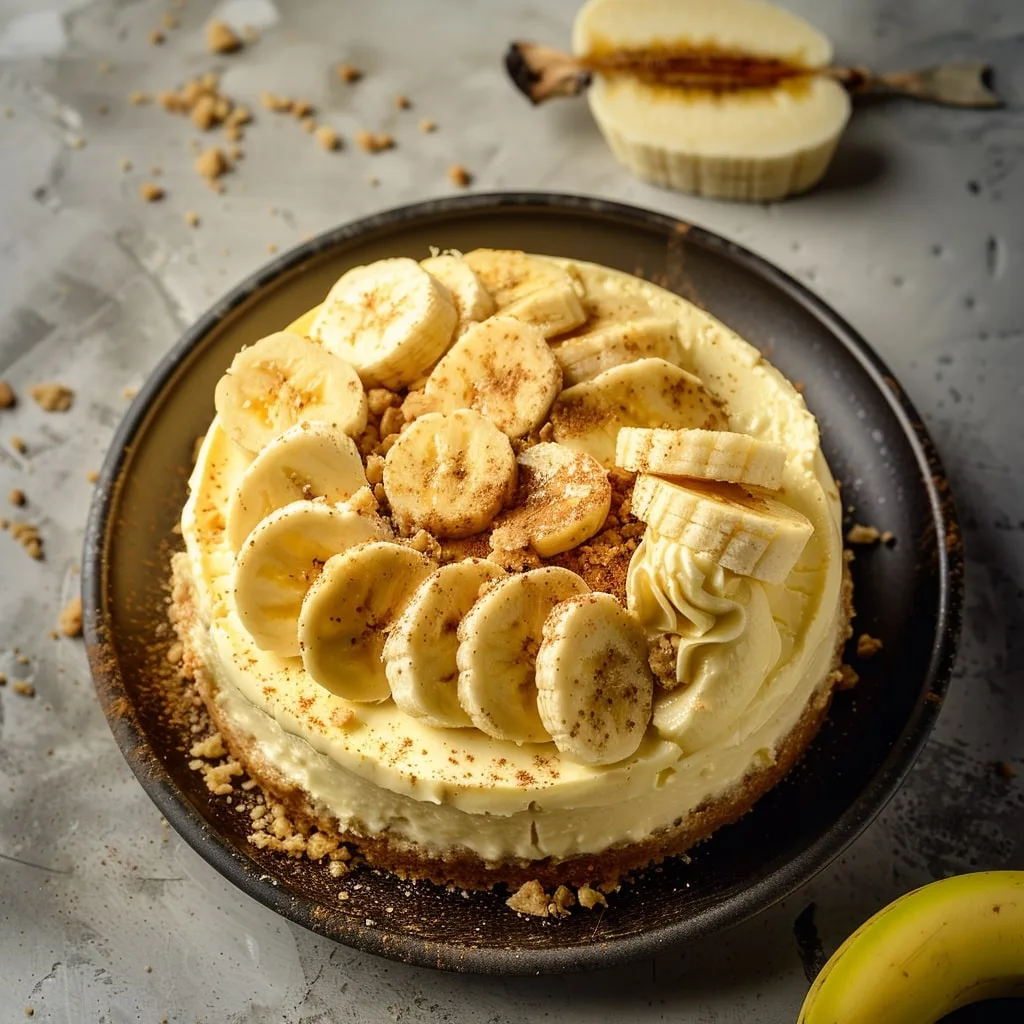
You know that moment when two classic desserts collide and create something magical? That’s exactly what happens with this banana pudding cheesecake. Imagine the creamy dreaminess of cheesecake marrying the nostalgic comfort of banana pudding, all nestled in a buttery Nilla Wafer crust. It’s like your favorite childhood dessert grew up and put on its fancy pants!
I first made this for my sister’s birthday last year when she couldn’t decide between cheesecake or banana pudding. “Why not both?” I thought, and oh boy, was that the right call. The whole family went wild for it – my nephew actually licked his plate clean (don’t worry, we were at home).
The secret’s in those roasted bananas, which we’ll mash into the filling. They bring this incredible depth of flavor you just don’t get with raw fruit. And that Nilla Wafer crust? Pure genius – it gives that perfect nostalgic crunch that makes banana pudding so special. The whole thing comes together in layers of creamy goodness that’ll have your guests begging for seconds.
What I love most is how the flavors develop overnight. That first bite after it’s had time to chill – wow! The banana flavor comes through so beautifully, the cheesecake stays luxuriously smooth, and the pudding layer ties it all together. It’s the kind of dessert that disappears fast at potlucks, so you might want to make two!
Banana Pudding Cheesecake Ingredients
Okay, let’s gather our goodies! Here’s what you’ll need to make this showstopper of a dessert. Trust me, every ingredient plays an important role in creating that perfect balance of flavors and textures we’re after.
For the Roasted Banana Mixture:
- 2 medium bananas (about 7-8 inches long) – look for ones with some brown spots for maximum sweetness
- 1 tablespoon light brown sugar – packed (this caramelizes beautifully when roasting)
For the Nilla Wafer Crust:
- 1 ½ cups Nilla Wafer crumbs (about 45 wafers crushed) – measure after crushing
- ¼ cup granulated sugar
- 4 tablespoons unsalted butter, melted (that’s half a stick)
For the Cheesecake Filling:
- 32 ounces cream cheese, room temperature (that’s 4 standard packages – leave them out for at least 2 hours)
- 1 cup granulated sugar
- 8 ounces sour cream, room temperature
- 1 tablespoon vanilla extract – don’t skimp here, it makes all the difference!
- 4 large eggs, room temperature (let them sit out with the cream cheese)
- 1-2 medium bananas, sliced (for topping – optional but gorgeous)
For the Toppings:
- ½ box instant vanilla pudding mix (about 3.4 ounces total – use half the package)
- 1 cup cold milk (whole milk works best)
- ½ cup heavy cream, chilled
- ½ tablespoon granulated sugar
- ½ teaspoon vanilla extract
- Extra Nilla Wafers for garnish (because more is always better, right?)
A little pro tip: I like to measure everything before starting – it makes the process so much smoother. And remember, room temperature ingredients are key for that perfect creamy texture we’re after!
How to Make Banana Pudding Cheesecake
Alright, let’s dive in! I’ll walk you through each step to create this heavenly banana pudding cheesecake. Don’t let the layers scare you – it’s easier than it looks, and I’ve got all the tips to make sure yours turns out perfect.
Prepare the Roasted Banana Mixture
First things first – we’re roasting those bananas! This step is what takes your cheesecake from “oh, that’s nice” to “oh my goodness what is this magic?!” Preheat your oven to 400°F (that’s 204°C if you’re fancy with metrics). While it heats up, grab your bananas and slice them lengthwise – no need to peel them first. Place them on a baking sheet cut-side up and sprinkle that lovely brown sugar all over. The sugar will melt into the bananas as they roast, creating this incredible caramelized flavor.
Pop them in the oven for about 10 minutes – you’ll know they’re ready when they’re fragrant and the sugar has turned all syrupy. Let them cool just enough so you can handle them, then scoop the soft banana goodness right out of the peels into a bowl. Mash them up with a fork – some small lumps are totally fine, they’ll add nice texture. Now, set this aside while we work on the crust.
Make the Nilla Wafer Crust
Time to create that crispy, buttery foundation for our masterpiece. Reduce your oven temperature to 325°F (162°C). Grab your food processor or a trusty ziplock bag and rolling pin to crush those Nilla Wafers into fine crumbs. You’ll want about 1½ cups of crumbs – I usually crush a few extra wafers just in case.
Mix the crumbs with the sugar, then pour in the melted butter. Stir until it looks like wet sand – when you squeeze a handful, it should hold its shape. Dump this into your springform pan (I use a 9-inch one) and press it firmly into the bottom and about an inch up the sides. I like to use the bottom of a measuring cup to really pack it in evenly.
Bake this for 10 minutes – just enough to set it and bring out that wonderful vanilla cookie flavor. Set it aside to cool while you make the filling – don’t worry, it doesn’t need to be completely cool before adding the batter.
Mix the Cheesecake Batter
Now for the creamy heart of our dessert! Remember how I said room temperature ingredients are crucial? This is where it really matters. In your stand mixer or with a hand mixer, beat the cream cheese until it’s completely smooth – about 2 minutes. Scrape down the sides with a rubber spatula – don’t skip this! Then add the sugar and beat again until fluffy.
Mix in the sour cream and vanilla, then add your gorgeous roasted banana mixture. Now for the eggs – add them one at a time, mixing just until each is incorporated before adding the next. Overbeating after the eggs go in can cause cracks, so take it easy here. The batter should be smooth and slightly glossy when you’re done.
Pour this luscious batter into your prepared crust, then give the pan a gentle tap on the counter to release any air bubbles. This is also when I sometimes run a knife through the batter to pop any stubborn bubbles – makes for a prettier top!
Bake and Cool the Cheesecake
Here’s where many cheesecakes go wrong – the baking method. We’re using a water bath (or bain-marie if you want to be fancy) to ensure even, gentle cooking. Wrap the bottom of your springform pan tightly with aluminum foil – I like to do two layers just to be safe. Place it in a larger pan (I use a roasting pan) and pour in boiling water until it comes about halfway up the sides of the springform.
Bake for 1 hour 20 minutes to 1 hour 45 minutes. You’re looking for the edges to be set but the center to still have a slight jiggle – like Jell-O when you tap the pan. When it’s done, turn off the oven, crack the door open, and let it cool in there for 1 hour. This gradual cooling helps prevent cracks. Then move it to a wire rack for another 2 hours before topping. Patience is hard, but it’s worth it!
Add Pudding and Whipped Cream Layers
Now for the fun finishing touches! Make your pudding layer by whisking half the pudding mix with the cold milk for about 2 minutes until it thickens. Let it sit for 5 minutes to set up, then spread it gently over your completely cooled cheesecake. Pop this in the fridge for at least 6 hours – overnight is even better if you can wait!
Right before serving, whip up that cream with the sugar and vanilla until you get stiff peaks. Pile it on top or get fancy with a piping bag – I like to use a star tip for pretty swirls. Garnish with banana slices (dip them in lemon juice first to prevent browning) and some whole Nilla Wafers. Then stand back and admire your masterpiece before digging in!

Why You’ll Love This Banana Pudding Cheesecake
Oh honey, let me count the ways this dessert will steal your heart! First off, that creamy texture – it’s like velvet meets clouds meets everything good in the world. The roasted bananas add this deep, caramelized flavor that makes regular banana desserts taste flat in comparison.
But here’s what really gets me:
- Nostalgia bomb! That Nilla Wafer crust tastes just like childhood, but all grown up and fancy
- Make-ahead magic – it actually gets better after chilling overnight (if you can resist eating it right away)
- Showstopper looks with minimal effort – the layers do all the fancy talking for you
- Crowd pleaser – I’ve never brought this to a gathering without someone asking for the recipe
- Perfect texture balance – crispy crust, creamy filling, fluffy topping… it’s got it all!
Seriously, this is the dessert that’ll make people think you slaved for days. Our little secret? It’s way easier than it looks. Just wait till you see those first blissed-out bites – that’s the real payoff right there!
Banana Pudding Cheesecake Tips for Success
Listen, I’ve made this banana pudding cheesecake more times than I can count, and let me tell you – I’ve learned all the tricks the hard way so you don’t have to! Here are my absolute must-know tips for cheesecake perfection every single time.
How to prevent that dreaded crack
First things first – don’t panic if your cheesecake cracks! It’ll still taste amazing. But if you want that Instagram-perfect smooth top, here’s what works for me:
- Room temp ingredients are non-negotiable – cold cream cheese = lumpy batter = cracks. I leave mine out for at least 2 hours before starting.
- Don’t overmix after adding eggs – once those eggs go in, mix just until combined. Overbeating incorporates too much air that then escapes during baking, leaving cracks behind.
- That water bath is your best friend – it creates gentle, even heat that prevents the top from drying out and cracking. Make sure your foil wrap is tight – soggy crust is no fun!
- Cool it slooooowly – that hour in the turned-off oven makes all the difference. No sudden temperature changes!
Perfect slices every time
There’s nothing sadder than a gorgeous cheesecake that turns into mush when you try to slice it. Here’s how to get clean cuts:
- Chill it thoroughly – I know it’s hard to wait, but that full 6 hours (better yet, overnight) in the fridge lets everything set up properly.
- Use a hot knife – run your knife under hot water and dry it between each cut. Works like magic!
- Parchment paper liner – if you line the bottom of your pan with parchment, you can lift the whole cheesecake out for easier slicing.
Extra pro tips from my kitchen to yours
These little tricks have saved me so many times:
- Roast extra bananas – I always do 3 instead of 2. The extras are amazing on toast or oatmeal the next morning!
- Brown sugar hack – if your brown sugar hardened into a brick, microwave it with a damp paper towel for 20 seconds to soften.
- Crumb crust insurance – press some extra crumbs up the sides where the crust meets the filling – helps prevent leaks!
- Pudding layer timing – wait until the pudding just begins to set before spreading, but don’t let it get too stiff.
Remember – even if it cracks or your slices aren’t perfect, it’ll still taste incredible. The best desserts are the ones made with love (and usually a little mess in the kitchen)!
Ingredient Substitutions & Notes
Listen, I know we don’t always have exactly what a recipe calls for – life happens! Here are my tried-and-true swaps that’ll still give you fantastic results. Just promise me one thing – don’t tell my grandma I’m suggesting these!
When you’re out of Nilla Wafers
That iconic vanilla flavor is hard to replace, but in a pinch:
- Graham crackers work beautifully – use the same 1½ cups crumbs with ¼ cup sugar and butter
- Vanilla wafers from other brands will do – just taste one first to check sweetness
- Shortbread cookies add a lovely buttery note – reduce the added sugar slightly
Dairy-free options that actually work
For my lactose-intolerant friends, you’ve got options:
- Cream cheese – Kite Hill or Daiya make decent plant-based versions
- Sour cream – coconut milk yogurt (the plain, unsweetened kind) mimics the tang
- Butter – use coconut oil or vegan butter sticks (not the tub kind!)
- Milk – any unsweetened plant milk works for the pudding layer
Pantry raid substitutions
Mid-recipe realization you’re missing something? Been there!
- Sour cream → Plain Greek yogurt (full-fat works best)
- Light brown sugar → Mix 1 tbsp molasses into 1 cup white sugar
- Instant pudding → Cook-and-serve works if you have time to chill it properly
- Fresh bananas for topping → Sliced and frozen work in a pinch (thaw first!)
A few important notes about ingredients
From one home cook to another – these details make all the difference:
- Banana size matters – medium means about 7-8 inches long, not those giant ones
- Room temperature is key – cold cream cheese will make your batter lumpy no matter how long you mix
- Pudding mix portion – this recipe uses exactly half the standard 3.4oz box
- Egg size – large means large! Extra large eggs can throw off the texture
Remember – baking is part science, part art. The most important ingredient is always love (and maybe a little patience when waiting for things to cool!).
Serving and Storing Banana Pudding Cheesecake
Now for the best part – enjoying your masterpiece! Here’s how to serve it up right and keep any leftovers (if you’re lucky enough to have some) tasting fresh.
Garnishing like a pro
Presentation is everything with this showstopper! My go-to garnishes are:
- Fresh banana slices (dipped in lemon juice first to prevent browning)
- Whole Nilla Wafers standing up around the edges – so cute!
- Crushed wafer sprinkles over the whipped cream
- Caramel drizzle for extra decadence (just warm some caramel sauce slightly to make it pourable)
- Mini chocolate chips for a fun contrast
Getting those perfect slices
Nothing worse than messy slices ruining your beautiful dessert. Here’s my method:
- Run your knife under very hot water and dry it completely
- Make your first cut, then wipe the knife clean
- Repeat the hot water step between each slice – it’s worth the extra effort!
- Use a cake server or thin spatula to lift out each piece
Storing your cheesecake
This beauty keeps beautifully if you store it right:
- Refrigerator: Cover tightly with plastic wrap or in an airtight container for up to 5 days
- Freezer: Wrap individual slices in plastic, then foil, and freeze for up to 3 months
- Pro tip: Wait to add fresh banana slices until right before serving if storing
When thawing frozen slices, move them to the fridge overnight. The texture stays perfect – I’ve fooled many people with “fresh” cheesecake that was actually frozen weeks earlier!
One last serving tip? Have napkins ready – between the creamy layers and crispy toppings, this is one gloriously messy dessert worth every delicious bite.
Banana Pudding Cheesecake FAQs
Okay, let’s tackle those burning questions I always get about this recipe! I’ve answered everything from panicked texts (“Help! My cream cheese was cold!”) to curious inquiries about substitutions. Here’s what you need to know:
Can I use fresh bananas instead of roasted?
Technically? Yes. But oh honey, you’ll miss out on so much flavor! Roasting caramelizes the natural sugars in bananas, giving this cheesecake its incredible depth. Fresh bananas work in a pinch (use 1½ mashed), but they’ll taste milder and can make the texture slightly wetter. If you must skip roasting, at least let the mashed bananas sit with the brown sugar for 30 minutes to macerate.
How long does banana pudding cheesecake keep?
In the fridge, it stays dreamy for 4-5 days if stored airtight (I press plastic wrap directly on the surface). The whipped cream topping holds up best if added right before serving. Frozen? Wrap slices tightly in plastic then foil – they’ll keep for 3 months! Thaw overnight in the fridge for perfect texture.
Can I make this without a springform pan?
Absolutely! A 9-inch deep pie dish works (you might have extra batter – bake it in ramekins!). For regular cake pans, line with parchment paper hanging over the edges for easy removal. Just know the water bath trick gets trickier – place the pan on a towel in a roasting pan to prevent sliding.
Why did my pudding layer turn out runny?
Two likely culprits: either the pudding didn’t chill long enough before spreading (give it 10 minutes after whisking), or the cheesecake wasn’t fully cooled. Both cause the pudding to “melt.” Pro tip: if this happens, pop the whole thing back in the fridge for 2 hours – it usually firms up!
Can I prepare this ahead for a party?
You’re speaking my language! Here’s my make-ahead game plan:
- 3 days before: Bake and cool cheesecake (no toppings)
- 1 day before: Add pudding layer and refrigerate
- Party day: Top with whipped cream and garnishes
This timeline lets flavors develop while keeping everything fresh-looking. Just cover each layer with plastic wrap as you go!
Still have questions? Slide into my DMs anytime – I love helping fellow bakers nail this showstopper!
Nutritional Information
Alright, let’s talk numbers – but remember, baking is about joy first, math second! These estimates are based on slicing our glorious banana pudding cheesecake into 10 generous portions. Your actual counts might vary slightly depending on exact ingredients and serving sizes (let’s be real – my “slices” tend to grow as the night goes on!).
Here’s the breakdown per serving:
- Calories: 450 (worth every single one!)
- Total Fat: 28g (16g saturated – hello, cream cheese!)
- Cholesterol: 140mg
- Sodium: 280mg
- Total Carbohydrates: 42g
- Dietary Fiber: 1g
- Sugars: 35g (includes natural sugars from bananas)
- Protein: 7g
A quick note for my nutrition-conscious friends: You can lighten things up slightly by using reduced-fat cream cheese and sour cream, but I find the texture isn’t quite as luxuriously smooth. Personally? I’d rather have a smaller slice of the real deal and savor every bite!
Remember, these values are estimates calculated using standard ingredients. Your exact counts may vary based on specific brands and measurements. Now go enjoy your masterpiece – life’s too short not to indulge in desserts made with love!
Print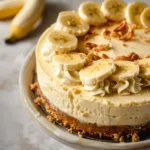
Banana Pudding Cheesecake
- Total Time: 9 hours 45 minutes
- Yield: 10 servings 1x
- Diet: Vegetarian
Description
A creamy Banana Pudding Cheesecake with a Nilla Wafer crust, topped with vanilla pudding and whipped cream.
Ingredients
- 2 medium bananas
- 1 tablespoon light brown sugar
- 1 ½ cups Nilla Wafer crumbs
- ¼ cup granulated sugar
- 4 tablespoons unsalted butter, melted
- 32 ounces cream cheese, room temperature
- 1 cup granulated sugar
- 8 ounces sour cream, room temperature
- 1 tablespoon vanilla extract
- 4 large eggs, room temperature
- 1–2 medium bananas
- ½ box instant vanilla pudding mix
- 1 cup cold milk
- ½ cup heavy cream
- ½ tablespoon granulated sugar
- ½ teaspoon vanilla extract
Instructions
- Preheat oven to 400ºF (204ºC). Slice bananas lengthwise and sprinkle with brown sugar. Roast for 10 minutes. Mash and cool.
- Reduce oven to 325ºF (162ºC). Combine wafer crumbs, sugar, and butter. Press into a springform pan. Bake for 10 minutes.
- Beat cream cheese and sugar until smooth. Add sour cream, roasted bananas, and vanilla. Mix in eggs one at a time. Fold batter and pour into crust.
- Create a water bath and bake for 1 hour 20 minutes to 1 hour 45 minutes. Cool in oven for 1 hour, then on a rack for 2 hours.
- Mix pudding with milk and chill.
- Spread pudding on cooled cheesecake. Chill for at least 6 hours.
- Beat cream, sugar, and vanilla to stiff peaks. Spread or pipe on cheesecake and garnish with wafer crumbs and banana slices.
Notes
- Use room temperature ingredients for smoother batter.
- Let the cheesecake cool slowly to prevent cracking.
- Chill thoroughly before serving for best texture.
- Prep Time: 25 minutes
- Cook Time: 1 hour 20 minutes
- Category: Dessert
- Method: Baking
- Cuisine: American
Nutrition
- Serving Size: 1 slice
- Calories: 450
- Sugar: 35g
- Sodium: 280mg
- Fat: 28g
- Saturated Fat: 16g
- Unsaturated Fat: 9g
- Trans Fat: 0g
- Carbohydrates: 42g
- Fiber: 1g
- Protein: 7g
- Cholesterol: 140mg
Keywords: banana pudding cheesecake, Nilla Wafer crust, creamy dessert, easy cheesecake recipe


