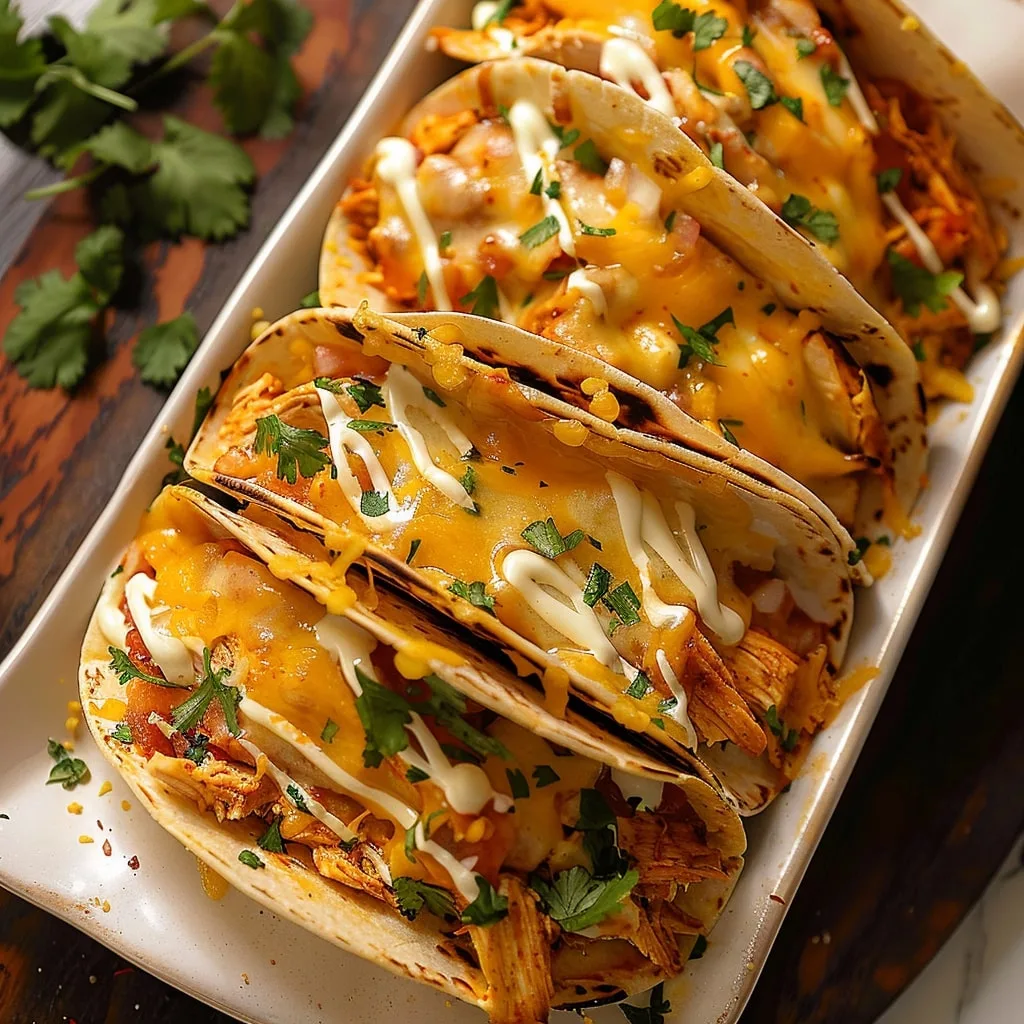
Okay, let me tell you about the night these Cheesy Baked Chicken Tacos became a legend in my house. It was one of those “I have zero energy but need something delicious” evenings, and I swear the kids were seconds away from mutiny. But here’s the magic – in under 30 minutes, I had crispy shells stuffed with melty cheese, perfectly seasoned chicken, and all the good stuff. The whole family went quiet except for “Mmmms” and “Can I have another?”

What I love most (besides how crazy easy these are) is how the cheese gets all golden and bubbly in the oven. It’s like regular tacos decided to put on their fancy pants. The Stand ‘N Stuff shells hold everything perfectly – no more filling avalanches halfway through eating! Trust me, once you try baking your tacos, you’ll wonder why you ever did it any other way.
This recipe is my go-to when I need something that feels special but doesn’t require special effort. Rotisserie chicken does half the work, and that pre-shredded Mexican cheese blend? Pure genius. Even my “I don’t like beans” kid inhales these because the refried beans just melt into the background, adding creaminess without stealing the show.
Table of Contents
Why You’ll Love These Cheesy Baked Chicken Tacos
Let me count the ways these tacos will become your new weeknight hero:
- Speed demon: From fridge to table in 25 minutes flat – faster than pizza delivery!
- One-pan wonder: Just a baking sheet and skillet to wash (my kind of cleanup).
- Crowd pleaser: Kids go nuts for the crispy cheese, adults love the bold flavors – no more separate meals!
- No-fail: The oven does all the hard work – no flipping, no messy frying, just golden perfection.
- Leftover magic: That rotisserie chicken finally has its moment to shine (and saves you time).
Honestly? The first time I made these, my husband asked if I’d taken cooking classes. Nope – just discovered the easiest way to look like a kitchen rockstar!
Ingredients for Cheesy Baked Chicken Tacos
Here’s everything you’ll need to make these ridiculously good tacos – I’ve learned a few tricks about these ingredients that make all the difference:
- 10 Old El Paso Stand ‘N Stuff taco shells – The wide, flat-bottomed ones are key for holding all that cheesy goodness without tipping over.
- 1/2 medium yellow onion, diced – About the size of a baseball when whole. I like mine finely chopped so no one gets a big onion surprise!
- 2 1/2 cups rotisserie chicken or cooked chicken, shredded – That’s about 1 pound.
Pro tip: Grab the already-cooked chicken from the grocery store deli to save time. - 1 (1 oz.) packet taco seasoning – My secret? Use half the water the packet suggests for a thicker, more flavorful filling.
- 1 (10 oz.) can Rotel diced tomatoes, fully drained – Seriously, press these in a strainer – soggy tacos are the worst!
- 8 oz. refried beans – The cans with the pull-tab lid are my jam when I’m in a hurry.
- 1 (8 oz.) package Mexican cheese blend – That pre-shredded fiesta blend is perfect here – no grating necessary!
See? Nothing fancy, just smart choices that come together for maximum flavor with minimal effort. The Rotel and cheese blend are my two “don’t skip” ingredients – they make these tacos taste like you spent hours when really, you’ll be done before the oven finishes preheating!
Equipment You’ll Need
Gather these trusty kitchen tools – nothing fancy required:
- Large baking sheet – The kind you’d use for cookies works perfectly
- Medium skillet – For that golden onion and chicken magic
- Mixing bowl – Just one medium-sized one does the trick
- Spatula – My slightly battered one still works like a charm
- Strainer – Crucial for draining those Rotel tomatoes properly
That’s it! No special gadgets needed – just the basics you probably already have in your kitchen drawers.
How to Make Cheesy Baked Chicken Tacos
Okay, let’s get these beauties in the oven! I’ve made this recipe so many times I could do it in my sleep, but I’ll walk you through each step so yours turn out perfect on the first try.
Step 1: Prep the Filling
First things first – crank that oven to 400°F. While it’s heating up, grab your skillet and let’s get cooking. Toss in your diced onions with a tiny splash of oil (I use canola) and sauté them over medium heat until they turn translucent – about 3 minutes should do it. You’ll know they’re ready when your kitchen smells amazing and the onions look kinda shiny.
Now dump in your shredded chicken – I like to use my hands to really break it up. Sprinkle that taco seasoning packet over everything (here’s my trick: only add half the water the packet suggests – makes the filling thicker!). Stir it all together and let it simmer for about 5 minutes until the liquid reduces and coats the chicken beautifully. When it looks like the chicken is wearing a shiny spice jacket, you’re golden.
Last step for the filling – drain those Rotel tomatoes like your taco life depends on it (it kinda does). Press them in a strainer until no more liquid drips out, then stir them into the chicken mixture. Cook for another 2 minutes just to warm them through – done!
Step 2: Assemble the Tacos
Line up your taco shells on the baking sheet – I leave a little space between them so the cheese can get crispy all around. Now grab your refried beans – if they’re cold from the fridge, microwave them for 30 seconds to make spreading easier.
Here’s how I layer: first a spoonful of beans smeared on the bottom (about 1 tablespoon per shell), then pile on that glorious chicken mixture (don’t be shy!), and finally – the star of the show – a generous handful of cheese on top. I press it down slightly so it melts into all the nooks and crannies.
Step 3: Bake to Perfection
Slide that baking sheet into your preheated oven and set a timer for 5 minutes. At the 5-minute mark, peek in – you want the cheese fully melted with maybe a few golden spots starting to form. If it’s not quite there, give it another 2 minutes max. Overbaking makes the shells too crispy (trust me, I learned the hard way).
When they come out, the cheese should be stretchy when you pull a taco away, and the shells will have that perfect crisp-tender texture. Let them cool for just a minute (so you don’t burn your mouth!) before adding your favorite toppings.
Tips for Perfect Cheesy Baked Chicken Tacos
After making these tacos more times than I can count, here are my can’t-miss secrets for the absolute best results:
- Drain like you mean it: Press those Rotel tomatoes in a strainer until not a single drop of liquid remains – soggy taco shells are the enemy!
- Fresh is best: Grocery store rotisserie chicken beats boiled chicken breasts every time – the extra flavor makes all the difference.
- Cheese strategy: Use half the cheese under the chicken and half on top for maximum meltiness in every bite.
- Shell saver: Spread beans all the way to the edges – they act as a moisture barrier to keep shells crisp.
- Watch the clock: Set a timer! Even 1 extra minute can turn perfect shells into crackers.
Follow these tips and you’ll get perfect tacos every single time – golden, gooey, and packed with flavor!
Serving Suggestions for Cheesy Baked Chicken Tacos
Oh, the topping possibilities! Here’s how we go all out at my house:
- The classics: Cool dollops of sour cream, chunky salsa, and creamy guacamole (or just smashed avocado if I’m lazy)
- Crunch factor: Shredded lettuce or cabbage for that fresh crispness against the melty cheese
- Heat seekers: Pickled jalapeños or a drizzle of hot sauce for those who like it spicy
- Bright bites: A squeeze of lime and chopped cilantro to cut through the richness
Set everything out buffet-style and let everyone customize – half the fun is building your perfect bite!
Storage and Reheating Instructions
Here’s the good news – these tacos actually keep beautifully! Just pop any leftovers (if you’re lucky enough to have any) in an airtight container in the fridge for up to 3 days. When you’re ready for round two, skip the microwave – it’ll make the shells soggy. Instead, reheat them on a baking sheet at 350°F for about 8 minutes. The cheese gets all melty again and the shells stay crisp – almost like fresh from the oven!
Nutritional Information
Here’s the scoop on what’s in these tasty tacos (per serving): Calories: 280 • Fat: 12g • Carbs: 25g • Protein: 18g. Remember, nutritional values are estimates and can vary based on your specific ingredients – like if you go wild with the cheese (no judgment here!). These numbers don’t include any extra toppings you pile on, so factor those in if you’re counting.
FAQs About Cheesy Baked Chicken Tacos
Got questions? I’ve got answers! Here are the most common things people ask me about these tacos:
Can I use ground beef instead of chicken?
Absolutely! Brown 1 pound of ground beef (I like 85/15 for flavor) and drain the fat before adding the taco seasoning. The cooking time stays the same, and the result is just as delicious.
My shells always break – help!
Two tricks: First, let your refried beans come to room temperature before spreading – cold beans can make shells brittle. Second, don’t overstuff! About 1/4 cup filling per shell is perfect.
Can I make these ahead?
You bet! Prep the filling up to 2 days in advance and store it in the fridge. When ready, just assemble and bake – add an extra minute or two since everything’s cold.
What if I can’t find Stand ‘N Stuff shells?
No worries! Regular taco shells work – just lay them on their sides and prop them against each other on the baking sheet so the filling doesn’t spill out.
Is there a vegetarian version?
Yup! Swap the chicken for 2 cups of cooked lentils or black beans. Use vegetable broth instead of water with the taco seasoning for extra flavor.
Share Your Experience
Did these tacos become your new favorite like they did for my family? Snap a cheesy, melty photo and tag me on Instagram – I’d love to see your creations! Leave a rating below if you enjoyed them as much as we do.
Print
Cheesy Baked Chicken Tacos
- Total Time: 25 minutes
- Yield: 10 tacos 1x
- Diet: Low Lactose
Description
A simple and delicious recipe for cheesy baked chicken tacos.
Ingredients
- 10 Old El Paso Stand ‘N Stuff taco shells
- 1/2 medium yellow onion, diced
- 2 1/2 cups rotisserie chicken or cooked chicken, shredded (about 1 lb.)
- 1 (1 oz.) packet taco seasoning
- 1 (10 oz.) can Rotel diced tomatoes, fully drained
- 8 oz. refried beans
- 1 (8 oz.) package Mexican cheese blend
Instructions
- Preheat oven to 400°F.
- Sauté onions until soft.
- Add chicken, taco seasoning, and water as per packet instructions. Simmer until thickened.
- Add Rotel and cook until liquid is reduced.
- Spread refried beans in taco shells, add chicken mixture, and top with cheese.
- Bake for 5-7 minutes until cheese melts.
- Serve with desired toppings.
Notes
- Use fresh rotisserie chicken for best flavor.
- Drain Rotel thoroughly to avoid soggy tacos.
- Prep Time: 15 minutes
- Cook Time: 10 minutes
- Category: Main Course
- Method: Baking
- Cuisine: Mexican
Nutrition
- Serving Size: 1 taco
- Calories: 280
- Sugar: 2g
- Sodium: 450mg
- Fat: 12g
- Saturated Fat: 5g
- Unsaturated Fat: 4g
- Trans Fat: 0g
- Carbohydrates: 25g
- Fiber: 3g
- Protein: 18g
- Cholesterol: 45mg
Keywords: cheesy baked chicken tacos, easy taco recipe, baked tacos


