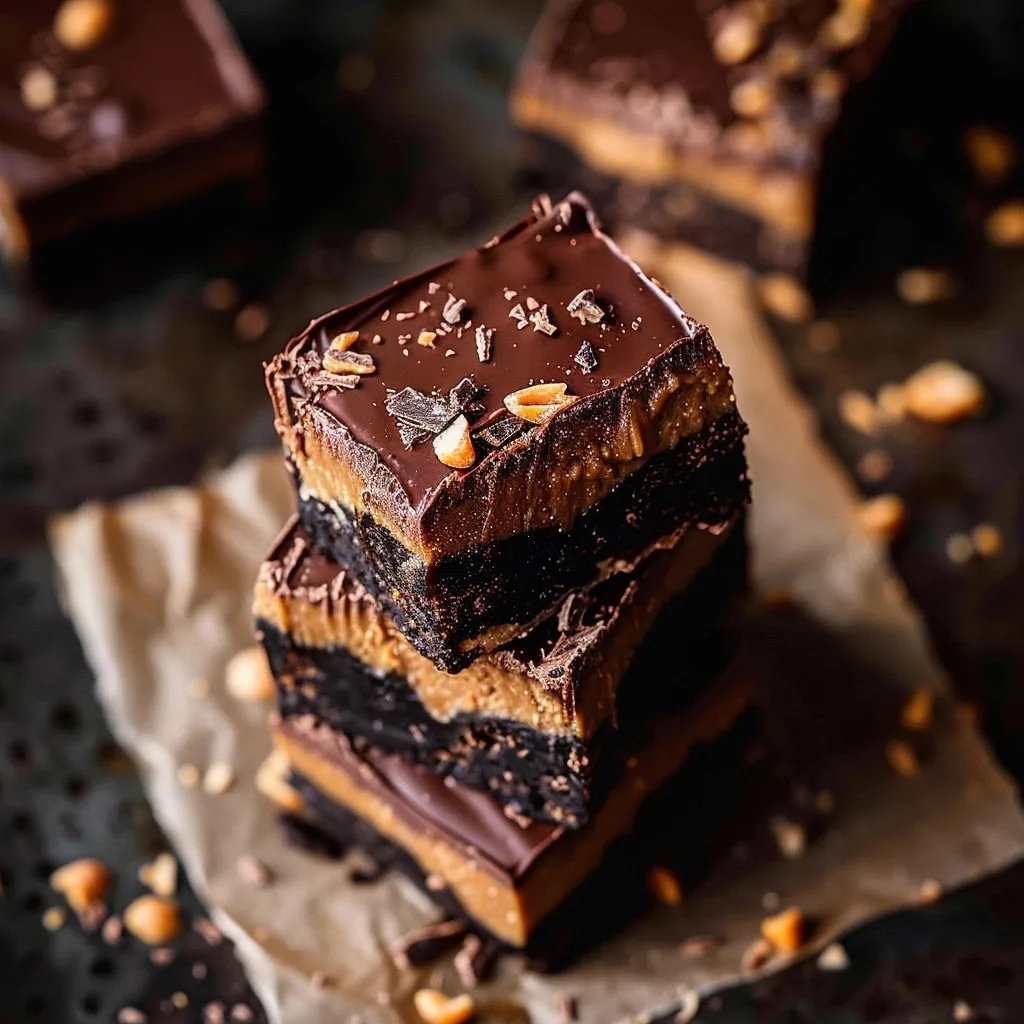
Oh my stars, let me tell you about these chocolate peanut butter fudge bars – they’re like a hug for your taste buds! I first made these for my nephew’s birthday party last summer, and let me tell you, they disappeared faster than kids chasing an ice cream truck. What makes them so special? That magical trio of a crunchy Oreo crust, smooth-as-silk peanut butter filling, and that luscious chocolate fudge topping that just melts in your mouth.
The best part? You don’t even need to turn on your oven! When my kitchen gets too hot to bake (hello, Arizona summers), this no-bake wonder becomes my go-to dessert. It’s perfect for when you need something impressive but don’t want to fuss – just layer, chill, and watch people’s eyes light up when they take that first bite. The contrast between the crisp cookie base and the velvety peanut butter layer gets me every time.
These bars are the reason I keep extra Oreos and condensed milk in my pantry at all times. You never know when a chocolate peanut butter emergency might strike!
Table of Contents
Why You’ll Love These Chocolate Peanut Butter Fudge Bars
Listen, I know we’re all busy, and sometimes you just need a dessert that delivers big flavor without the hassle. That’s exactly why these fudge bars have become my secret weapon over the years. Here’s what makes them irresistible:
- No oven required – Perfect for hot summer days when baking sounds unbearable (or when you’re just feeling lazy!)
- Minimal prep time – From pantry to fridge in under 20 minutes flat
- That dreamy texture – The way the crunchy Oreo base gives way to creamy peanut butter and smooth chocolate? Absolute perfection
- Crowd-pleasing magic – I’ve never met anyone who could resist these, from picky kids to fancy dessert snobs
- Gift-worthy goodies – Package them in cute boxes and you’ve got instant holiday or hostess gifts that’ll make you look like a pro
Honestly, the hardest part about this recipe? Not eating the whole pan yourself before you can share them!
Ingredients for Chocolate Peanut Butter Fudge Bars
Okay, let’s gather our goodies! Here’s everything you’ll need to make these heavenly bars – and trust me, every single ingredient plays a starring role in creating that perfect bite. I’ve learned through trial and error (and many delicious mistakes) that precision matters here:
- 30 regular Oreo cookies (340 g) – The whole cookie, cream filling and all!
- 1/4 cup (60 g) unsalted butter, melted and cooled – For binding that Oreo crust
- 2 tablespoons milk – Any kind works, but whole milk makes the crust extra tender
- 1 cup (250 g) creamy peanut butter – See my notes below about this crucial ingredient
- 1/4 cup (35 g) powdered sugar – Just enough sweetness without overpowering the peanut flavor
- Another 1/4 cup (60 g) unsalted butter, melted and cooled – Yes, more butter for that peanut butter layer
- 2 cups (12 oz / 340 g) semi-sweet chocolate, finely chopped – Chocolate chips work in a pinch
- 1 can (14 oz) sweetened condensed milk – The secret weapon for that fudgy texture
Ingredient Notes & Substitutions
Now let’s talk about the VIPs of this recipe. Creamy peanut butter is non-negotiable for me – the natural kind separates too much, and crunchy PB messes with that smooth texture we’re after. In a pinch? Almond butter works surprisingly well!
About the chocolate: I adore semi-sweet because it balances the sweetness, but milk chocolate makes these extra decadent if that’s your jam. And if you’re using chocolate chips instead of chopped bars, no worries – just know they might take an extra minute to melt smoothly with the condensed milk.
One last tip: that Oreo crust needs regular Oreos, not Double Stuf. The proportions are perfect as-is – trust me, I’ve tested both ways (and happily eaten the evidence)!
How to Make Chocolate Peanut Butter Fudge Bars
Alright, let’s make some magic happen! I’ve made these bars so many times I could probably do it in my sleep, but I’ll walk you through each step carefully so yours turn out perfect on the first try. Just follow along – it’s easier than you think!
- Prep your pan: Line an 8×8-inch baking pan with parchment paper, leaving some overhang on the sides. This little trick is my lifesaver for easy removal later. Trust me, you’ll thank yourself when those perfect squares pop right out!
- Crush those Oreos: Toss your cookies into a food processor or zip-top bag and crush them into fine crumbs. You want them to look like dark brown sand – no big chunks! Mix with the melted butter and milk until it resembles wet sand. When you press some between your fingers, it should hold together.
- Press it like you mean it: Dump the crumbs into your prepared pan and press FIRMLY with the bottom of a measuring cup or glass. I mean really pack it in there – this prevents crumbling when you slice later. Get all the way into the corners! Pop it in the fridge to set while you make the next layer.
- Peanut butter bliss: In a bowl, whisk together the peanut butter, powdered sugar, and melted butter until completely smooth. It should look like satiny peanut butter frosting. Spread this over your chilled crust, going all the way to the edges. Now the important part – freeze this layer for at least 30 minutes. Don’t skip this! It keeps the layers distinct when you add the chocolate.
- Fudge time: In a saucepan over low heat, melt the chocolate with the sweetened condensed milk, stirring constantly. Low and slow is key here – burnt chocolate is tragic. When it’s perfectly smooth and glossy, pour it over your peanut butter layer and tilt the pan to spread evenly.
- The hardest part: Refrigerate for at least 1 hour until fully set. I know, the waiting is torture! But good things come to those who wait (and don’t stick their finger in the chocolate… not that I’ve done that…).

Tips for Perfect Chocolate Peanut Butter Fudge Bars
Want pro-level results? Here are my hard-won tips: Run your knife under hot water and dry it before each cut for those Instagram-perfect slices. Let the bars sit at room temp for 5 minutes before serving – that peanut butter layer needs to soften slightly. And whatever you do, don’t rush the chilling times between layers! Patience gives you those clean, beautiful layers that make everyone go “wow.”
Serving and Storing Chocolate Peanut Butter Fudge Bars
Oh, the joy of slicing into these chilled beauties! I always serve them straight from the fridge – that cool, firm texture is just divine. They pair perfectly with a glass of cold milk (obviously!) or a hot cup of coffee to balance the sweetness. For parties, I cut them into smaller squares – they’re rich, so a little goes a long way.
Storage? Easy peasy! Just layer them in an airtight container with parchment between layers. They’ll keep happily in your fridge for up to a week… if they last that long! I don’t recommend freezing – the texture changes and the layers can separate. But honestly, in my house, they’re lucky to make it 24 hours before disappearing!
Nutritional Information for Chocolate Peanut Butter Fudge Bars
Okay, let’s be real – we’re not eating these heavenly bars for their health benefits! But since some folks like to know, here’s the scoop: these rich treats pack a decadent punch, as you’d expect from something with Oreos, peanut butter, and chocolate. A typical bar (cut into 16 servings) has about 300-350 calories, with that perfect balance of sweet and salty flavors we all crave.
The nutritional values will dance around depending on your specific ingredients – like whether you use natural peanut butter or regular, dark versus milk chocolate, etc. That powdered sugar in the peanut butter layer? It’s just enough to enhance the flavor without going overboard. And remember, these are estimates – your homemade bars might vary slightly based on how thick you slice them (no judgment if yours are “tester” sized!).
Pro tip: If you’re watching portions, cut them smaller – they’re so rich that a little square satisfies big time. But honestly? Some days call for treating yourself, and that’s exactly what these fudge bars were made for!
FAQs About Chocolate Peanut Butter Fudge Bars
Can I use natural peanut butter? I’ve tried it, and honestly? Stick with regular creamy peanut butter. The natural stuff separates too much and makes the middle layer oily. If you must use natural, stir it really well first and maybe add an extra tablespoon of powdered sugar to help stabilize it.
How long do these fudge bars last? In an airtight container in the fridge, they’re perfect for up to a week! The chocolate might develop a slight bloom after a few days, but they’ll still taste amazing. Pro tip: Put parchment between layers if stacking them.
Can I make these gluten-free? Absolutely! Just swap the Oreos for gluten-free chocolate sandwich cookies. Everything else is naturally gluten-free. I’ve done this for friends with celiac and they couldn’t tell the difference.
Why is my chocolate layer cracking when I cut it? Oh honey, that means it got too cold! Let the pan sit at room temp for 5-10 minutes before slicing. And always use a warm knife – run it under hot water and dry it between cuts.
Can I double this recipe? You bet! Use a 9×13 pan instead and keep all the layer thicknesses the same. Just remember – bigger pan means more willpower needed not to eat them all at once!
Share Your Chocolate Peanut Butter Fudge Bars Experience
Okay, friends – I’ve spilled all my secrets, now I want to hear from you! Did these bars become your new obsession like they did mine? Snap a pic of your masterpiece (or the empty pan – no shame!) and tag me on Instagram @recipesbycharlotte, so I can cheer you on. Leave a comment below telling me how they turned out or share your own brilliant tweaks. Nothing makes me happier than seeing you create these chocolate peanut butter wonders in your own kitchen. Now go forth and make some fudgy magic!
Print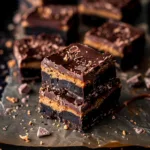
Chocolate Peanut Butter Fudge Bars
- Total Time: 1 hour 50 minutes
- Yield: 16 bars 1x
- Diet: Vegetarian
Description
Rich, creamy Chocolate Peanut Butter Fudge Bars with a crunchy Oreo crust, smooth peanut butter filling, and silky chocolate fudge topping. Perfect for parties or satisfying your sweet tooth.
Ingredients
- 30 (340 g) regular Oreo cookies
- 1/4 cup (60 g) unsalted butter, melted and cooled
- 2 tablespoons milk
- 1 cup (250 g) creamy peanut butter
- 1/4 cup (35 g) powdered sugar
- 1/4 cup (60 g) unsalted butter, melted and cooled
- 2 cups (12 oz / 340 g) semi-sweet chocolate, finely chopped
- 1 can (14 oz) sweetened condensed milk
Instructions
- Line an 8×8-inch baking pan with parchment paper.
- Crush Oreo cookies into fine crumbs. Mix with melted butter and milk, then press firmly into the bottom of the pan to form the crust.
- In a bowl, whisk peanut butter, powdered sugar, and melted butter until smooth. Spread evenly over the Oreo crust. Freeze for 30 minutes to firm up.
- In a saucepan over low heat, melt chocolate with condensed milk, stirring until smooth. Pour over the peanut butter layer and spread evenly.
- Refrigerate for at least 1 hour, or until fully set. Slice into bars and serve chilled.
Notes
- Store in an airtight container in the fridge for up to 1 week.
- For cleaner cuts, warm the knife slightly before slicing.
- Prep Time: 20 minutes
- Cook Time: 0 minutes
- Category: Dessert
- Method: No-Bake
- Cuisine: American
Nutrition
- Serving Size: 1 bar
- Calories: 310 kcal
- Sugar: 22 g
- Sodium: 120 mg
- Fat: 20 g
- Saturated Fat: 8 g
- Unsaturated Fat: 10 g
- Trans Fat: 0 g
- Carbohydrates: 28 g
- Fiber: 2 g
- Protein: 6 g
- Cholesterol: 15 mg
Keywords: chocolate peanut butter fudge bars, no-bake dessert, Oreo crust, peanut butter filling


