Oh my goodness, let me tell you about these Tiramisu Cups, they’re my absolute favorite way to enjoy this classic Italian dessert without any fuss! I fell in love with tiramisu during my first trip to Venice years ago, but let’s be honest – making the traditional cake version can be intimidating. That’s why I developed these adorable individual portions that capture all the magic of authentic tiramisu in cute little glasses or jars.
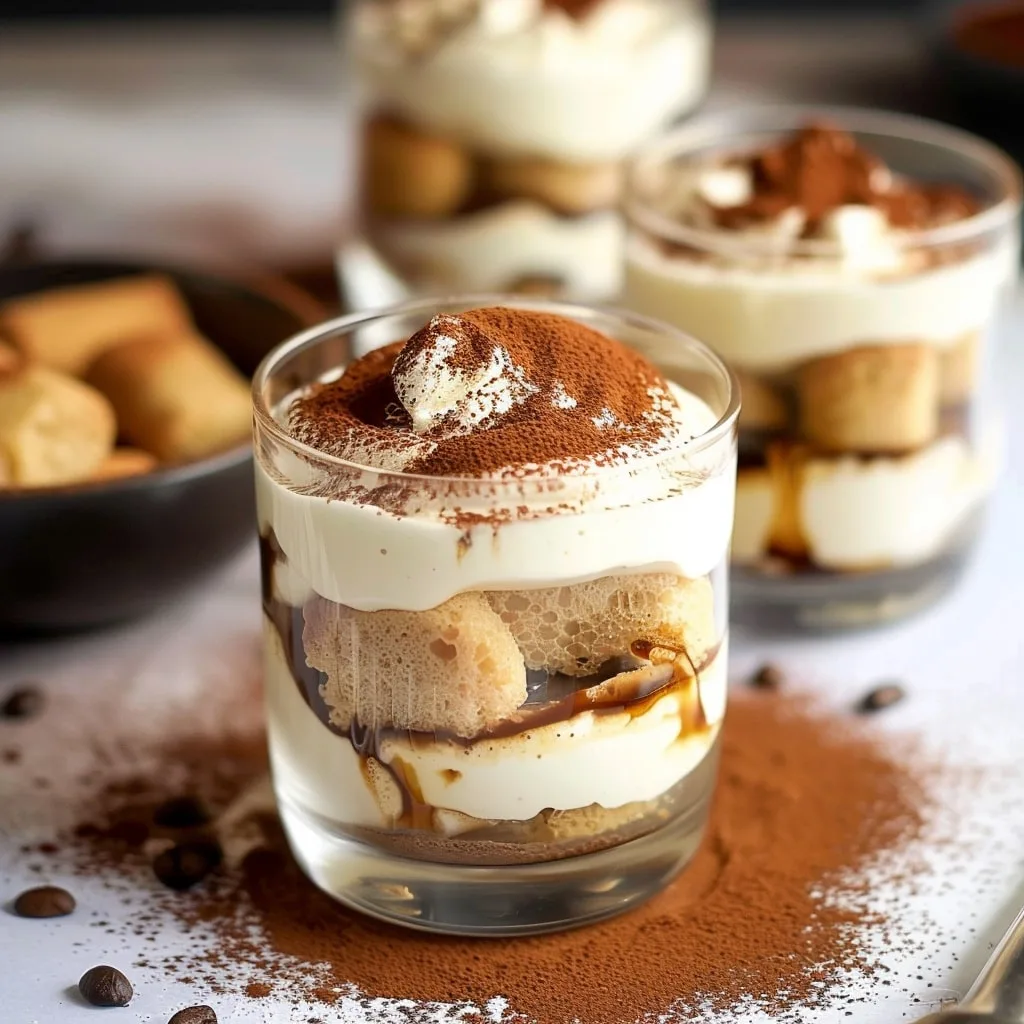
The best part? You don’t need any fancy baking skills or equipment. Just layer espresso-dipped ladyfingers with the dreamiest mascarpone cream, and voilà – you’ve got an elegant dessert that looks like you spent hours in the kitchen. Trust me, your guests will never guess how simple these are to make!
What makes these Tiramisu Cups so special is how they maintain all the authentic flavors – the rich coffee, creamy mascarpone, and hint of cocoa – while being infinitely easier to assemble than the traditional layered dessert. Plus, they’re perfect for portion control (though I won’t judge if you go back for seconds!).
Table of Contents
Why You’ll Love These Tiramisu Cups
Let me count the ways these little cups of joy will become your new favorite dessert! First off, they’re ridiculously easy to put together – no baking, no complicated techniques, just layer and chill. But don’t let their simplicity fool you. These Tiramisu Cups look like they came straight from a fancy Italian café.
Simple Yet Impressive
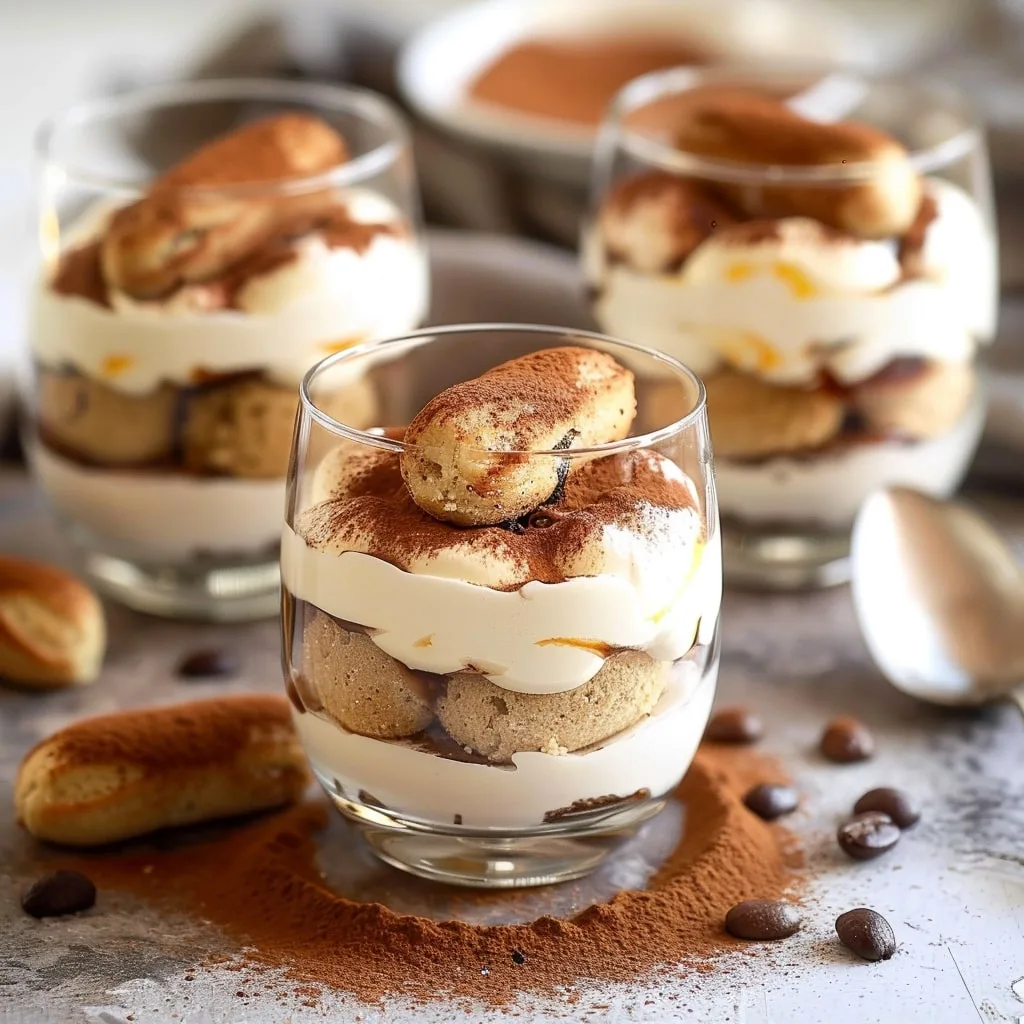
I love how these transform basic ingredients into something that always gets “oohs” and “aahs.” The layers of coffee-soaked ladyfingers and cloud-like mascarpone cream create such a beautiful presentation with minimal effort. It’s my go-to when I want to impress but don’t want to spend all day in the kitchen.
Make-Ahead Friendly
Here’s my secret: these actually taste better when made ahead! The flavors meld beautifully overnight in the fridge, which means you can prep them the day before your dinner party. No last-minute dessert stress – just pull them out, dust with cocoa, and watch everyone’s eyes light up.
Ingredients for Tiramisu Cups
Let’s talk ingredients – the magic players that come together to create these heavenly little desserts. You’ll need:
- 450g mascarpone cheese (room temperature – this is crucial for smooth blending!)
- 2 cups heavy cream (straight from the fridge – cold cream whips up better)
- 1/2 cup granulated sugar (regular white sugar works perfectly)
- 14 ladyfingers (those crisp Italian savoiardi biscuits)
- 1 cup freshly brewed espresso (cooled to room temp – no hot coffee here!)
- 1 tablespoon liqueur (optional but delicious – I love Kahlúa or amaretto)
- 2 tablespoons cocoa powder (for that classic tiramisu dusting)
Pro tip: Don’t skimp on the mascarpone quality – splurge on the full-fat Italian stuff. It makes all the difference in that creamy texture we love!
How to Make Tiramisu Cups
Okay, let’s get to the fun part – assembling these dreamy little desserts! I promise it’s easier than you think. Just follow these steps, and you’ll have perfect Tiramisu Cups every single time.
Preparing the Mascarpone Cream
First things first – that heavenly mascarpone cream. Here’s how I do it: Grab your coldest heavy cream (I even chill my mixing bowl sometimes!) and pour it into a large bowl with the sugar. Whip it with an electric mixer until you get beautiful stiff peaks – you’ll know it’s ready when the cream holds its shape when you lift the beaters.
Now for the mascarpone! Make sure it’s at room temperature (this is non-negotiable – cold mascarpone will leave lumps). Gently fold it into the whipped cream with a rubber spatula, being careful not to deflate all that air you just whipped in. The mixture should be smooth, thick, and oh-so-creamy. Taste it – go ahead, I won’t tell! This is when I usually add a splash of vanilla if I’m feeling fancy.
Assembling the Layers
Time to build those beautiful layers! I like using clear glasses or jars so you can see all the pretty stripes. Start by piping (or spooning) a layer of your mascarpone cream into each glass – about 1/3 of the way up.
Now for the ladyfingers! Break each one into 3 pieces (they’ll fit better this way) and quickly dip them in your cooled espresso. And I mean quick – just a second or two per side. You want them moist but not soggy. Arrange these over your cream layer – don’t worry about perfection here, the next cream layer will cover any gaps.
Repeat the process: another cream layer, more dipped ladyfingers, then finish with a final cream layer on top. Smooth it out nicely – this will be your canvas for that gorgeous cocoa dusting later. Pop them in the fridge for at least 3 hours, though overnight is truly magical. The waiting is the hardest part, but trust me, it’s worth it!
When you’re ready to serve, grab your finest sieve and dust the tops with cocoa powder. I like doing this right before serving so it stays pretty. And there you have it – restaurant-worthy Tiramisu Cups with minimal effort!
Tips for Perfect Tiramisu Cups
After making these dozens of times (okay, maybe hundreds – no judgment!), I’ve picked up some game-changing tips that’ll take your Tiramisu Cups from good to unforgettable. First up: scrape that bowl! When you’re mixing the mascarpone cream, stop halfway and scrape down the sides with a rubber spatula. Those sneaky bits of unincorporated cheese at the bottom can ruin your smooth, dreamy texture if you don’t catch them.
Speaking of mascarpone – please, please use the full-fat version. I know it’s tempting to grab the lighter option, but the extra richness makes all the difference in both flavor and stability. My Italian grandmother would haunt me if I suggested anything less! And while we’re on ingredients – that espresso needs to be at room temperature, not warm. Hot coffee makes the ladyfingers turn to mush before you can say “tiramisu.”
Finally, be patient with the chilling time. I know it’s hard to wait when your kitchen smells like an Italian café, but those 3 hours (or better yet, overnight) let the flavors marry and the texture set perfectly. Your future self will thank you when you take that first heavenly bite!
Variations for Tiramisu Cups
The beauty of these Tiramisu Cups is how easily you can customize them to suit any taste! My personal favorite twist is swapping the traditional coffee liqueur for amaretto – that almond flavor pairs magically with the mascarpone. Want something extra indulgent? Sprinkle chocolate shavings between the layers or drizzle with melted chocolate before serving.
For my dairy-free friends, you can absolutely make a delicious version using coconut cream and vegan mascarpone (just make sure it’s the scoopable kind). And if you’re feeling adventurous, try dipping the ladyfingers in chai tea instead of espresso for a warming spice variation. The possibilities are endless!
Serving and Storing Tiramisu Cups
Here’s the best part – these Tiramisu Cups actually taste better when they’ve had time to chill! I always serve them straight from the fridge – the cool temperature makes that creamy mascarpone layer feel like silk on your tongue. If you can resist digging in right away (I rarely can), they’ll keep beautifully in the fridge for 3-4 days covered with plastic wrap – though they never last that long in my house!
One important note: don’t freeze these beauties. I learned the hard way that frozen mascarpone separates when thawed, leaving you with a grainy texture instead of that dreamy smoothness we love. Trust me – they’re so delicious fresh, you won’t have leftovers to worry about anyway!
Tiramisu Cups Nutritional Info
Okay, let’s talk numbers – but remember, these are just estimates based on my exact recipe. Your Tiramisu Cups might vary slightly depending on the brands you use or if you tweak the ingredients (like adding extra liqueur – no judgment here!). Here’s the breakdown per serving:
- Serving Size: 1 cup (about 3/4 cup volume)
- Calories: 320 (worth every single one!)
- Sugar: 18g (mostly from the natural sweetness of mascarpone and a touch of sugar)
- Sodium: 45mg
- Fat: 24g (this is where all that creamy goodness comes from)
- Saturated Fat: 14g (remember, we’re using full-fat mascarpone – no shortcuts!)
- Carbohydrates: 22g
- Fiber: 1g (thanks to that cocoa powder dusting)
- Protein: 4g
- Cholesterol: 85mg
A little nutrition pro tip from me: if you’re watching your sugar intake, you can reduce the sugar by about 1/4 cup without sacrificing too much flavor. The mascarpone and espresso bring so much richness already. But honestly? Sometimes you just need to treat yourself – life’s too short for sad desserts!
FAQs About Tiramisu Cups
Can I use instant coffee instead of espresso?
Absolutely! Just mix 1 tablespoon of instant coffee granules with 1 cup of hot water and let it cool completely. The flavor won’t be quite as robust as espresso, but it’ll still give you that classic tiramisu taste.
How long do tiramisu cups last in the fridge?
They’ll stay perfect for 3-4 days when covered tightly with plastic wrap. The flavors actually deepen after the first day – if you can resist eating them all right away!
Can I make vegan tiramisu cups?
Yes! Use coconut cream instead of heavy cream and a good vegan mascarpone alternative. For the ladyfingers, check for egg-free versions or use vegan sponge cake pieces.
Why is my mascarpone cream lumpy?
Your mascarpone was probably too cold! Always let it come to room temperature before mixing. If lumps form, you can try gently warming the mixture over a double boiler while whisking.
Share Your Tiramisu Cups
I’d love to see your beautiful creations! Snap a photo of your Tiramisu Cups and share them with me on Instagram @recipesbycharlotte. Did you add any fun twists? Leave a comment below with your tips or questions. Nothing makes me happier than seeing others enjoy this recipe as much as I do!
Print
Tiramisu Cups
- Total Time: 3 hours 20 minutes
- Yield: 6–8 servings 1x
- Diet: Vegetarian
Description
Delicious and creamy Tiramisu Cups, a perfect dessert with layers of mascarpone cream and espresso-dipped ladyfingers.
Ingredients
- 450 g mascarpone cheese, room temperature
- 2 cups heavy cream, cold
- 1/2 cup granulated sugar
- 14 ladyfingers
- 1 cup espresso, cooled
- 1 tablespoon liqueur (optional)
- 2 tablespoons cocoa powder
Instructions
- Brew the espresso and let it cool for a few minutes. Set aside while you make the mascarpone cream.
- In a large mixing bowl, add the cold heavy cream and granulated sugar. Mix with an electric hand mixer until stiff peaks form.
- Add the room-temperature mascarpone cheese to the whipped cream. Gently fold the mascarpone into the whipped cream until smooth.
- Transfer the mascarpone mixture into a piping bag. Pipe a layer of the cream into the bottom of each glass or jar.
- Break the ladyfingers into 3 pieces and briefly dip them in the cooled espresso (with liqueur if using). Place the dipped ladyfingers on top of the cream layer.
- Repeat the layering process with another layer of mascarpone cream, another layer of dipped ladyfingers, and finish with a final layer of mascarpone cream.
- Cover the glasses or jars and place them in the fridge to chill for at least 3 hours, preferably overnight.
- Before serving, dust the tops with cocoa powder. Serve and enjoy!
Notes
- Ensure the mascarpone cheese is at room temperature for smooth mixing.
- Use full-fat mascarpone cheese for a stable and rich dessert.
- Chill the dessert for at least 3 hours, ideally overnight, for full flavor development.
- Scrape down the sides of the bowl frequently while mixing.
- Prepare ingredients beforehand for a smooth process.
- Use high-quality ingredients for the best flavor.
- Prep Time: 20 minutes
- Cook Time: 0 minutes
- Category: Dessert
- Method: No-Bake
- Cuisine: Italian
Nutrition
- Serving Size: 1 cup
- Calories: 320
- Sugar: 18g
- Sodium: 45mg
- Fat: 24g
- Saturated Fat: 14g
- Unsaturated Fat: 8g
- Trans Fat: 0g
- Carbohydrates: 22g
- Fiber: 1g
- Protein: 4g
- Cholesterol: 85mg
Keywords: tiramisu cups, easy tiramisu, no-bake dessert, Italian dessert


