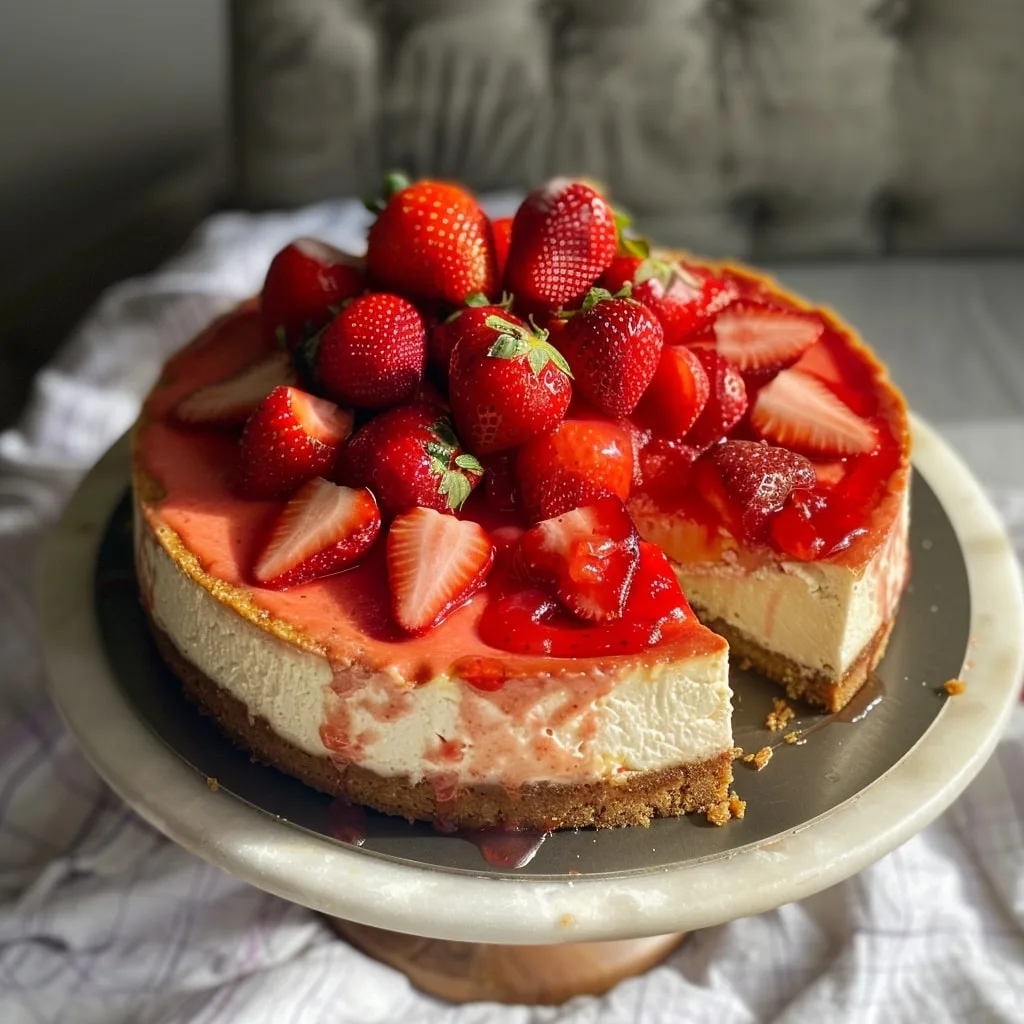
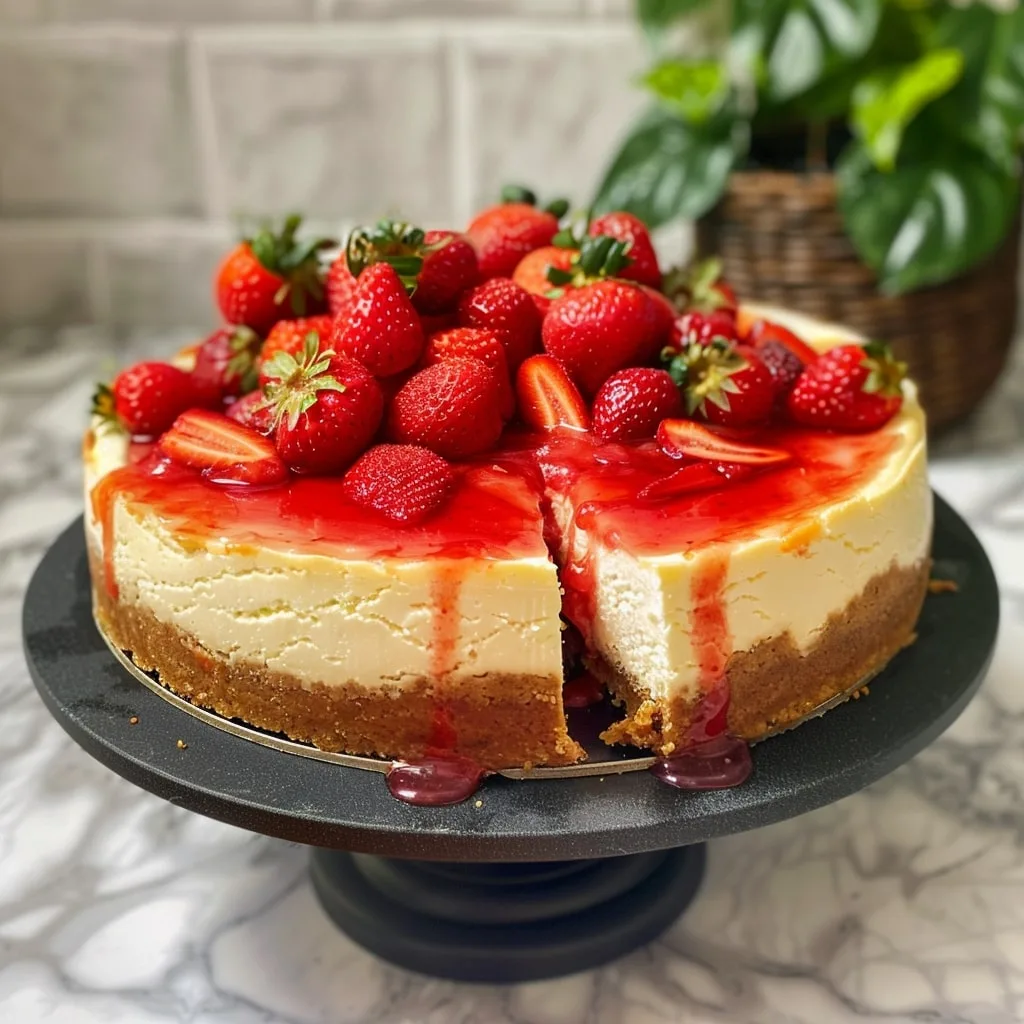
Have you ever had a dessert so good it makes you close your eyes and just savor the moment? That’s exactly what this Strawberry Dream Cheesecake is all about. It’s the recipe I pull out when I want to make something truly special. We’re talking about an unbelievably creamy, rich filling on top of a buttery graham cracker crust, all crowned with a vibrant, sweet-tart strawberry sauce that I could honestly just eat with a spoon. It’s pure, decadent happiness on a plate.

I’ll be honest, for years, baked cheesecake was my white whale. I made so many that ended up with a giant, tragic crack right down the middle. It was so frustrating! But after tons of experimenting (and eating my less-than-perfect attempts), I finally cracked the code. This recipe is the result of all that trial and error. It’s my foolproof guide to a stunning, flawless cheesecake every single time.
So, if you’ve ever been a little intimidated by the idea of making a real-deal cheesecake from scratch, don’t be. I’m going to walk you through every step. Trust me, you can absolutely do this, and the reward is so, so worth it.
Table of Contents
Why You’ll Love This Strawberry Dream Cheesecake
Okay, besides the fact that it’s just ridiculously delicious, this recipe is a total keeper. It’s the one I make when I really want to impress people without having a total meltdown in the kitchen. Here’s exactly why you’re going to fall in love with it:
- Unbelievably Creamy Texture: This isn’t your average dense, heavy cheesecake. It’s silky, smooth, and melts in your mouth. We’re talking pure luxury in every single bite.
- A Flawless, Crack-Free Top: My water bath method might sound a little extra, but trust me, it’s the secret weapon! It guarantees a beautiful, perfectly flat top with zero cracks. You’ll look like a total pro.
- The Perfect Flavor Balance: That rich, sweet cheesecake filling is amazing, but the homemade strawberry compote is what takes it over the top. The tang from the fresh berries cuts through the richness beautifully.
- It’s a Total Showstopper: Let’s be real, this cheesecake is gorgeous. The vibrant red topping against the pale, creamy filling makes it a stunning centerpiece for any party or holiday table.
Essential Equipment for Your Cheesecake
You don’t need a ton of fancy gadgets to make an incredible cheesecake, I promise! But there are a few key items that will make your life so much easier and pretty much guarantee success. Think of these as your cheesecake dream team.
- A 9-inch springform pan: This is the one non-negotiable tool. That little latch on the side is a game-changer because it lets you release the sides of the pan from the base. It’s the only way to get that perfect, beautiful cheesecake out without destroying it.
- An electric mixer: A stand mixer is amazing for this, but a powerful handheld mixer will absolutely get the job done. You just need it to beat that cream cheese until it’s perfectly smooth and lump-free.
- A food processor: This is my favorite way to get super-fine, even crumbs for the crust. If you don’t have one, you can always put the crackers in a zip-top bag and smash them with a rolling pin!
- A large roasting pan: You’ll need a pan that’s big enough to hold your springform pan. This is for the water bath, which is our secret to a creamy, crack-free cheesecake. It creates a steamy oven and ensures gentle, even baking.
Strawberry Dream Cheesecake Ingredients
Okay, let’s talk about what you’ll need to make this magic happen! Good ingredients are the heart and soul of any great recipe, and this cheesecake is no exception. The most important thing I can tell you is to pay attention to the temperature of your dairy; getting everything to room temp is the secret to a lump-free, silky-smooth cheesecake. We’ll break it all down into three easy parts.
For the Graham Cracker Crust:
This is the simple, buttery foundation for our cheesecake. All you need are three basic ingredients to create a perfect, crunchy base that complements the creamy filling.
- 190g graham crackers (about 1.5 sleeves)
- 35g granulated sugar
- 75g unsalted butter, melted
For the Cheesecake Batter:
Here’s where the creamy magic happens! Don’t be tempted to use low-fat anything here; we need that full-fat goodness for the richest flavor and texture. And I can’t say it enough: make sure your cream cheese, eggs, sour cream, and heavy cream have been sitting out for a couple of hours. Trust me on this!
- 32 oz full-fat cream cheese, softened to room temperature
- 325g granulated sugar
- ½ tsp salt
- 1 tsp vanilla extract
- 4 large eggs, at room temperature
- 120g heavy cream, at room temperature
- 240g sour cream, at room temperature
- 1 tbsp cornstarch
- 2-3 tbsp fresh lemon juice
For the Strawberry Compote:
This fresh, vibrant topping cuts through the richness of the cheesecake perfectly. It’s so simple to make and tastes a million times better than anything from a jar. Plus, a few extra fresh berries on top make it look so professional.
- 1 lb fresh strawberries, hulled and roughly chopped
- 55g sugar
- 1 tsp cornstarch
- Juice from ½ a lemon
- A handful of fresh strawberries for decoration (totally optional, but pretty!)
How to Make a Strawberry Dream Cheesecake Step-by-Step
Alright, this is where the fun begins! Don’t let the number of steps scare you. I’ve broken everything down into super simple, manageable chunks. We’re going to build this gorgeous cheesecake layer by layer. Just follow along, and I promise you’ll feel like a total baking rockstar. Let’s do this!
Get Your Oven and Ingredients Ready
First things first, let’s get that oven preheating to 350°F (175°C). While it’s warming up, double-check that all your cheesecake batter ingredients, especially that cream cheese, the eggs, and the sour cream, are truly at room temperature. This is my number one secret for a silky, smooth batter with zero lumps. If they’re still a bit chilly, just give them a little more time on the counter. Patience now pays off later!
Make the Graham Cracker Crust
Time to make the crunchy base! Toss your graham crackers and the 35g of sugar into a food processor and blitz them until you have fine, sandy crumbs. Then, pour in your melted butter and pulse it just a few more times until the mixture looks like wet sand. No food processor? No problem! Just put the crackers in a zip-top bag, seal it, and go to town with a rolling pin. It’s great for getting out a little aggression!
Press and Bake the Crust
Lightly butter the bottom of your 9-inch springform pan. Now, dump the crumb mixture in. My favorite trick for a perfect crust is to use the flat bottom of a measuring cup or a glass to pack the crumbs down really tightly and evenly across the bottom. Don’t forget to push them slightly up the sides, maybe about half an inch. Pop that into your preheated oven and bake for about 8 minutes. This little pre-bake makes the crust extra sturdy and crisp. Once it’s done, take it out and turn your oven temperature down to 325°F (165°C).
Start the Creamy Filling
In the bowl of your stand mixer (or a large bowl with your hand mixer), beat the room temperature cream cheese on medium speed for about 2-3 minutes. You really want to get it completely smooth and creamy before you add anything else. Scrape down the sides and bottom of the bowl with a spatula to make sure there are no little lumps hiding anywhere.
Add the Sugar
With the mixer still running, gradually pour in the 325g of granulated sugar. Keep mixing for another 3-5 minutes. The mixture should become smooth and a little lighter. Scrape the bowl down again. This is so important for making sure everything is perfectly combined!
Slowly Add the Eggs
Okay, this is a big one! In a separate small bowl, just lightly whisk your eggs. With the mixer on low speed, slowly stream in the whisked eggs. The key here is to mix just until they are incorporated. Over-mixing the eggs is the number one cause of cracked cheesecakes because it beats too much air into the batter. So, be gentle!
Mix in the Final Ingredients
Now, on low speed, add the heavy cream, sour cream, lemon juice, salt, vanilla extract, and the tablespoon of cornstarch. Mix just until everything is blended and the batter is smooth. One final scrape of the bowl, a quick stir by hand, and you’re done. See? Easy!
Prep for the Water Bath
Here’s the secret to a flawless cheesecake: the water bath. But first, we have to make sure our pan is waterproof. I learned this the hard way with a very soggy cheesecake bottom once! Tear off a few large sheets of heavy-duty aluminum foil. Place your springform pan in the center and carefully wrap the foil up the sides, creating a solid, watertight barrier. I usually use two or three layers just to be extra safe.
Time to Bake!
Pour that beautiful, creamy batter into your prepared crust. Place the wrapped pan inside your large roasting pan. Carefully place the whole setup on the oven rack. Now, pour boiling water into the roasting pan until it comes about 1-2 inches up the side of your cheesecake pan. Be careful not to splash any water into the cheesecake itself! Bake for 75-80 minutes. The edges should be set, but the very center will still have a slight jiggle to it. That’s perfect! Turn off the oven, crack the door open, and let the cheesecake cool in the oven for about an hour.
The Long, Important Chill
After it has cooled in the oven, take the cheesecake out of the water bath and remove the foil. Let it cool completely on a wire rack at room temperature for another 2-3 hours. Then, cover it loosely with plastic wrap and move it to the refrigerator. It needs to chill overnight, or for at least 8 hours. This step is NOT optional! This is when the cheesecake sets up properly and develops that signature dense, creamy texture.
Make the Strawberry Compote
While the cheesecake is chilling, you can make the topping. In a small saucepan, combine your chopped strawberries, 55g of sugar, cornstarch, and lemon juice. Cook it over low-medium heat, stirring occasionally. After about 5-7 minutes, the strawberries will break down and the sauce will get bubbly and thick. It smells absolutely incredible! Take it off the heat and let it cool down completely.
The Grand Finale!
Once your cheesecake is fully chilled, run a thin knife around the edge to loosen it before you unlatch the springform pan. Transfer it to a pretty serving platter. Now for the best part! Pour that gorgeous, cooled strawberry compote over the top. You can spread it all the way to the edges or just let it pool in the center. If you have extra fresh strawberries, now’s the time to arrange them on top. Stand back and admire your masterpiece!
Pro Tips for the Best Strawberry Dream Cheesecake
Over the years, I’ve learned that a few little tricks can take a good cheesecake and make it absolutely unforgettable. These are my tried-and-true secrets that I swear by for a perfect Strawberry Dream Cheesecake every single time. Think of this as your cheat sheet to baking glory!
Room Temperature is a Non-Negotiable Rule: I know I keep saying it, but it’s the most important tip! When your cream cheese, eggs, and sour cream are all the same room temperature, they blend together into a perfectly smooth, emulsified batter. If the cream cheese is even a little cold, you’ll fight with lumps forever, and your final cheesecake won’t have that silky, melt-in-your-mouth texture we’re aiming for.
Don’t You Dare Open That Oven Door: I know it’s tempting to peek, but please, resist the urge! Every time you open the oven, you create a drastic temperature drop. That sudden shock is the number one reason cheesecakes get that giant, tragic crack down the center. Trust your timer and let the oven do its magic.
Embrace the Jiggle: The best way to know your cheesecake is done is by giving the pan a gentle nudge. The edges should look set and slightly puffed, but the center (about a 2-3 inch circle) should still have a distinct wobble, kind of like Jell-O. If the whole thing is firm, it’s overbaked. That little jiggle means it will set up perfectly into a creamy dream as it cools.
Overnight Chilling is Flavor Magic: The hardest part of this recipe is waiting! But that overnight chill in the fridge is so crucial. It’s not just about getting the cake cold; this is when the structure fully sets and, more importantly, the flavors deepen and meld together. A cheesecake served too early will taste flat. Patience is truly a virtue here!
The Hot Knife Trick for Clean Slices: Want those picture-perfect, clean slices you see in bakeries? It’s so easy. Fill a tall glass with hot water. Dip a long, sharp knife into the water, then wipe it completely dry with a paper towel. Make one clean cut. Repeat the process, dip, wipe, cut, for every single slice. It’s a tiny bit of extra effort that makes a huge difference in presentation.
Recipe Variations to Try
Okay, so once you get this classic recipe down, the real fun begins, playing with it! I absolutely adore this cheesecake exactly as it is, but sometimes you just feel like mixing things up, you know? Here are a few simple tweaks that are totally amazing.
Let’s talk crusts! A classic graham cracker crust is fantastic, but imagine this with a dark, chocolatey Oreo crust instead. The color contrast alone is stunning! Or, for a warm, spiced, cookie-butter vibe, try using Biscoff cookies. You just swap them one-for-one with the graham crackers. So easy!
The strawberry compote is a dream, but don’t feel locked into it. A tart raspberry compote is an incredible swap, it really cuts through the richness of the filling. You could also do a mixed berry compote with whatever you have on hand. The method is exactly the same!
My favorite super-simple trick? Add a little citrus zest right into the cheesecake batter. The zest of one lemon or a small orange adds this incredible brightness and a beautiful, fresh scent. It’s a tiny change that makes the whole dessert feel even more special. Don’t be afraid to experiment!
Serving and Storing Your Cheesecake
You did it! Your beautiful cheesecake is chilled, set, and ready for its big debut. This is my favorite part! For the absolute best, most show-stopping presentation, I always wait to add that gorgeous strawberry compote and any fresh berries until right before I’m ready to serve. This little trick keeps the graham cracker crust perfectly crisp and ensures the topping looks glossy and vibrant, not sad and settled. It just makes that first slice even more perfect.
Now, if you somehow have leftovers, which is a big “if” in my house, storing it is super simple. This cheesecake definitely needs to live in the fridge. I like to put it in an airtight cake carrier or a container to keep it from drying out. This is really important because you don’t want it absorbing any weird fridge smells. Trust me, nobody wants a cheesecake that tastes faintly of last night’s leftover garlic bread!
It will stay perfectly delicious and creamy in the fridge for up to 5 days. And yes, you can absolutely freeze it for later! My advice is to freeze the plain cheesecake, without the topping. The compote can get a little watery when it thaws. Just wrap the plain cake tightly in plastic wrap and then foil, and you can make a fresh batch of topping when you’re ready to enjoy it.
Strawberry Dream Cheesecake Nutrition Facts
Okay, let’s have a quick chat about the numbers. Honestly, when a dessert is this dreamy, I try not to think about the nutrition facts too much! This is a special treat, meant to be savored and enjoyed without a single ounce of guilt. But for those of you who are curious, here’s a rough idea of what you’re looking at for one generous slice.
Each slice has about 450 calories, 41g of fat, 7g of protein, and 50g of carbohydrates. Please remember that this is just my best estimate! The final numbers can change a bit depending on the exact brands you use, so think of this as a helpful guideline, not a strict rule. My real nutritional advice for this one? Just enjoy it!
Strawberry Dream Cheesecake FAQs
I get it, baking a cheesecake can feel a little intimidating, and you probably have some questions! I’ve been there. Here are the answers to some of the things people ask me all the time. Hopefully, this helps you feel super confident before you even turn on your oven.
Why did my cheesecake crack?
Oh, the dreaded crack! First of all, don’t panic. A crack is not the end of the world, especially since we’re covering it with that delicious strawberry topping! But the most common reason for a crack is over-mixing the batter after you add the eggs. This whips too much air into the filling, which causes it to puff up in the oven and then sink and crack as it cools.
Another big culprit is a sudden temperature change. That’s why we cool the cheesecake in the turned-off oven with the door cracked open. It prevents the shock of going from a hot oven to a cool kitchen. And remember, over-baking will also cause cracks, so pull it out when it still has that slight jiggle in the center!
Can I make this Strawberry Dream Cheesecake ahead of time?
Yes, absolutely! In fact, you *have* to. This is one of the best make-ahead desserts out there because it needs that long, uninterrupted chill time in the fridge to fully set up and let the flavors meld together. You can bake the cheesecake a full day or two before you plan to serve it. Just keep it covered in the fridge.
I recommend making the strawberry compote separately and storing it in its own container. Then, right before you’re ready to serve, you just transfer the cake to your platter and pour that beautiful topping over it. It makes party day so much less stressful!
Can I use low-fat cream cheese?
Okay, I’m going to give you some tough love here because I want you to have the best cheesecake ever: please don’t. For a recipe like this, full-fat cream cheese is absolutely essential. It’s what creates that unbelievably rich, dense, and creamy texture that makes a cheesecake so special.
Low-fat or fat-free cream cheese has a higher water content and won’t give you that same luxurious result. The texture can end up a bit more watery or even rubbery. This is a dessert for a special occasion, so it’s the time to embrace the real, full-fat ingredients. Trust me, it makes all the difference in the world.
I’d love to hear how your Strawberry Dream Cheesecake turns out, so please leave a comment and a rating below!
Print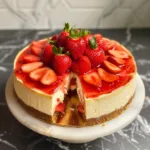
Strawberry Dream Cheesecake
- Total Time: 13 hours 15 minutes
- Yield: 12 servings 1x
- Diet: Vegetarian
Description
This Strawberry Dream Cheesecake is a delightful dessert. You can create a creamy, dreamy cheesecake with a delicious strawberry topping by following these simple steps. It features a buttery graham cracker crust, a rich cream cheese filling, and a fresh strawberry compote.
Ingredients
- Cheesecake Crust:
- 190g graham crackers
- 35g sugar
- 75g melted unsalted butter
- Cheesecake Batter:
- 32 oz full-fat cream cheese, at room temperature
- 325g granulated sugar
- ½ tsp salt
- 1 tsp vanilla extract
- 4 large eggs, room temperature
- 120g heavy cream, room temperature
- 240g sour cream, room temperature
- 1 tbsp cornstarch
- 2–3 tablespoon lemon juice
- Strawberry Compote:
- 1 lb strawberries, roughly chopped
- 55g sugar
- 1 tsp cornstarch
- ½ lemon juice
- Fresh strawberries for decoration (optional)
Instructions
- Bring all cheesecake ingredients to room temperature. Preheat your oven to 350F.
- For the crust, grind graham crackers, sugar, and melted butter in a food processor until smooth.
- Butter the bottom of a 9-inch springform pan. Add the crust mixture and pack it tightly using a measuring cup.
- Bake the crust for 8 minutes, then reduce the oven temperature to 325F.
- For the cheesecake batter, cream the room temperature cream cheese for 2-3 minutes until creamy.
- Add the sugar and mix again for 3-5 minutes until well combined.
- In a separate bowl, lightly whisk the eggs. Add the eggs to the batter slowly and mix at low speed until just combined.
- Add the heavy cream, sour cream, lemon juice, salt, vanilla extract, and cornstarch. Mix at low speed until just combined.
- Pour the batter into the prepared crust. Seal the springform pan tightly with aluminum foil on the outside.
- Place a large tray in your oven and fill it with 1-2 inches of boiling water. Place the cheesecake pan in the water bath and bake for about 75-80 minutes.
- Cool the cheesecake at room temperature for 2-3 hours. Then, refrigerate overnight to chill completely.
- For the strawberry compote, mix the chopped strawberries, sugar, cornstarch, and lemon juice in a nonstick saucepan.
- Stir and cook on low heat for 5-7 minutes until the mixture becomes saucy and thick. Let the compote cool down fully.
- Transfer the cooled cheesecake to a serving stand. Cover with the strawberry compote and decorate with fresh strawberries.
Notes
- Ensure all cheesecake ingredients are at room temperature for a smooth batter.
- Do not open the oven door while the cheesecake is baking.
- Chilling the cheesecake overnight is essential for the best texture and flavor.
- Use a measuring cup to pack the crust tightly for a firm base.
- Prep Time: 60 minutes
- Cook Time: 75 minutes
- Category: Dessert
- Method: Baking
- Cuisine: American
Nutrition
- Serving Size: 1 slice
- Calories: 450 kcal
- Sugar: 35g
- Sodium: 96mg
- Fat: 41g
- Saturated Fat: 25g
- Unsaturated Fat: 16g
- Trans Fat: 0g
- Carbohydrates: 50g
- Fiber: 1g
- Protein: 7g
- Cholesterol: 171mg
Keywords: Strawberry Dream Cheesecake, Strawberry Cheesecake Recipe, Baked Cheesecake, Cream Cheese Dessert, Homemade Cheesecake


