Let me tell you about the first time I fell head over heels for Key Lime Pie Bars.
Picture this: a sweltering Florida summer, my best friend’s backyard barbecue, and one bite of these tangy, creamy squares that made my taste buds dance. That perfect balance of buttery crust and puckery-sweet filling? Absolute magic.
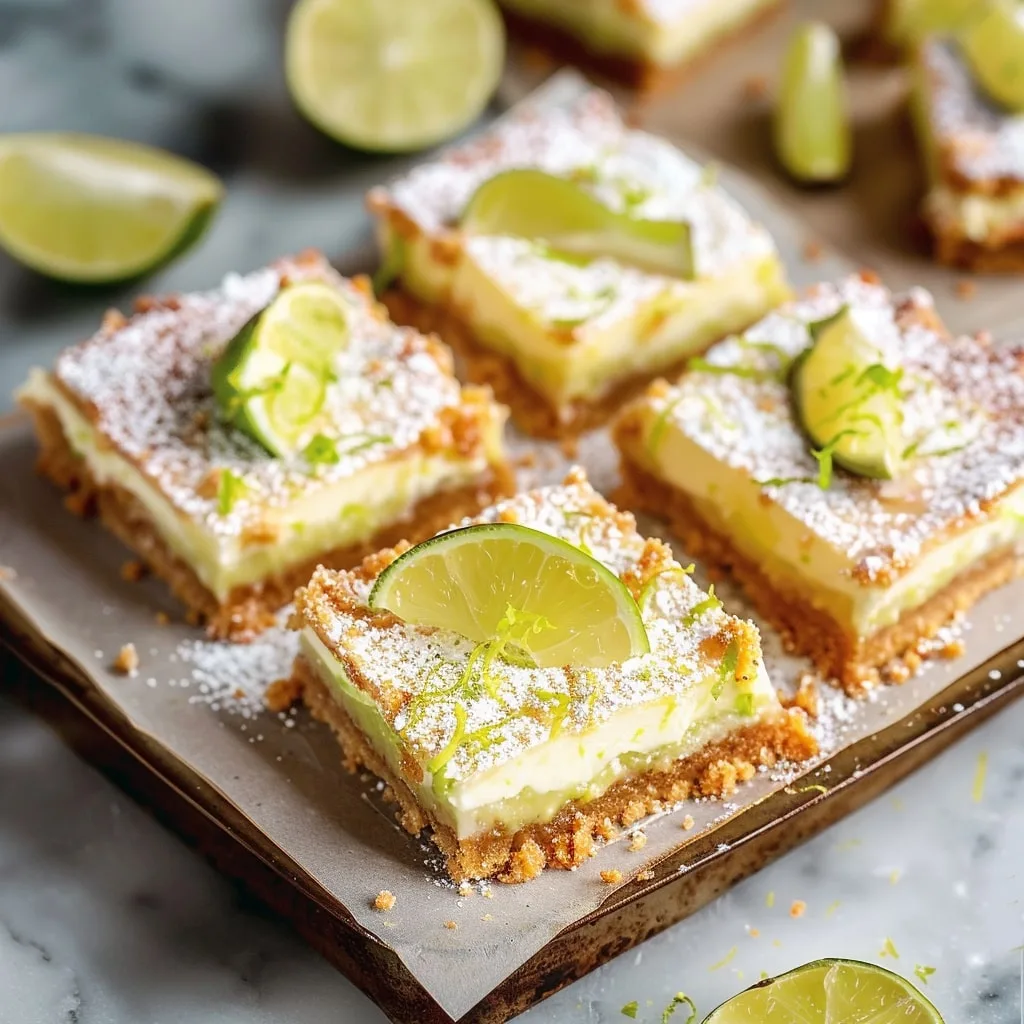
Now, years later, I’ve perfected my own version – the kind that makes people beg for the recipe. These aren’t just any dessert bars; they’re little squares of sunshine that brighten even the grayest days. And the best part? They come together quicker than you can say “second helping.”
Table of Contents
Key Lime Pie Bars Ingredients
Alright, let’s talk ingredients – because trust me, every single one of these matters when you’re chasing that perfect balance of tart and sweet. I’ve learned through many (many) batches that quality ingredients make all the difference here. Don’t worry, nothing fancy – just good, simple stuff you probably already have in your kitchen.
- 1 1/2 cups graham cracker crumbs – About 10 full sheets crushed fine (but not powder-fine – we want some texture!)
- 6 tablespoons salted butter, melted – The salted kind gives the crust that irresistible salty-sweet kick
- 1/3 cup granulated sugar – Just enough to sweeten the crust without overpowering the lime
- 14 ounces sweetened condensed milk – One standard can – don’t skimp here, this is the magic
- 5 egg yolks – Save those whites for meringues! Yolks give that velvety texture
- 1/2 cup key lime juice (fresh preferred) – About 15-20 key limes if you’re squeezing fresh (regular limes work too in a pinch)
- 2 tablespoons key lime zest – That bright green zest packs serious flavor
- Powdered sugar (optional) – For that pretty snow-dusted finish
- Additional lime zest (optional) – Because we eat with our eyes first!
A quick note about the limes – yes, you can use regular Persian limes if you can’t find key limes (they’re smaller, yellower, and more aromatic). The flavor will be slightly different but still delicious. But if you spot those tiny key limes at the store? Grab ’em! That distinctive floral-tart flavor is what makes these bars sing.
How to Make Key Lime Pie Bars
Okay, let’s get to the fun part! Making these bars is seriously simple – I promise even my 12-year-old niece could handle this recipe. But there are a few key steps that’ll make the difference between “good” and “oh-my-gosh-I-need-the-whole-pan” amazing. The process breaks down into three main phases: crust, filling, and the all-important chill time. Ready? Let’s do this!
Preparing the Graham Cracker Crust
First things first – preheat that oven to 375°F (190°C). While it’s heating up, let’s tackle the crust. You’ll want to line your 8-inch or 9-inch square pan with parchment paper – leave some overhang on the sides so you can lift the whole thing out later. Game changer for clean slices!
Now, take that graham cracker crumb mixture (crumbs + melted butter + sugar) and press it into the pan like you mean it. I use the bottom of a measuring cup to really pack it in tight – this prevents crumbling later. Bake for exactly 7 minutes – just enough to set it without browning. Then comes the hardest part: letting it cool completely before adding the filling. I know, I know – but patience pays off here!
Mixing the Key Lime Filling
While your crust cools, lower the oven to 350°F (175°C) and make the filling. This is where the magic happens! In a medium bowl, whisk together the sweetened condensed milk and egg yolks first until they’re totally smooth – no streaks! Then add that glorious lime juice and zest. The mixture will thicken up right before your eyes as the acid works its chemistry magic.
Pro tip: zest your limes before juicing them (so much easier!) and don’t skip the zest – that’s where the real lime flavor lives. The filling should be silky smooth and just slightly pourable. If it seems too thick, give it another good whisk – sometimes the condensed milk just needs extra encouragement.
Baking and Chilling the Bars
Pour that dreamy lime filling over your cooled crust (see why we waited?) and pop it in the oven for about 25 minutes. You’re looking for the edges to be set but the center should still have a slight jiggle – it’ll firm up as it chills. Overbaking is the enemy of creamy texture here!
Now comes the real test of willpower – let the pan cool on the counter for 30 minutes, then transfer to the fridge for at least 4 hours (overnight is even better). I know it’s tempting to cut in early, but trust me – chilling is what gives you those picture-perfect clean slices. When you’re ready to serve, lift out using the parchment, dust with powdered sugar if you’re feeling fancy, and slice into squares with a sharp knife wiped clean between cuts.
Tips for Perfect Key Lime Pie Bars
After making more batches of these bars than I can count (what can I say – my neighbors keep “volunteering” as taste testers), I’ve picked up some foolproof tricks that’ll take your key lime bars from good to “are-you-sure-you’re-not-a-professional-pastry-chef?” amazing.
- Fresh juice is everything – I know bottled lime juice is convenient, but for that true key lime pie flavor, fresh juice can’t be beat. The difference is like night and day! Squeezing those little limes is worth the effort – just roll them on the counter first to get the most juice out. Pro tip: microwave limes for 10 seconds before juicing to maximize yield.
- Cool that crust completely – I can’t stress this enough. If your crust is even slightly warm when you add the filling, it’ll make the bottom layer soggy. No one wants a mushy crust! I usually prepare the crust first thing in the morning, let it cool while I run errands, then make the filling later.
- Chill time is non-negotiable – I know waiting is hard when your kitchen smells like citrusy heaven, but those 4 hours in the fridge are what give you clean, perfect slices. For super-neat cuts, run your knife under hot water and wipe it clean between each slice. The colder the bars, the cleaner they’ll cut.
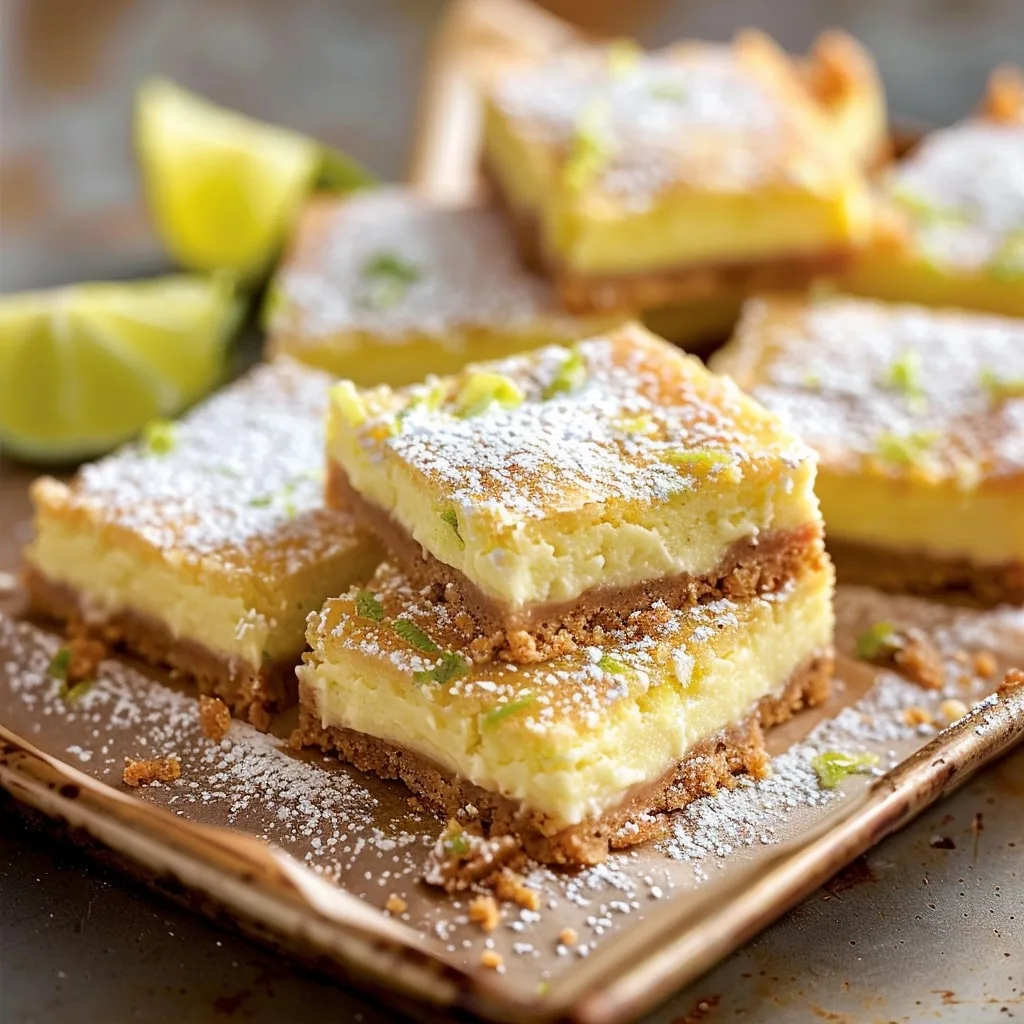
- Garnish game strong – While these bars are stunning on their own, a light dusting of powdered sugar right before serving makes them look bakery-worthy. If you’re feeling extra, add some lime zest or thin lime slices on top. For special occasions, pipe little whipped cream rosettes in the corners – just don’t add it until right before serving or it’ll weep.
- The secret to perfect texture – If your filling seems too runny after mixing, don’t panic! Let it sit for 5 minutes – the acid from the lime juice will thicken the condensed milk. And remember – the bars continue to set as they chill, so that slight jiggle in the center when they come out of the oven is exactly what you want.
Key Lime Pie Bars Variations
Now, here’s where we get to play! While I’m obsessed with the classic version, sometimes it’s fun to mix things up. These variations keep the soul of the original while adding little twists that make each batch unique. My friends have declared these their favorites over the years – maybe one will become your new go-to!
- Coconut Lime Dreams: Add 1/2 cup toasted coconut flakes to your graham cracker crust mixture. The nutty sweetness pairs amazingly with the tart lime. Bonus points for sprinkling extra coconut on top before baking the filling – it toasts up beautifully.
- Lemon-Lime Twist: Swap half the lime juice for fresh lemon juice and use lemon zest instead of lime for the garnish. The combination is sunshine in every bite – just slightly less tart than pure lime.
- Berry Swirl Magic: Before baking, dollop spoonfuls of raspberry or strawberry jam over the filling, then use a toothpick to create swirls. The berry tartness cuts through the richness perfectly.
- White Chocolate Drizzle: Melt 1/4 cup white chocolate chips with a teaspoon of coconut oil, then drizzle over cooled bars. The sweetness balances the lime’s zing beautifully – plus it looks gorgeous.
- Spiced Crust Upgrade: Add 1/2 teaspoon cinnamon and a pinch of cayenne to your graham cracker crumbs. The warmth plays so nicely against the cool lime – it’s unexpected but absolutely addictive.
Remember, baking is personal – feel free to make these your own! The only rule? Have fun with it. Every variation I’ve tried has been delicious in its own way, and I bet yours will be too.
Serving and Storing Key Lime Pie Bars
Here’s the thing about these bars – they’re shockingly versatile! I’ve served them straight from the fridge for backyard barbecues, packed them in lunchboxes (much to my kids’ delight), and even brought them to fancy dinner parties where they always steal the show. But no matter how you serve them, there are a few tricks to keep in mind.
- Presentation perfection: I always pull my bars from the fridge about 10 minutes before serving – just enough to take the chill off but still keep that perfect firm texture. For parties, I cut them into smaller bites (about 1-inch squares) and arrange them on a pretty platter with lime slices – they disappear FAST. If you’re feeling fancy, a dollop of whipped cream and a sprig of mint turns them into restaurant-worthy desserts.
- Storage smarts: These bars hate humidity, so always store them covered in the fridge. I layer them between parchment paper in an airtight container – they’ll stay fresh for up to 3 days this way. The crust does soften slightly over time, but the flavor only gets better as the lime mellows.
- Freezer-friendly tip: Did you know these freeze beautifully? Cut them into portions, wrap each tightly in plastic wrap, then store in a freezer bag for up to 2 months. Thaw overnight in the fridge – they taste almost as good as fresh! This is my secret for always having dessert ready when unexpected guests drop by.
- Leftover magic: If (by some miracle) you have leftovers, crumble them over vanilla ice cream or Greek yogurt for an instant gourmet treat. My husband swears by warming a square for 10 seconds in the microwave and topping it with berries – it’s like a personal key lime crisp!
Nutritional Information
Now, I’m no nutritionist, but I’ve done my homework on what’s in these little squares of joy – because let’s face it, we all want to know exactly how much bliss we’re indulging in! Keep in mind these numbers are estimates (your exact ingredients might vary slightly), but here’s the general breakdown per bar:
- Calories: 187 – Perfect for when you want just a taste of something sweet
- Fat: 8g – Most comes from that glorious butter and egg yolks
- Saturated Fat: 4g – All the better to carry those bright lime flavors!
- Carbohydrates: 25g – The sweet spot between graham crackers and condensed milk
- Sugar: 22g – Most from the natural sugars in the condensed milk
- Protein: 3g – Thanks to those egg yolks doing double duty
- Cholesterol: 75mg – Worth every last bite if you ask me
A little disclaimer from my kitchen to yours: these numbers can shift depending on your exact ingredients – like if you use low-fat condensed milk or add extra garnishes. But let’s be real – when you’re biting into that perfect balance of tart and sweet, the numbers hardly matter! Everything in moderation, right? Now go enjoy that sunshine in every bite.
Key Lime Pie Bars FAQs
I’ve gotten so many questions about these bars over the years – and trust me, no question is too silly! Here are the answers to the ones I hear most often, straight from my kitchen to yours.
Can I use bottled lime juice instead of fresh?
You can, but fresh is best! Bottled juice works in a pinch, but the flavor won’t be as bright or complex. If you must use bottled, add an extra teaspoon of zest to boost the lime flavor. Just promise me you’ll try fresh at least once – the difference will blow you away!
How long do key lime pie bars keep?
In the fridge, they’re perfect for 3 days (if they last that long!). The crust softens slightly over time, but the flavors actually deepen. For longer storage, freeze them – they’ll keep beautifully for 2 months. Just thaw overnight in the fridge before serving.
Help! My filling is runny – what went wrong?
Don’t panic! First, make sure you baked it long enough – the edges should be set with just a slight jiggle in the center. If you pulled it out too soon, pop it back in for 5 more minutes. Also, did you chill it thoroughly? These need at least 4 hours in the fridge to fully set. Runny filling usually means not enough chill time.
Can I make these gluten-free?
Absolutely! Just swap the graham crackers for gluten-free ones (I like the Pamela’s brand). The rest of the ingredients are naturally gluten-free, so you’re golden. The texture comes out identical – no one will guess they’re GF!
Why did my bars crack on top?
This usually happens if they baked too long or cooled too quickly. Next time, try baking at 325°F instead of 350°F for a gentler set, and let them cool gradually on the counter before refrigerating. A few cracks won’t affect the taste though – just dust with powdered sugar to camouflage!
Can I use regular limes instead of key limes?
You sure can! Persian limes work fine – you’ll need about 4-5 regular limes for the juice. The flavor will be slightly different (key limes are more floral), but still delicious. Just adjust the zest amount to taste – regular lime zest can be stronger.
Is there a way to make these less sweet?
Try reducing the sugar in the crust to 1/4 cup, and use only 3/4 can of condensed milk (about 10.5 oz). The filling will be tarter and set firmer – perfect for those who prefer more pucker! You might need to bake 5 minutes less with less filling.
Key Lime Pie Bars – Time to try!
I can’t wait for you to experience the magic of these Key Lime Pie Bars in your own kitchen! Trust me, once you make them, you’ll understand why my friends and family keep requesting them for every gathering. That perfect sweet-tart balance, the buttery crunch giving way to creamy lime bliss – it’s pure happiness in every bite.
And the best part? They’re so simple that you’ll have extra time to enjoy the compliments that are sure to come your way. Don’t forget to snap a photo of your beautiful creation – I’d love to see how yours turn out! Try this recipe and share your results in the comments below. Happy baking, my fellow lime lovers!
Print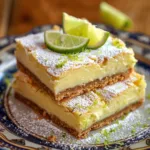
Key Lime Pie Bars
- Total Time: 37 minutes
- Yield: 16 bars 1x
- Diet: Vegetarian
Description
Key Lime Pie Bars are a delightful twist on a classic dessert, perfect for a refreshing treat any time of year. The buttery graham cracker crust and tangy key lime filling create a harmonious balance of flavors.
Ingredients
- 1 1/2 cups graham cracker crumbs
- 6 tablespoons salted butter, melted
- 1/3 cup granulated sugar
- 14 ounces sweetened condensed milk
- 5 egg yolks
- 1/2 cup key lime juice
- 2 tablespoons key lime zest
- Powdered sugar (optional)
- 2 tablespoons key lime and/or lemon zest (optional)
Instructions
- Preheat oven to 375°F.
- Spray an 8-inch or 9-inch square pan with cooking spray and line with parchment paper.
- Combine graham cracker crumbs, melted butter, and sugar in a small bowl. Stir until well combined.
- Press the graham cracker crumb mixture firmly into the bottom of the prepared pan. Use the bottom of a measuring cup to pack it tightly.
- Bake the graham cracker crust for 7 minutes. Remove from the oven and let cool completely.
- Preheat the oven to 350°F.
- In a medium bowl, whisk together sweetened condensed milk, egg yolks, key lime juice, and zest until smooth.
- Pour the filling over the cooled crust.
- Bake for 25 minutes.
- Let the bars chill in the refrigerator before serving.
- Dust with powdered sugar and sprinkle with additional zest if desired. Cut into bars and enjoy.
Notes
- Use fresh key lime juice for the best flavor.
- Let the crust cool completely before adding the filling.
- Chill the bars thoroughly for clean cuts.
- Prep Time: 5 minutes
- Cook Time: 32 minutes
- Category: Dessert
- Method: Baking
- Cuisine: American
Nutrition
- Serving Size: 1 bar
- Calories: 187
- Sugar: 22g
- Sodium: 85mg
- Fat: 8g
- Saturated Fat: 4g
- Unsaturated Fat: 3g
- Trans Fat: 0g
- Carbohydrates: 25g
- Fiber: 0g
- Protein: 3g
- Cholesterol: 75mg
Keywords: key lime pie bars, dessert recipe, easy key lime bars


