There are easy desserts, and then there’s this ridiculously decadent, crowd-pleasing No-Bake Butterfinger Pie. It’s the dessert that disappears first at every party, and the secret is how simple it is to make.
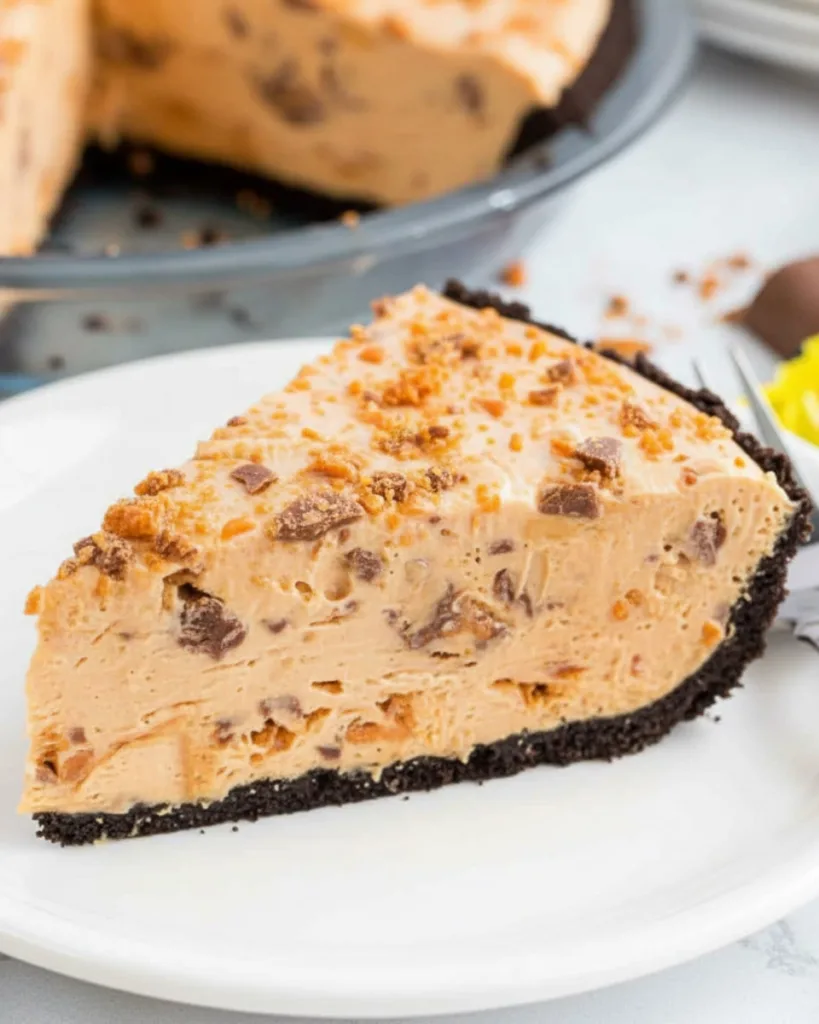
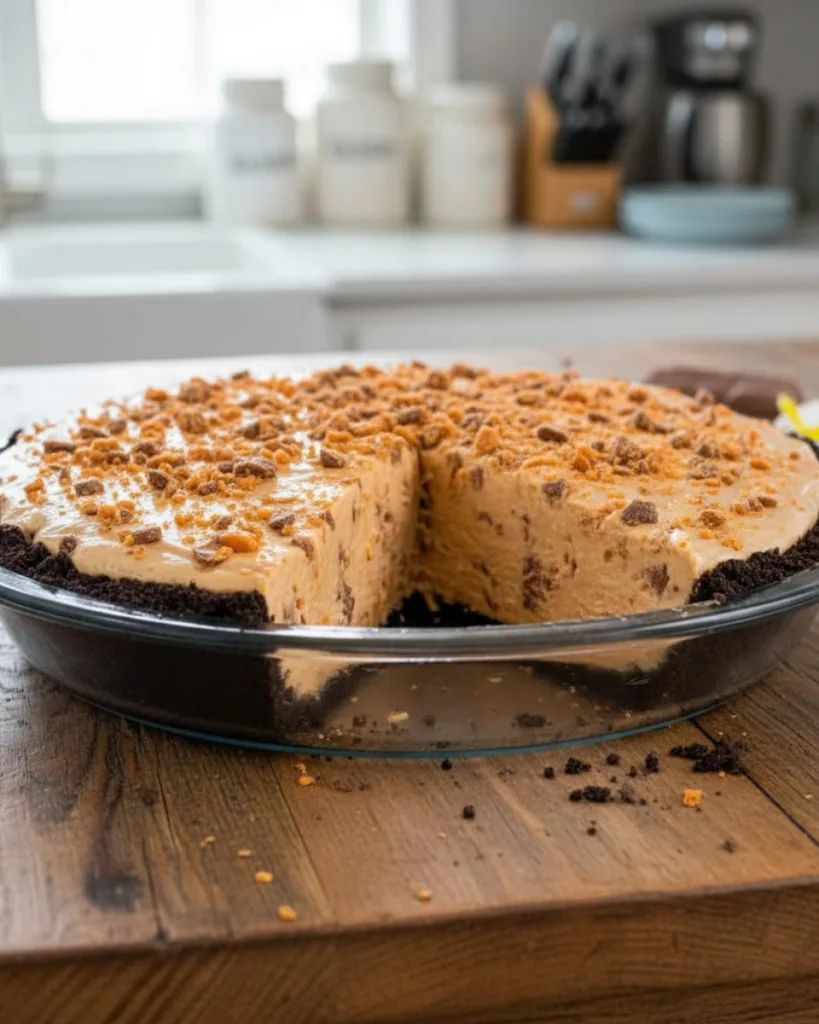
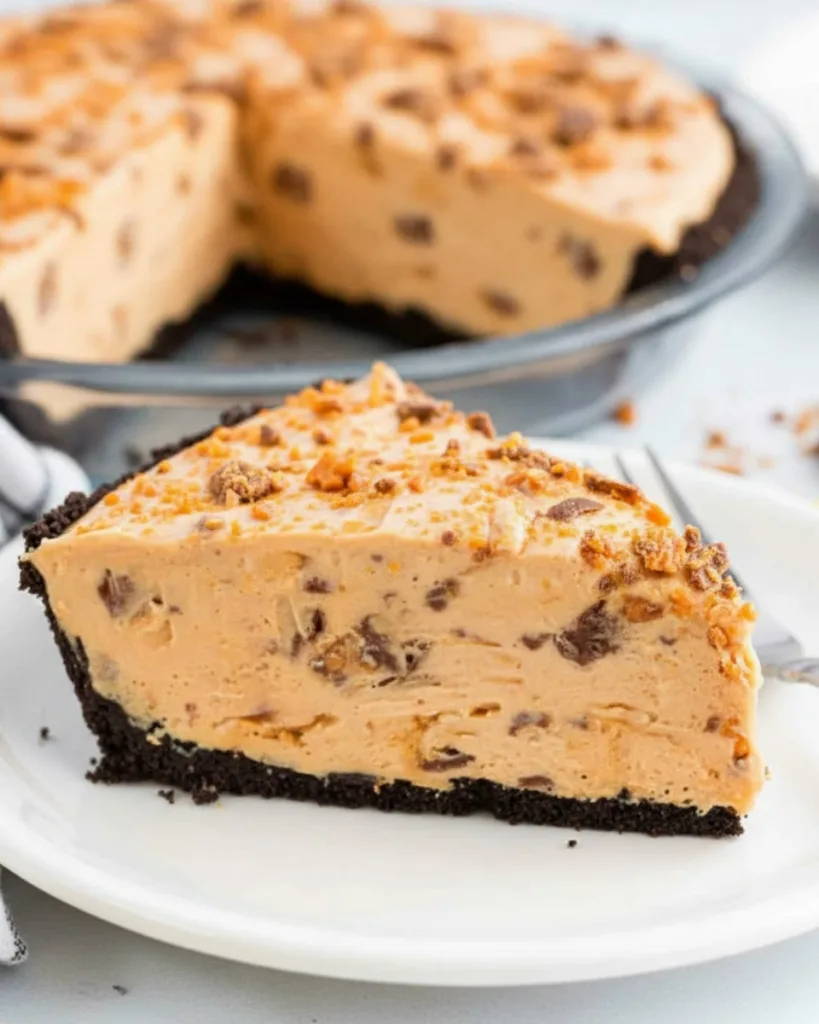
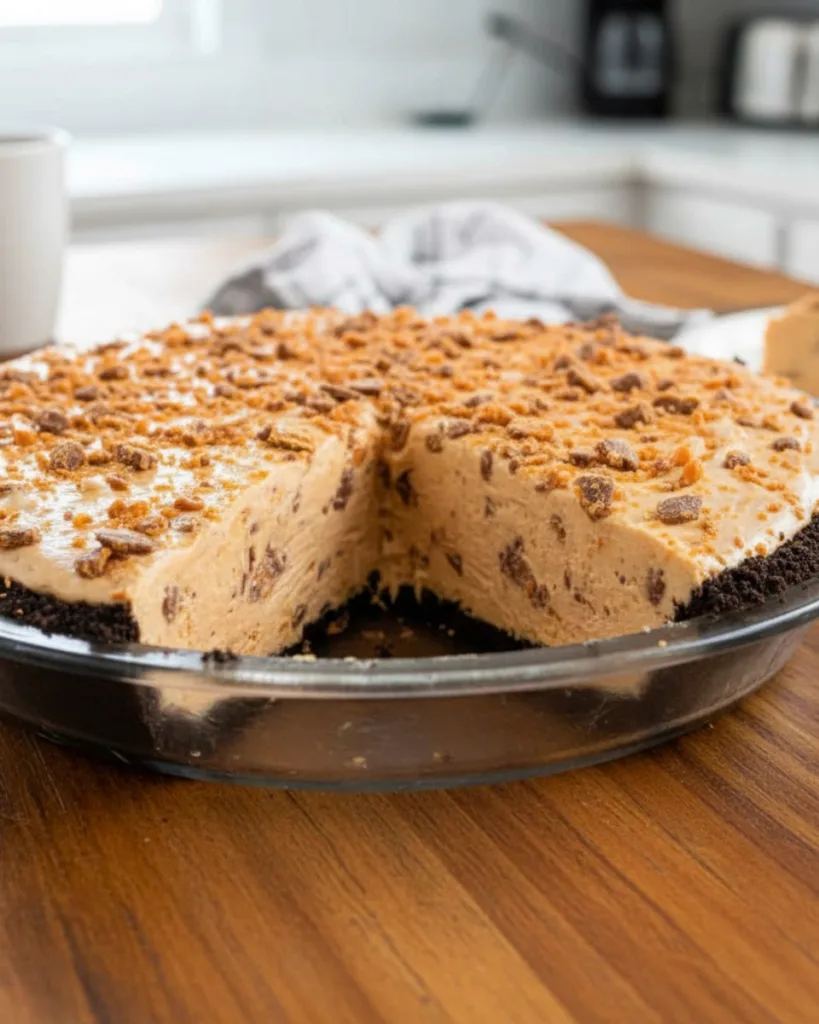
Imagine a crunchy chocolate Oreo crust that gives way to a creamy, peanut butter filling swirled with chopped Butterfinger candy bars. On top, a generous sprinkle of crushed Butterfingers adds that perfect crunch and sweetness in every bite.
This pie is not only delicious, but it’s also a perfect make-ahead dessert for any occasion, from casual family dinners to holiday celebrations. With no baking required, you can whip it up quickly and enjoy a rich, layered treat that delights peanut butter lovers and candy fans alike.
Get ready to impress with this easy, luscious dessert that’s bound to become your new favorite.
Table of Contents
Why This Butterfinger Pie Recipe is the Best
- Incredibly Easy: You only need 15 minutes of active prep time to whip up this delicious dessert. No complicated steps or hard-to-find ingredients involved.
- No-Bake: It’s perfect for summer days or whenever your oven is busy. Skip the heat and enjoy a cool, creamy pie without turning on the stove.
- Perfect Texture: This pie delivers the ultimate mix of creamy peanut butter filling, crunchy chocolate Oreo crust, and crispy Butterfinger candy bits on top.
- Crowd-Pleaser: Kids and adults both love it. Whether for a family dinner or a party, this pie always disappears fast.
- Customizable: Want to make it your own? You can swap the crust, add a drizzle of chocolate, or use homemade whipped cream. It’s easy to tailor to your taste.
This Butterfinger Pie recipe checks all the boxes for a quick, yummy, and show-stopping dessert.
Ingredients You’ll Need
For the Chocolate Oreo Crust
- Oreo Cookies: Use whole Oreo cookies, including the creamy filling. The filling helps bind the crust and adds extra richness.
- Unsalted Butter: Melt the butter before mixing. This helps the crust hold together firmly once pressed into the pie plate.
For the Creamy Peanut Butter Filling
- Cream Cheese: Make sure it’s softened to room temperature. This ensures a smooth and creamy filling without lumps.
- Sweetened Condensed Milk: Don’t substitute evaporated milk; the sweetness and texture of condensed milk are key to the pie’s richness.
- Creamy Peanut Butter: Choose a no-stir brand like Jif or Skippy for the best texture and flavor that blends well.
- Cool Whip: The secret to quick and easy! Use thawed Cool Whip to fold gently into the filling for a light, fluffy texture.
- Butterfinger Candy: Use about 12 fun-size Butterfinger bars, crushed into small pieces. Mix most of the filling and reserve some for topping to add that signature crunch.
These ingredients create the perfect balance of crunchy crust, creamy filling, and candy crunch that makes this Butterfinger Pie irresistible.
How to Make Butterfinger Pie
Step 1: Make the Oreo Crust
Start by crushing 25 Oreo cookies, including the creamy filling, into fine crumbs using a food processor. Add 5 tablespoons of melted unsalted butter to the crumbs and mix until well combined. Press this mixture firmly into the bottom and up the sides of a 9-inch pie plate to form an even crust. Place the crust in the freezer while you prepare the filling to help it set.
Step 2: Prepare the Butterfinger Filling
In a mixing bowl, beat 8 ounces of softened cream cheese with 14 ounces of sweetened condensed milk and 1 cup of creamy peanut butter until smooth and creamy. Gently fold in 8 ounces of thawed Cool Whip, which lightens and aerates the filling. Finally, fold in most of the 12 fun-size crushed Butterfinger candy bars, reserving a few to sprinkle on top.
Step 3: Assemble and Chill
Pour the creamy Butterfinger filling into the chilled Oreo crust, smoothing it out evenly. Sprinkle the remaining crushed Butterfinger pieces on top for extra crunch and visual appeal. Cover the pie with plastic wrap and refrigerate for at least 4 hours to allow it to set firmly. Slice and enjoy this decadent no-bake dessert perfect for any occasion.
Pro Tips for the Perfect Pie
- For Easy Crushing: Slightly freeze your Butterfinger bars for 15 minutes before crushing. This helps them shatter perfectly without becoming sticky or messy, making mixing much easier.
- For Clean Slices: Run a sharp knife under hot water and wipe it dry before each slice. This simple trick ensures clean, smooth cuts and gives your pie a professional finish every time.
- Room Temperature is Key: Make sure your cream cheese is softened fully at room temperature. Properly softened cream cheese blends smoothly into the filling, preventing lumps and creating a silky texture.
Following these expert tips will make your Butterfinger Pie not only delicious but visually impressive and easy to prepare. These small tricks transform a great recipe into a flawless dessert experience.
Recipe Variations & Customizations
- Nutter Butter Crust: Swap Oreos for Nutter Butter cookies in the crust to boost the peanut butter flavor. This change gives the pie an extra rich, nutty punch that’s perfect for peanut butter lovers.
- Add a Drizzle: Before serving, drizzle melted chocolate or caramel sauce over the pie. This simple addition adds a beautiful glossy finish and enhances the dessert’s sweetness and complexity.
- Homemade Whipped Cream: If you prefer fresh over Cool Whip, make your own stabilized whipped cream by beating 1.5 cups of cold heavy cream with ½ cup powdered sugar and 1 teaspoon vanilla until stiff peaks form. It adds a fresh, creamy texture that’s light and fluffy.
These easy variations let you customize your Butterfinger Pie to suit your taste or occasion, ensuring this crowd-pleaser stays exciting every time you make it.
Storage and Freezing Instructions
- To Store: After assembling and chilling your Butterfinger Pie, cover it tightly with plastic wrap to prevent it from drying out.
Refrigerate it for up to 4 days to keep the filling fresh and maintain its creamy texture.
Keeping it well-covered also preserves the crunchy topping and prevents any odors from the fridge from seeping in. - To Freeze: You can freeze the pie for up to 3 months.
Wrap it tightly in plastic wrap first, ensuring every surface is covered.
Then add a second layer by wrapping it in aluminum foil.
This double wrap protects the pie from freezer burn and helps maintain its texture.
When ready to enjoy, thaw the pie overnight in the refrigerator for the best texture and taste before serving.
Following these storage tips ensures your no-bake Butterfinger Pie stays delicious and ready to enjoy whenever you want a sweet treat.
FAQs About Butterfinger Pie
Why was Butterfinger discontinued?
Butterfinger bars were never fully discontinued, but in the past, there were brief periods when production slowed or certain varieties were temporarily unavailable due to changes in ownership or manufacturing shifts. However, the brand remains popular and widely available today, with the classic candy bar still going strong.
Are they discontinuing Butterfingers?
No current plans indicate that Butterfinger candy bars are being discontinued. The brand continues to innovate with new flavors and packaging, keeping the candy relevant for fans old and new.
What is the inside of a Butterfinger?
The inside of a Butterfinger bar consists of a crispy, flaky peanut butter candy center that has a light, crunchy texture. This is covered in a smooth milk chocolate coating, creating a delicious contrast of crunchy and creamy.
Can Butterfinger pie be frozen?
Yes, Butterfinger pie freezes well. To freeze, wrap the pie tightly in plastic wrap, then add a layer of aluminum foil to protect it from freezer burn. Thaw it overnight in the refrigerator before serving to maintain the best texture and flavor.
More Delicious Desserts You’ll Love
If you’re a fan of rich, indulgent sweets, these desserts will be perfect for your next baking adventure. Each recipe brings unique flavors and textures to the table, perfect for satisfying your sweet tooth or impressing guests.
- Butterfinger Poke Cake: A moist cake layered with Butterfinger candy and creamy frosting, perfect for a crowd.
- Caramel Apple Crisp Cheesecake: The best of fall flavors combined into a luscious cheesecake.
- Chocolate Mint Cheesecake: A refreshing twist for chocolate lovers looking for a cool dessert.
- Mini Caramel Pecan Cheesecakes: Bite-sized cheesecakes bursting with flavor, ideal for parties.
- Butterscotch Lush Cake: A layered cake with rich butterscotch that melts in your mouth.
Each of these recipes pairs beautifully with our Butterfinger Pie and will add even more variety to your dessert repertoire. Happy baking and enjoy every sweet bite!
Why This No-Bake Butterfinger Pie Stands Out
This no-bake Butterfinger Pie recipe stands out because it balances simplicity with indulgence perfectly. You get a luscious peanut butter cream filling, a crunchy chocolate Oreo crust, and the irresistible crunch of Butterfinger candy, all with minimal effort and no baking. It’s perfect for busy days, summer treats, or any occasion where you want a crowd-pleasing dessert that looks and tastes impressive.
Try this recipe today and experience the magic for yourself! Don’t forget to leave a comment sharing your results, and follow me on Instagram and Pinterest for more delicious recipes and kitchen tips. Happy baking!
Print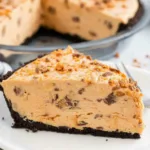
Butterfinger Pie
- Total Time: 4 hours 15 minutes
- Yield: 8 servings 1x
- Diet: Vegetarian
Description
This Butterfinger Pie is a no-bake dessert dream, creamy, crunchy, and irresistibly peanut buttery. Made with a chocolate cookie crust and loaded with crushed Butterfinger candy, it’s the perfect crowd-pleasing treat for any occasion.
Ingredients
For the Crust:
- 25 Oreo cookies
- 5 tablespoons unsalted butter, melted
For the Pie Filling:
- 8 oz cream cheese, softened to room temperature
- 1 (14 oz) can sweetened condensed milk
- 1 cup creamy peanut butter
- 8 oz Cool Whip, thawed
- 12 fun-size Butterfingers, crushed
Instructions
- Make the Crust: Place Oreo cookies in a food processor and pulse until fine crumbs form. Add melted butter and pulse again until combined. Press mixture into the bottom and sides of a 9-inch pie dish. Freeze while preparing the filling.
- Prepare the Filling: In a mixing bowl, beat the softened cream cheese with the sweetened condensed milk and peanut butter until smooth and creamy.
- Combine & Fill: Gently fold in the Cool Whip and all but 2 tablespoons of the crushed Butterfinger candy. Pour filling into the prepared crust and smooth the top. Sprinkle remaining Butterfinger crumbs on top.
- Chill & Serve: Cover with plastic wrap and refrigerate for at least 4 hours before serving. Slice, serve, and enjoy this creamy, crunchy dessert!
Notes
- For extra peanut butter flavor, try using Nutter Butter cookies for the crust instead of Oreos.
- Use shelf-stable peanut butter (like Jif or Skippy) for the best texture.
- Store covered in the fridge for up to 4 days, or freeze for up to 3 months. Thaw overnight before serving.
- Prep Time: 15 minutes
- Cook Time: 0 minutes
- Category: No-Bake Desserts, Pies
- Method: No-Bake
- Cuisine: American
Nutrition
- Serving Size: 1 slice
- Calories: 450
- Sugar: 40g
- Sodium: 320mg
- Fat: 28g
- Saturated Fat: 14g
- Unsaturated Fat: 10g
- Trans Fat: 0g
- Carbohydrates: 42g
- Fiber: 2g
- Protein: 9g
- Cholesterol: 45mg
Keywords: Butterfinger Pie, No-Bake Pie, Peanut Butter Pie, Oreo Crust Pie, Candy Dessert


