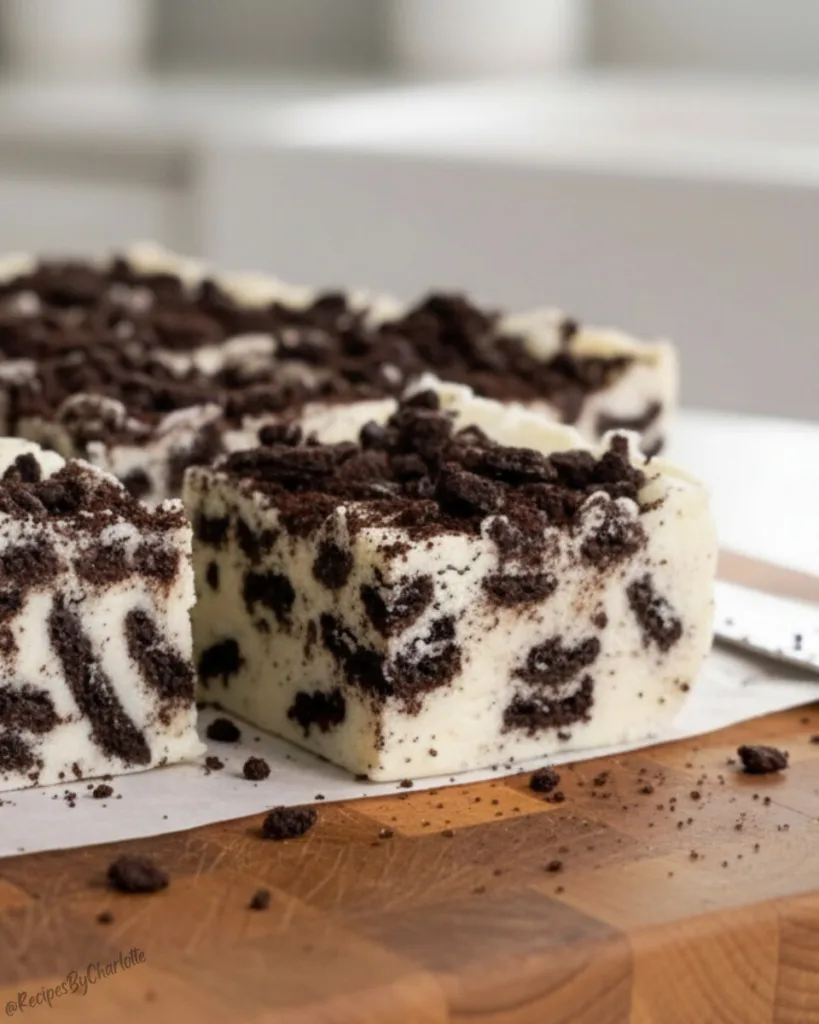
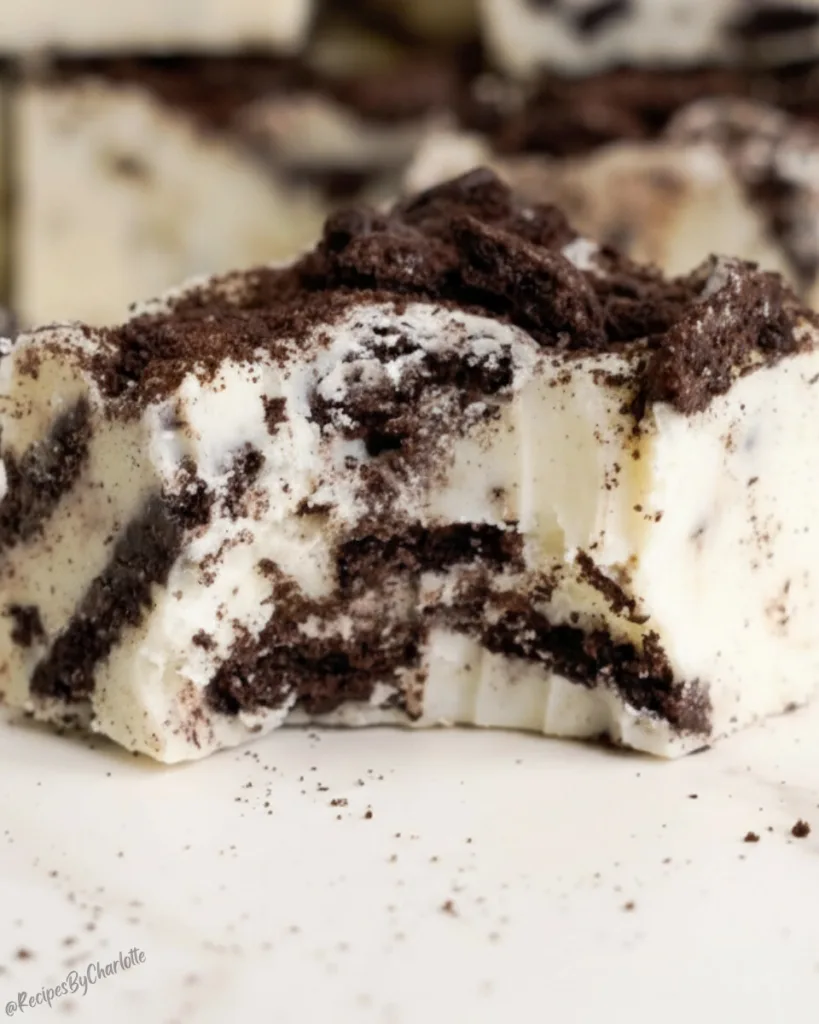
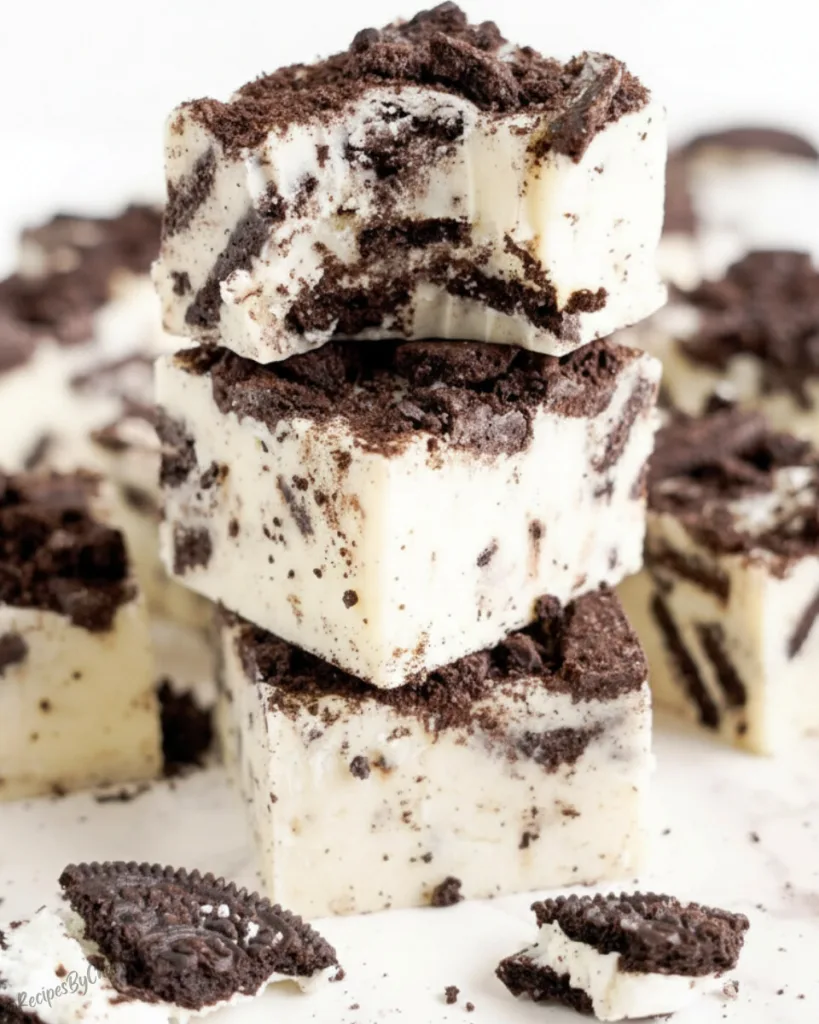
Forget about that waxy store-bought stuff. This Cookies and Cream Fudge is melt-in-your-mouth creamy and loaded with the perfect chocolatey crunch. You get a rich white chocolate base speckled with cookie bits in every single bite.

Most recipes rely on sweetened condensed milk, but we are doing things differently here. We use the “Fantasy Fudge” method with marshmallow fluff and evaporated milk. This swap creates a lighter texture that isn’t cloyingly sweet.
Best of all, you can leave your candy thermometer in the drawer. We use a simple 5-minute magic timer technique to get perfect results every time. It comes together on the stovetop in just 15 minutes. It is the perfect addition to a dessert board alongside my classic Christmas Fudge or a thoughtful homemade gift.
Table of Contents
Why You’ll Fall in Love with This Cookies and Cream Fudge Recipe
There is a reason this specific method is my absolute favorite. Once you try it, you will never go back to the microwave versions.
- Fail-Proof Texture: We use marshmallow fluff in this recipe. This ingredient guarantees a smooth consistency every single time. It acts as an insurance policy against crystallization, so you never end up with grainy sugar.
- No Special Equipment: You don’t need a candy thermometer to make this. Simple timing does all the work. If you can set a timer for five minutes, you can master this dessert.
- Incredible Flavor Balance: White chocolate can be overwhelming on its own. The addition of the dark cocoa cookies cuts through the sugar perfectly. It tastes just like the premium squares you buy at seaside candy shops.
- Speedy Preparation: The entire process takes just 15 minutes from start to finish. It is just as fast as my 2 Ingredient Peanut Butter Fudge, but the result tastes much more gourmet.
- Budget Friendly: You get a massive batch of high-end treats for the cost of a bag of chips and some sugar. It is the ultimate high-value dessert for holiday gifting.
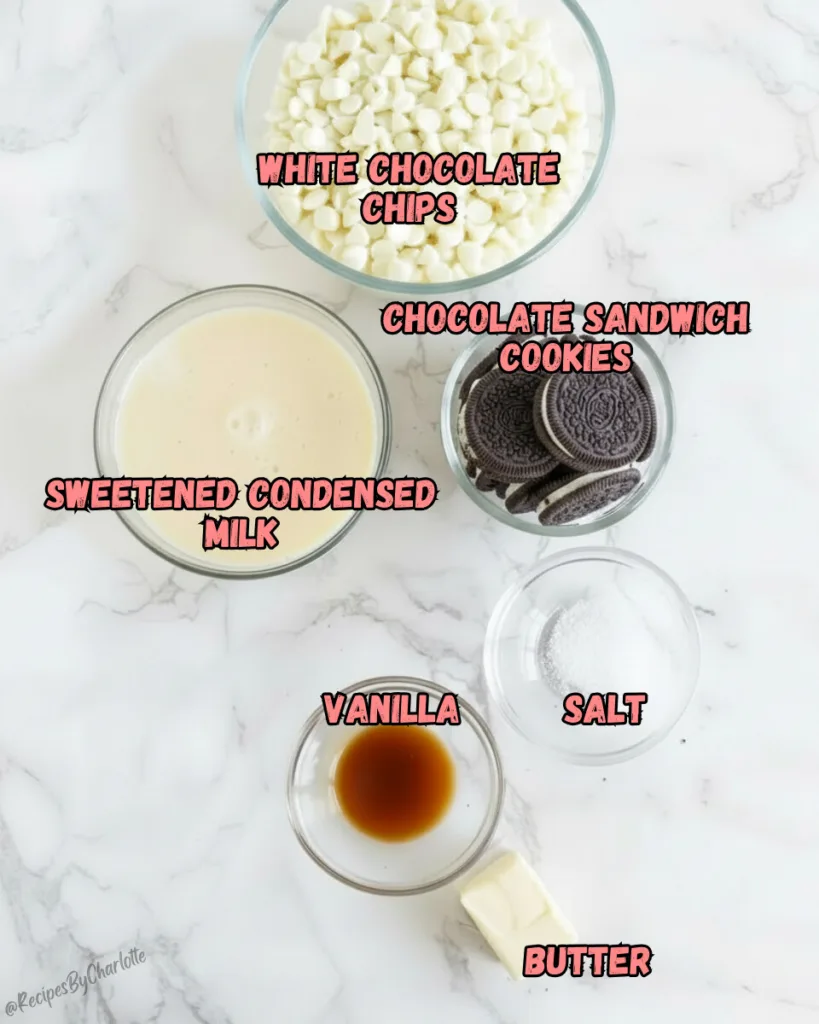
Ingredients for Cookies and Cream Fudge
You really only need a handful of pantry staples to pull this off. However, candy making relies on specific chemical reactions, so please stick closely to this list.
- Granulated Sugar: You will need 1 1/2 cups of standard white sugar. This provides the sweetness and the necessary bulk. When you boil it properly, it changes structure to hold the fudge together firmly once it cools.
- Unsalted Butter: Use 6 tablespoons cut into small cubes. Cubing the butter helps it melt quickly and evenly into the sugar mixture. I prefer unsalted butter to control the flavor, but salted works if that is all you have on hand.
- Evaporated Milk: Measure out 1/3 cup. Please double-check your can label carefully. Don’t mistake this for sweetened condensed milk! Condensed milk is thick and sticky, while evaporated milk is liquid like regular milk. Using the wrong one is the most common reason this recipe fails.
- Marshmallow Fluff: You need 1 cup of jarred marshmallow creme. This ingredient is the secret weapon that makes this “Fantasy Fudge.” It acts as a stabilizer to prevent sugar crystals from forming, which ensures your dessert is smooth rather than gritty.
- White Chocolate Chips: Since white chocolate is the primary flavor here, I highly recommend using a premium brand like Ghirardelli. Cheaper store-brand chips often contain waxy stabilizers that resist melting or turn oily when heated.
- Vanilla Extract: A half teaspoon rounds out the flavor profile and cuts through the intense sweetness.
- Sandwich Cookies: You need about 15 cookies total. Crush 10 for the filling and chop 5 for the topping. You can use original Oreos or a generic brand. Store-brand cookies are often slightly drier, which actually helps them stay crunchy in the warm fudge mixture.
If you buy a family-size pack of cookies and have extras, you should definitely use them to make my Cookies and Cream Brownies next!
How to Make Cookies and Cream Fudge
Step 1: Prep is Key
You must prepare your workstation before you even turn on the stove. This fudge sets incredibly fast once it comes off the heat, so it waits for no one. Line an 8×8 inch square baking pan with parchment paper or aluminum foil.
Make sure you leave a good amount of overhang on the sides. These will act as handles later so you can lift the entire block out for easy slicing. Lightly grease the lining with non-stick spray. If you enjoy making treats like my Mummy Fudge, you know that proper pan preparation is half the battle.
Step 2: The Boil
Grab a large heavy-bottomed saucepan to prevent hot spots. Combine the granulated sugar, butter cubes, and evaporated milk in the pan and place it over medium heat. You need to stir this constantly as the butter melts.
Watch closely for a “full rolling boil.” This is different from a gentle simmer. You want big bubbles bursting aggressively across the entire surface of the liquid. They shouldn’t disappear or stop bubbling when you stir the mixture.
Step 3: The 5-Minute Rule
The second you see that rolling boil, start your timer. You must boil this mixture for exactly five minutes. Don’t guess and don’t rely on your intuition here.
Continue to stir the entire time to ensure the sugary bottom doesn’t scorch or burn. This specific five-minute boil brings the sugar to the “soft-ball stage.” This chemical change allows the fudge to set firmly at room temperature without you needing to fiddle with a candy thermometer.
Step 4: The Mix
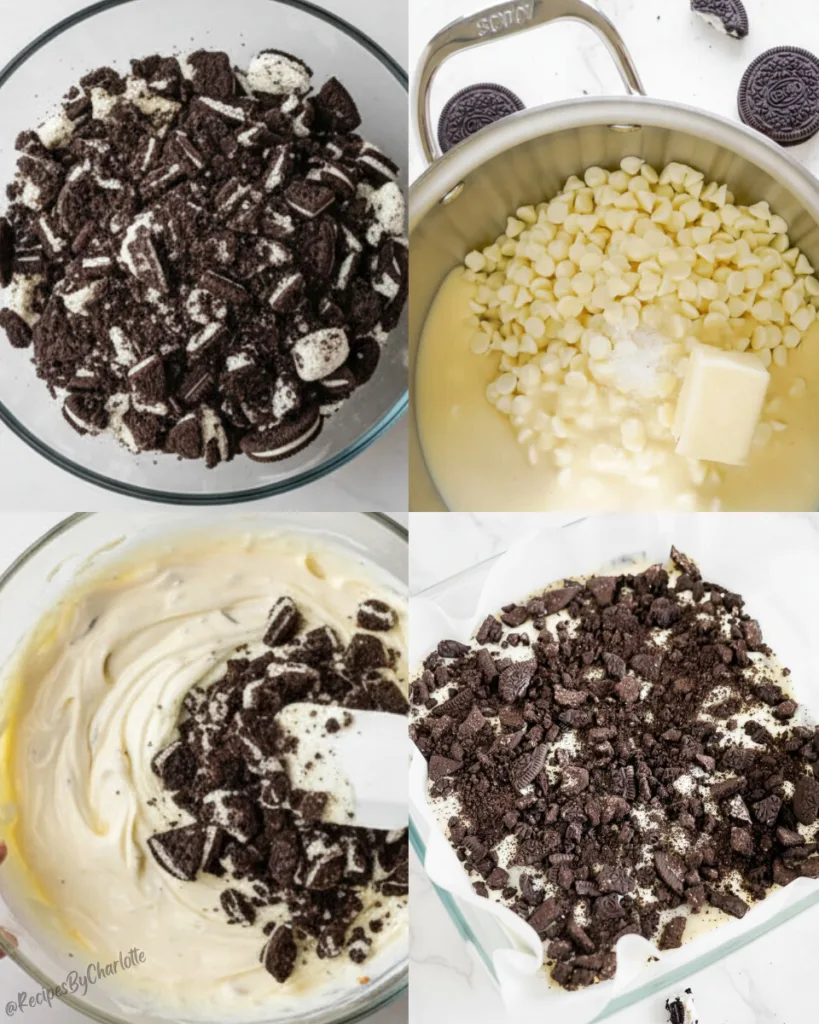
Remove the pan from the heat immediately when the timer goes off. Dump in the marshmallow fluff, white chocolate chips, and vanilla extract all at once. Now use some muscle.
Beat the mixture vigorously with a sturdy wooden spoon. The residual heat will melt the chips and fluff rapidly. You will see the mixture transform before your eyes from a runny liquid into a thick, glossy, and smooth batter.
Step 5: The Fold
Pour the coarse cookie crumbs into the white chocolate base. Fold them in gently just until they are incorporated. You want to keep the chunks big and crunchy rather than turning them into crumbs.
Work quickly because the fudge will start to stiffen as it cools. Pour the thick mixture into your prepared pan and spread it into an even layer. Immediately press the remaining chopped cookies onto the top for a beautiful finish.
Pro-Tips for Perfect Fudge Every Time
We have all been there. You get distracted for a split second, and the bottom of the pan catches slightly. If this happens, don’t scrape the bottom of the pan when pouring your mixture. Leave that burnt layer behind or your entire batch will taste scorched.
Patience pays off when cooling your dessert. I recommend letting it set at room temperature for about two to three hours. This prevents condensation from forming on the surface, which can make the top sticky. However, you can pop it in the fridge if you are in a rush.
Presentation is everything when gifting this treat. Lift the entire block out of the pan using the parchment handles and place it on a cutting board. Run a large sharp knife under warm water and wipe it dry. Slice firmly and wipe the blade clean between every single cut for bakery-quality squares.
Variations and Add-Ins
Mint Oreo Fudge: You can easily transform this into a winter wonder. Simply swap the vanilla extract for peppermint extract and use Mint Oreos instead of the standard ones. If you are a fan of my Mint Brownies, this refreshing twist is calling your name.
Holiday Colors: This recipe is a blank canvas for festive decorations. Toss some red and green sprinkles on top right after you press in the cookie pieces. It looks adorable nestled in a gift box next to my Christmas Fudge.
Golden Oreo Version: You might prefer a pure vanilla flavor profile. Use Golden Oreos instead of the chocolate version for a buttery and rich variation. The monochrome look is elegant, and the taste is surprisingly different.
Storage and Freezing Instructions
You can absolutely store this fudge right on your counter. Just pop the squares into an airtight container and keep them at a cool room temperature. It will stay fresh and delicious for up to two weeks.
Yes, you can freeze this recipe! Wrap the block tightly in plastic wrap and then add a layer of aluminum foil for extra protection. This keeps it safe from freezer burn for up to three months.
When you are ready to eat, let it thaw on the counter rather than in the fridge. This simple trick prevents sticky condensation or “sweating” from forming on the surface. It tastes just as good as the day you made it.
What to Serve with Fudge
This rich dessert demands a drink that can hold its own. Serve it with a strong cup of black coffee or a steaming mug of hot chocolate. The slight bitterness of the coffee cuts through the white chocolate sweetness perfectly.
You can also make this the centerpiece of your holiday gifting. I love tucking these squares into a festive tin alongside my Christmas Cookies or Italian Christmas Cookies. It creates a stunning variety of textures and flavors that looks professionally made.
FAQs About Cookies and Cream Fudge
Why is my fudge grainy?
Grainy fudge usually happens because the sugar crystals didn’t dissolve completely or they reformed during cooling. This typically means you didn’t boil the mixture quite long enough or you didn’t stir constantly. Make sure you hit that full rolling boil before starting your timer.
Why is my fudge too soft?
If your fudge is still goo after cooling, you likely didn’t boil it for the full five minutes. That specific time is needed to reach the “soft-ball stage.” Another culprit is low-fat margarine. Stick to real butter, as the fat content is crucial for setting.
Can I use marshmallow crème instead of fluff?
Yes, you absolutely can! Marshmallow crème and fluff are essentially the same product for the purpose of this recipe. They both provide that stabilizer we need for a smooth texture.
What is the secret to making good fudge?
The real secret is patience and precision. Don’t guess on the boiling time, use a timer! Also, having all your ingredients measured and ready (mise en place) before you turn on the stove makes a huge difference.
Why is my 3 ingredient fudge not setting?
If you are making a simpler recipe like my 2 Ingredient Peanut Butter Fudge, it usually fails because of the wrong milk. Using evaporated milk instead of sweetened condensed milk will result in a soupy mess. Check your labels!
What happened to Oreo Fudge Creme?
You might be thinking of the store-bought cookies that were dipped in fudge cream. They can be hard to find or discontinued depending on where you live. Luckily, this homemade block tastes even better than the packaged version.
What is millionaire fudge?
Millionaire fudge is usually a layered treat inspired by “Millionaire’s Shortbread.” It typically features layers of chocolate fudge, caramel, and sometimes a shortbread base. It is delicious, but definitely more work than this easy 15-minute recipe!
More Easy Fudge and Sweet Treats
If you love the creamy, crunchy texture of this cookies and cream fudge, you need to check out these other easy desserts. They are perfect for gifting, parties, or just satisfying a chocolate craving!
- Cookies and Cream Brownies: Double down on the Oreo flavor with these rich, fudgy brownies.
- 2 Ingredient Peanut Butter Fudge: Whip up this incredibly easy, creamy peanut butter fudge in just minutes.
- Red Velvet Oreo Cheesecake: Impress your guests with this stunning and delicious Oreo-crust cheesecake.
- Christmas Fudge: A classic, rich chocolate fudge that is perfect for holiday gifting.
Whether you are filling a holiday cookie tin or just treating yourself to something sweet, these recipes are quick, delicious, and sure to be a hit. Enjoy!
Enjoy Your Homemade Cookies and Cream Fudge
You are going to be obsessed with how simple this recipe is. It is truly the best Cookies and Cream Fudge you will ever make. You get that perfect creamy texture in just 15 minutes without messing with a difficult candy thermometer.
I can’t wait for you to whip up a batch for your family this week. Please leave a comment below and let me know how it turned out! I love hearing about your kitchen adventures.
Don’t forget to follow me on Facebook for more easy dessert ideas. I’m always pinning new treats that are perfect for busy bakers like you.
Print
Cookies and Cream Fudge
- Total Time: 15 minutes
- Yield: 36 pieces 1x
Description
This creamy white chocolate fudge is loaded with crunchy chocolate cookie bits for a classic flavor combination. It comes together on the stovetop in just 15 minutes without needing a candy thermometer, making it perfect for holiday gifting.
Ingredients
- 1 1/2 cups granulated sugar
- 6 tablespoons unsalted butter, cubed
- 1/3 cup evaporated milk
- 1 cup white chocolate chips
- 1 cup marshmallow fluff (marshmallow creme)
- 1/2 teaspoon vanilla extract
- 1 cup coarsely crushed chocolate sandwich cookies (about 10 cookies)
- 1/2 cup chopped chocolate sandwich cookies (for topping)
- Non-stick cooking spray
Instructions
- Prepare the pan: Line an 8×8-inch square baking pan with parchment paper or aluminum foil, leaving an overhang on the sides to use as handles later. Lightly grease the lining with non-stick cooking spray. This step ensures you can lift the entire block of fudge out easily for clean slicing.
- Boil the base: In a large heavy-bottomed saucepan, combine the granulated sugar, butter cubes, and evaporated milk. Place over medium heat. Stir constantly until the butter melts and the mixture comes to a full rolling boil.
- Cook the sugar: Once boiling, set a timer for exactly 5 minutes. Continue to stir constantly to prevent the bottom from scorching. This 5-minute boil brings the sugar to the soft-ball stage, which is essential for the fudge to set properly without needing a thermometer.
- Mix the fudge: Remove the pan from the heat immediately. Stir in the marshmallow fluff, white chocolate chips, and vanilla extract. Beat the mixture vigorously with a wooden spoon until the chocolate is completely melted and the batter is smooth and glossy.
- Add the cookies: Fold in the 1 cup of coarse cookie crumbs until they are evenly distributed throughout the white chocolate base. Work quickly, as the fudge will start to set as it cools.
- Set and garnish: Pour the thick mixture into the prepared pan and spread it into an even layer. Immediately press the remaining 1/2 cup of chopped cookie pieces onto the top. Let the fudge cool completely at room temperature until firm, which usually takes about 2 to 3 hours. You can refrigerate it to speed up the process.
- Slice and serve: Once firm, lift the fudge out of the pan using the parchment handles. Place it on a cutting board and slice it into small squares.
Notes
- Store in an airtight container at room temperature for up to 1 week or refrigerate for longer freshness.
- For cleaner slices, chill before cutting and wipe the knife between cuts.
- Prep Time: 10 minutes
- Cook Time: 5 minutes
- Category: Dessert
- Method: Stovetop
- Cuisine: American
Nutrition
- Serving Size: 1 piece
- Calories: 110
- Sugar: 14g
- Sodium: 45mg
- Fat: 5g
- Saturated Fat: 3g
- Unsaturated Fat: 1g
- Trans Fat: 0g
- Carbohydrates: 16g
- Fiber: 0g
- Protein: 1g
- Cholesterol: 10mg
Keywords: cookies and cream fudge, white chocolate fudge, easy holiday fudge, no thermometer fudge


