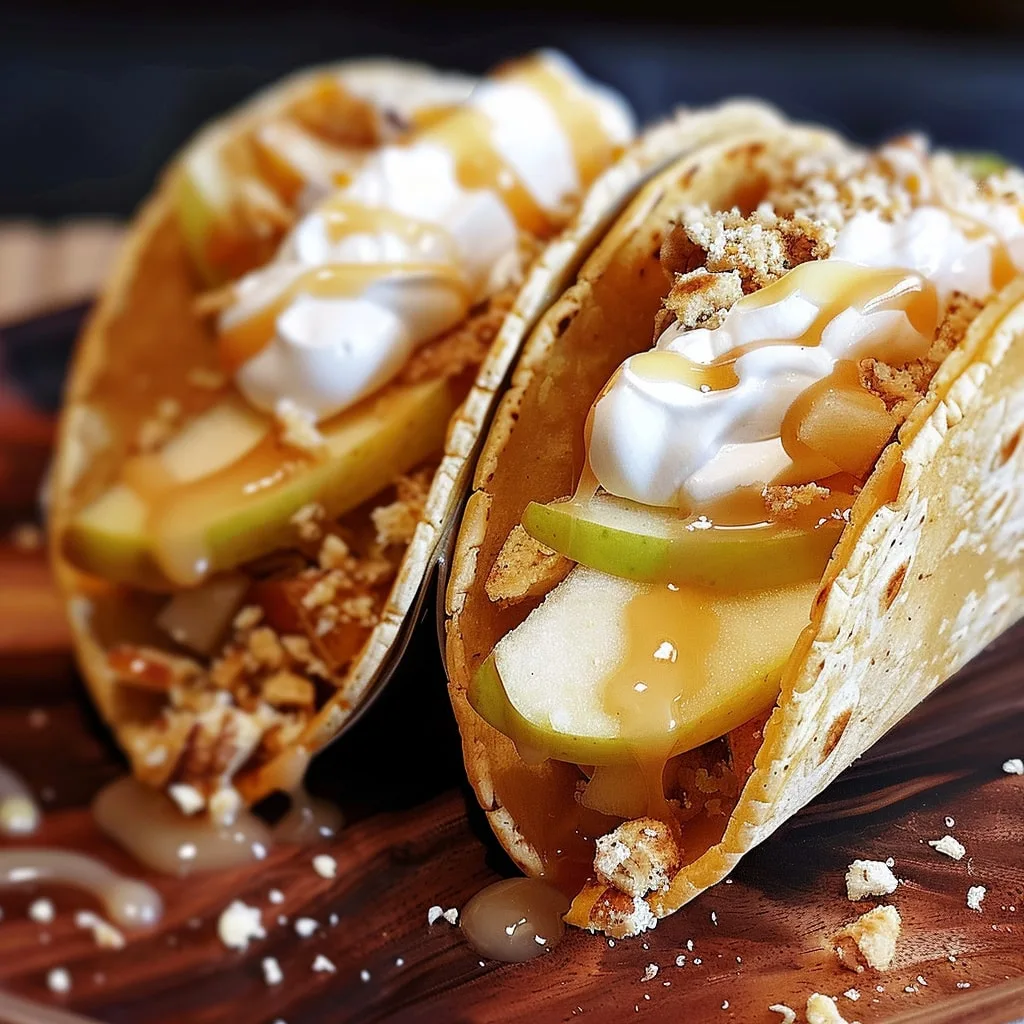
Okay, let’s just get this out of the way: these are probably the most fun dessert I’ve ever made. Seriously. Imagine a warm, crispy taco shell, sparkling with cinnamon-sugar, filled with a cool, creamy cheesecake fluff. Then, you top that with gooey, spiced apple pie filling. It’s everything you love about two classic desserts, all wrapped up in one incredible bite. These Apple Pie Cheesecake Tacos are an absolute showstopper, and they look way more complicated than they actually are.
I first whipped these up for a casual backyard get-together, kind of on a whim. I wasn’t sure if people would “get” it, you know? Well, they were gone in about ten minutes flat. I had people coming up to me asking for the recipe all night. It’s that perfect mix of crunchy, creamy, warm, and cool that just makes everyone’s eyes go wide. Trust me, you’re going to want to make a double batch.
Table of Contents
Why You’ll Love These Apple Pie Cheesecake Tacos
Honestly, what’s not to love? But if you need a few more reasons to run to the kitchen right now, here’s why these tacos are pure magic:
- The perfect party dessert. They are handheld, easy to eat, and people absolutely lose their minds over them. Seriously, they’re a total crowd-pleaser.
- A ridiculously fun twist on classic flavors. Who doesn’t love apple pie and cheesecake? Putting them together in a taco is just pure genius, if I do say so myself.
- All the best textures in one bite. You get that crispy, cinnamon-sugar shell, the rich, creamy filling, and the warm, spiced apples. It’s just… wow.
- Ready in about 40 minutes. You can have this amazing, fancy-looking dessert on the table in less than an hour. It’s a total win.
Ingredients for Apple Pie Cheesecake Tacos
The magic of these tacos comes from a few simple, but important, ingredients. You probably have most of this on hand already! Just make sure you get the right stuff, it really does make a difference in the final taste and texture, so don’t be tempted to substitute the full-fat cream cheese. Trust me on this one!
- For the Taco Shells:
- 8 small (fajita-size) flour tortillas
- 1/4 cup butter, melted
- 1/4 cup granulated sugar
- 1 teaspoon ground cinnamon
- For the Cheesecake Filling:
- 8 oz full-fat cream cheese, softened to room temperature
- 1/2 cup powdered sugar
- 1 teaspoon vanilla extract (the good stuff!)
- 1 cup whipped topping, thawed
- For the Apple Pie Filling:
- 2 cups firm, crisp apples (like Granny Smith or Honeycrisp), peeled and diced into 1/4-inch pieces
- 2 tablespoons butter
- 1/4 cup packed light brown sugar
- 1 teaspoon ground cinnamon
- 1/4 teaspoon ground nutmeg
- 1 tablespoon lemon juice
Essential Equipment
You don’t need anything too fancy for these, just some basic kitchen gear. Here’s what you’ll want to grab from your cupboards before you get started:
- Oven with a standard rack
- Baking sheet (to catch any drips!)
- A few mixing bowls
- A medium skillet
- Piping bag with a large tip (optional, but it makes filling so much easier and cleaner!)
How to Make Apple Pie Cheesecake Tacos
Alright, this is where the real fun begins! We’re going to tackle this in a few simple parts. The most important thing is getting the shells crispy and letting them cool down completely before we add any of the delicious fillings. Don’t rush that part! Just follow along, and you’ll have these amazing dessert tacos ready in no time.
Step 1: Make the Crispy Cinnamon Sugar Shells
First things first, get that oven preheating to 400°F (200°C). This part moves fast, so you want the oven ready to go. While it’s heating up, mix your granulated sugar and cinnamon together in a little bowl until it’s all one lovely, speckled color. Now, grab your tortillas. Brush both sides of each one with melted butter, don’t be shy! Then, dip them right into the cinnamon-sugar mix, making sure they get a good, even coat on both sides.
Here comes my favorite trick! To get that perfect taco shape, you’re going to carefully drape each tortilla over two bars of your oven rack. It feels a little weird, but it works like a charm. Just make sure to slide a baking sheet on the rack below to catch any buttery drips. Trust me, you do not want to scrub burnt sugar off the bottom of your oven later.
Bake them for about 6 to 8 minutes. You need to watch them like a hawk because they can go from perfectly golden to burnt in a flash! Once they look crispy and golden brown, carefully take them out and let them cool completely. And I mean completely! If they’re even a little warm, they’ll make the fillings melt and the shells will get soggy. Patience is key here.
Step 2: Prepare the Creamy Cheesecake Filling
While those beautiful shells are cooling, let’s make the cheesecake filling. Make sure your cream cheese is super soft and at room temperature. If it’s cold, you’ll end up with lumps, and nobody wants lumpy cheesecake. In a big bowl, beat the softened cream cheese, powdered sugar, and vanilla extract together until it’s totally smooth and creamy.
Now, grab your whipped topping. We want to keep this filling light and fluffy, so gently fold the whipped topping into the cream cheese mixture. Use a spatula and go from the bottom of the bowl up and over, turning the bowl as you go. No frantic stirring! Once it’s all combined, spoon the filling into a piping bag. If you don’t have one, a Ziploc bag with the corner snipped off works just as well. Pop it in the fridge to chill and firm up while we make the apples.
Step 3: Cook the Spiced Apple Filling
Get ready for your kitchen to smell absolutely incredible. Melt the butter in a skillet over medium heat. Once it’s bubbly, add your diced apples, brown sugar, cinnamon, nutmeg, and a splash of lemon juice. The lemon juice is great because it brightens up the flavor and keeps the apples from getting too brown.
Give everything a good stir and let it cook for about 8 to 10 minutes. You want the apples to be tender but not total mush, they should still have a little bit of a bite to them. Once they’re done, take the skillet off the heat and let the filling cool down just a bit. You want it to be warm for serving, but not so hot that it will melt our lovely cheesecake filling into a puddle.
Step 4: Assemble Your Apple Pie Cheesecake Tacos
It’s go time! This is the moment we’ve been waiting for. Grab your completely cooled, crispy taco shells. Pipe or spoon that chilled cheesecake filling generously into each shell. I like to fill them about halfway. Then, spoon that warm, gooey apple pie filling right on top of the cheesecake.
That’s it! You’ve done it. The most important final step? Serve these immediately. Seriously, don’t wait around. The magic is in that perfect combination of the crispy, crunchy shell, the cool and creamy cheesecake, and the warm, spiced apples. Hand them out and watch everyone’s faces light up. Enjoy!
Pro Tips for the Best Apple Pie Cheesecake Tacos
You’re so close to dessert heaven! After making these a zillion times, I’ve learned a few little tricks that guarantee they turn out perfect every single time. Pay attention to these, they really matter!
- Use the right apples. Seriously, don’t just grab any old apple. You want something firm and a little tart like a Granny Smith or Honeycrisp. They hold their shape when you cook them and balance all the sweetness perfectly.
- Let the shells cool completely. I can’t say this enough! If your taco shells are even a tiny bit warm, the cheesecake filling will melt and the shells will get soggy. Be patient, it’s worth the wait.
- Don’t overbake the shells. Pull them from the oven the second they look golden brown. They will continue to get crispier as they cool on the counter, so don’t worry if they seem a little soft at first.
- Serve them immediately! The whole point of these is that incredible contrast of textures and temperatures. The crispy shell, the cool filling, the warm apples, it’s magic! Assemble them right before you plan to eat.
Fun Variations
Okay, the classic recipe is pretty much perfect, but it’s so fun to play around once you’ve got it down! These tacos are a fantastic canvas for all sorts of delicious additions. Here are a few of my absolute favorite ways to switch things up a bit:
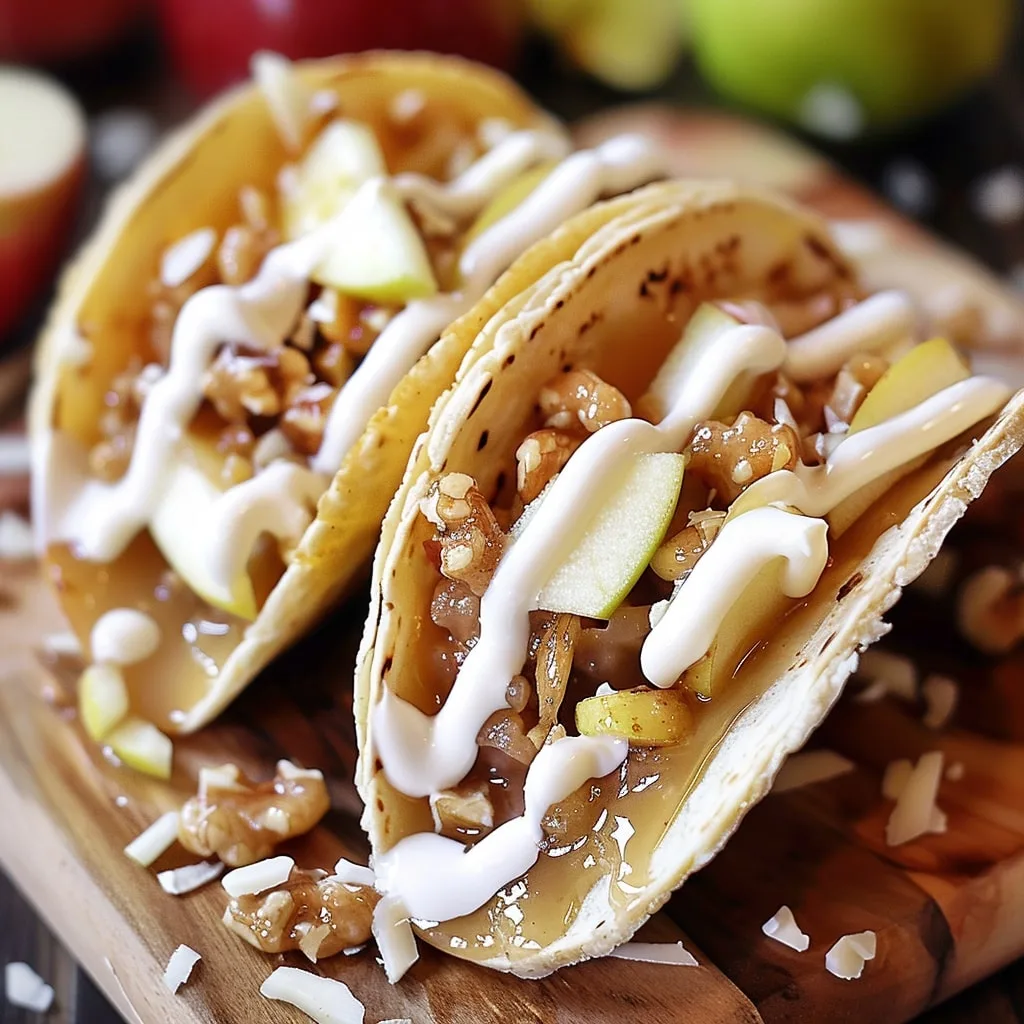
- Go for the Drizzle. A generous drizzle of caramel sauce over the top is practically a requirement in my book. It just takes the whole thing to another level. Chocolate sauce works beautifully, too!
- Add Some Crunch. Want more texture? Try tossing a handful of chopped pecans or walnuts into the apple filling while it cooks. That toasty, nutty flavor with the warm apples is just fantastic.
- Get Cozy with Spices. When fall rolls around, I sometimes swap the cinnamon and nutmeg for a teaspoon of pumpkin pie spice. It instantly gives them a warm, cozy vibe that’s perfect for a chilly evening.
How to Serve and Store Your Dessert Tacos
To make these look extra special right before you hand them out, a little dusting of powdered sugar over the top is beautiful. Or, go all out with an extra dollop of whipped cream! Now, for the important part: leftovers. Let me be super clear, these tacos are absolutely best eaten the moment they are assembled. That crispy, warm, cool combo is everything!
But, if you find yourself with leftovers, do not store them assembled! You’ll end up with sad, soggy shells. The trick is to store the components separately. Keep the fillings in airtight containers in the fridge for up to 2 days. The shells can stay in an airtight container at room temperature. Then, just assemble a fresh taco whenever the craving hits!
FAQs About Apple Pie Cheesecake Tacos
I always get a few questions when I share this recipe, so I wanted to put all the answers in one place for you! These are the little things that will take your dessert tacos from good to absolutely unforgettable. Let’s dive in.
What are the best apples for this recipe?
Oh, this is such a great question because the apple you choose really matters! You absolutely want to use a firm, crisp apple that has a bit of tartness. My top picks are always Granny Smith or Honeycrisp. They don’t turn into a pile of mush when you cook them, and that little bit of tartness is the perfect balance for the sweet cheesecake filling and cinnamon-sugar shells. A softer apple, like a Red Delicious, will just fall apart.
How do I keep my Apple Pie Cheesecake Tacos from getting soggy?
This is the golden rule of dessert tacos! The number one enemy here is moisture and heat. First, your baked taco shells have to be 100% cool before you even think about putting the filling in. Even a little warmth will create steam and make them soft. Second, you have to serve them right after you assemble them. That amazing crunchy-creamy-warm combo is the whole point, and it only lasts for a little while. So, assemble and serve immediately!
Can I make parts of this recipe ahead of time?
Yes, absolutely! This is actually my secret to making these for a party without losing my mind. You can totally make both the cheesecake filling and the apple pie filling a day in advance. Just keep them in separate airtight containers in the refrigerator. The taco shells can also be made a few hours ahead and stored in an airtight container at room temperature. Then, when it’s dessert time, all you have to do is assemble and serve. It makes you look like a kitchen wizard!
Nutrition Information for Apple Pie Cheesecake Tacos
For anyone who likes to keep track of the details, here’s a quick nutritional estimate for one of these incredible dessert tacos. Please remember that this is just a ballpark figure! The actual numbers will vary based on the specific brands of tortillas, cream cheese, and other ingredients you use. Think of this as a general guide, not a strict rule, it’s a treat, after all!
- Serving Size: 1 Taco
- Calories: 250
- Sugar: 28g
- Sodium: 160mg
- Fat: 14g
- Saturated Fat: 8g
- Unsaturated Fat: 5g
- Trans Fat: 0g
- Carbohydrates: 29g
- Fiber: 2g
- Protein: 4g
- Cholesterol: 45mg
Did You Make These Apple Pie Cheesecake Tacos?
Okay, your turn! If you made these incredible Apple Pie Cheesecake Tacos, I am dying to know how they turned out! Please leave a comment and a star rating below to share your experience. Tell me everything, did your family and friends go absolutely wild for them? I can’t wait to hear all about it!
Print
Apple Pie Cheesecake Tacos
- Total Time: 40 minutes
- Yield: 8 Tacos 1x
- Diet: Vegetarian
Description
This dessert combines apple pie and cheesecake in a fun taco shell. It is a perfect dessert for a party or a special treat. You get a crispy, cinnamon-sugar shell filled with creamy cheesecake and warm, spiced apples.
Ingredients
- For the Taco Shells:
- 8 small flour tortillas
- 1/4 cup butter, melted
- 1/4 cup granulated sugar
- 1 teaspoon ground cinnamon
- For the Cheesecake Filling:
- 8 oz cream cheese, softened
- 1/2 cup powdered sugar
- 1 teaspoon vanilla extract
- 1 cup whipped topping
- For the Apple Pie Filling:
- 2 cups diced apples
- 2 tablespoons butter
- 1/4 cup brown sugar
- 1 teaspoon ground cinnamon
- 1/4 teaspoon ground nutmeg
- 1 tablespoon lemon juice
Instructions
- Preheat your oven to 400°F (200°C).
- Mix the granulated sugar and ground cinnamon in a small bowl.
- Brush both sides of each tortilla with melted butter.
- Coat both sides of the tortillas with the cinnamon-sugar mixture.
- Drape the tortillas over two bars of your oven rack to form a taco shape.
- Bake for 6 to 8 minutes until they are golden brown and crispy.
- Let the taco shells cool completely.
- For the cheesecake filling, beat the softened cream cheese, powdered sugar, and vanilla extract in a large bowl until smooth.
- Gently fold in the whipped topping.
- Spoon the filling into a piping bag and refrigerate it.
- For the apple pie filling, melt butter in a skillet over medium heat.
- Add the diced apples, brown sugar, cinnamon, nutmeg, and lemon juice.
- Cook for 8 to 10 minutes until the apples are soft. Let the filling cool slightly.
- Pipe the cheesecake filling into the cooled taco shells.
- Spoon the warm apple pie filling over the cheesecake filling.
- Serve immediately.
Notes
- Use firm apples like Granny Smith or Honeycrisp so they hold their shape.
- Ensure the taco shells are completely cool before you add the filling.
- These tacos are best served immediately to maintain the crispy shell.
- You can add a drizzle of caramel sauce for extra flavor.
- Prep Time: 20 minutes
- Cook Time: 20 minutes
- Category: Dessert
- Method: Baking
- Cuisine: American
Nutrition
- Serving Size: 1 Taco
- Calories: 250
- Sugar: 28g
- Sodium: 160mg
- Fat: 14g
- Saturated Fat: 8g
- Unsaturated Fat: 5g
- Trans Fat: 0g
- Carbohydrates: 29g
- Fiber: 2g
- Protein: 4g
- Cholesterol: 45mg
Keywords: Apple Pie Cheesecake Tacos, Dessert Tacos, Apple Pie Recipe, Cheesecake Recipe, Sweet Tacos


