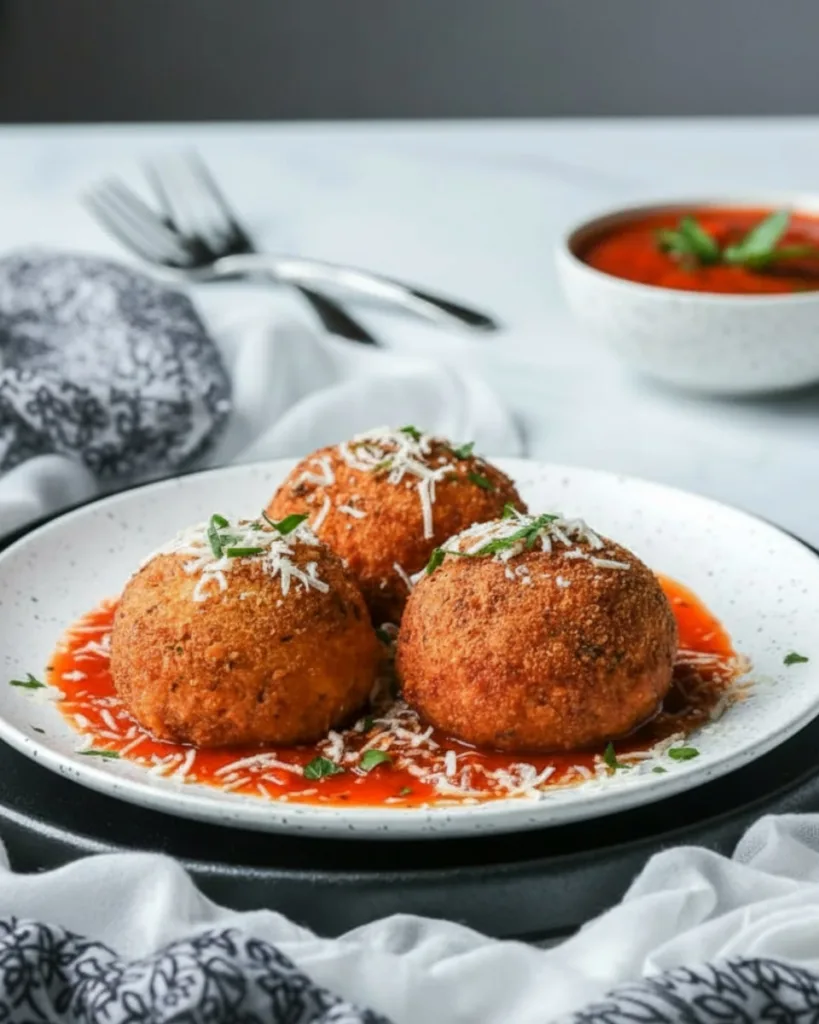
Arancini Rice Balls are the ultimate Italian comfort food, a crispy golden shell giving way to a soft, creamy risotto center, often with gooey mozzarella or savory fillings. I first tried making arancini as a way to bring restaurant-worthy Italian snacks to family gatherings, and they quickly became everyone’s favorite. The magic is all in that bite: the crunch, the warmth, the burst of cheesy flavor.
What’s wonderful about this recipe is how easy it is to master at home, even if traditional Italian cooking seems intimidating. With simple step-by-step tips, you’ll discover the secret to perfectly crisp exteriors and rich, flavorful interiors. Whether served as a cozy appetizer or an impressive party snack, these Arancini Rice Balls bring a true taste of Italy right to your kitchen and always leave guests reaching for seconds.
Table of Contents
What Are Arancini?
Arancini are a true taste of Italy, with roots going back to 10th-century Sicily when the island was under Arab rule. The name arancini literally means “little oranges,” perfectly describing their round shape and golden color after frying.
Originally created as a portable and filling meal, these fried risotto balls quickly became a popular street food across Italy. Traditional arancini di riso, or Sicilian arancini, are made with leftover risotto, stuffed with delicious fillings like cheese or meat sauce, and fried to crispy perfection
Why This is the Only Arancini Recipe You’ll Ever Need
I’ve tried many different approaches, and this is the only arancini recipe you’ll ever need. It’s designed to give you perfect results every single time, making you feel like a pro in your own kitchen.
I’ve refined this method to avoid common issues, ensuring your cooking process is smooth and enjoyable from start to finish. This recipe consistently produces delicious, restaurant-quality Arancini Rice Balls.
- Foolproof Method: I break down the entire process with simple, step-by-step instructions. This foolproof guide helps you avoid common mistakes, like rice that is too sticky or balls that fall apart while frying. You’ll find making arancini is much easier than you ever imagined.
- Perfectly Creamy & Cheesy: My secret is in the rice preparation. You’ll learn how to cook the rice to a perfectly creamy texture that’s never mushy. Plus, I’ll show you exactly how to place the mozzarella cube to guarantee that glorious, gooey cheese pulls every time you break one open.
- Crispy, Not Oily: Say goodbye to greasy, heavy arancini. My specific breading and frying techniques ensure a light, golden, and super crispy shell. The key is the right oil temperature and a double-coating process that locks out excess oil, giving you that perfect crunch without the greasiness.
The Key Ingredients for Authentic Arancini
To make truly authentic arancini, using the right ingredients is everything. Each component plays a vital role in creating that perfect balance of creamy, cheesy, and crispy textures.
Don’t be tempted to substitute these key players, as they are the secret to my foolproof recipe. High-quality ingredients will always give you the best flavor and a final product you can be proud of.
Here is what you’ll need for these amazing Arancini Rice Balls.
- Arborio Rice: This is the heart and soul of our arancini. Arborio rice is a short-grain Italian rice with a very high starch content. This starch is what creates that signature creamy texture inside the rice balls, helping everything bind together perfectly. Do not use long-grain rice, as it won’t give you the same creamy result.
- Chicken Broth: Cooking the rice in a flavorful broth is essential. I use chicken broth for a rich, savory taste, but feel free to use a good quality vegetable broth if you want to make a vegetarian version.
- Parmesan & Mozzarella Cheese: Quality matters when it comes to cheese. Use freshly grated Parmesan cheese for the best flavor in your rice mixture. For that amazing cheese pull, a cube of low-moisture mozzarella in the center is perfect because it melts beautifully without making the arancini soggy.
How to Make Arancini Rice Balls
Now for the fun part, let’s walk through how to make arancini from scratch. I’ve broken down the process into five simple stages, each with a clear photo to guide you. Follow these steps, and you’ll be making perfect Arancini Rice Balls in no time.
Step 1: Cook the Risotto Base
First, we create the creamy heart of our arancini. Pour your chicken broth into a large saucepan and bring it to a rolling boil. Add the Arborio rice, give it a good stir, and then lower the heat to a gentle simmer.
Let it cook for about 20 minutes, stirring occasionally, until the rice is tender and has absorbed all that delicious broth. This slow-cooking process is what releases the starches in the rice, giving you the perfect creamy foundation.
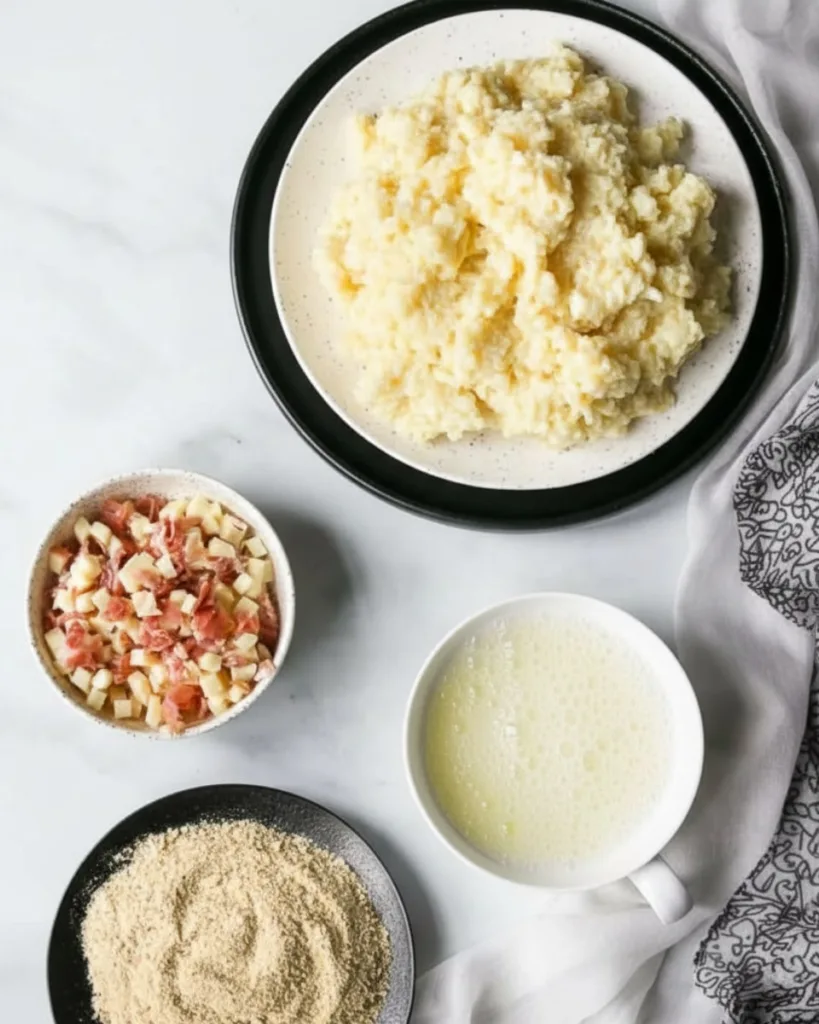
Step 2: Cool and Prepare the Rice Mixture
Once the rice is cooked, remove it from the heat. Immediately stir in the freshly grated Parmesan cheese, butter, and a pinch of salt and pepper. Now, for a crucial step: let the mixture cool down.
Spreading it on a baking sheet can speed this up. If you add the eggs while the rice is too hot, they’ll scramble. Once it’s just warm to the touch, mix in the beaten eggs. They act as a binder, holding everything together.
Step 3: Shape and Stuff the Rice Balls
This is where the magic happens. Once the rice is cool enough to handle, scoop a portion about the size of a golf ball into your hands. To shape the rice balls, flatten the portion in your palm and press one of your mozzarella cubes into the center.
Carefully mold the rice around the cheese, making sure it’s completely enclosed. Roll it between your palms to form a tight, compact ball.
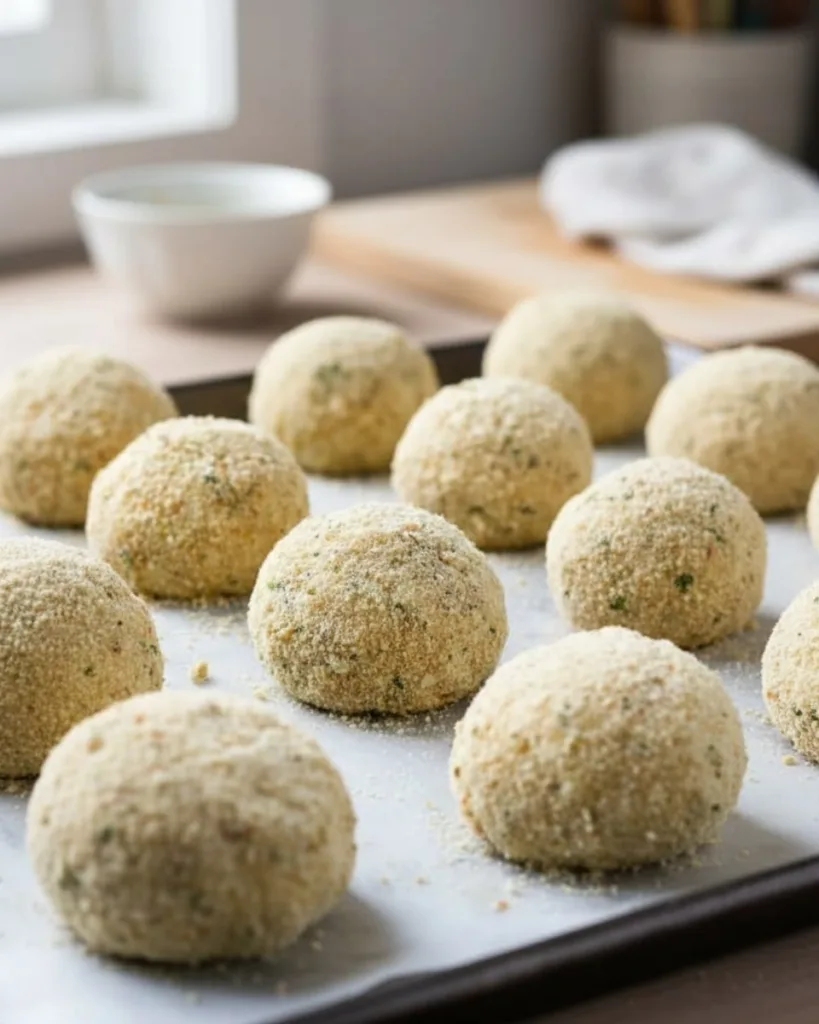
Step 4: Bread the Arancini
For that signature crispy shell, we use a three-step breading process. Prepare three separate shallow dishes: one with flour, one with more beaten eggs, and a third with breadcrumbs.
Roll each rice ball first in the flour, which helps the egg stick. Next, dip it into the egg, allowing any excess to drip off. Finally, roll it generously in the breadcrumbs until it’s completely coated.
Step 5: Fry to Golden Perfection
Heat your vegetable oil in a deep pot to 350°F (175°C). A thermometer is your best friend here for getting the temperature just right. Carefully lower the arancini into the hot oil in small batches, being careful not to overcrowd the pot.
Fry them for about 3-4 minutes, turning occasionally, until they are a beautiful, even golden brown. Remove them with a slotted spoon and let them drain on paper towels before serving hot.

Pro Tips for Perfect Arancini Every Time
I’ve made my fair share of arancini, and I’ve picked up a few game-changing tricks along the way. These professional tips will elevate your Arancini Rice Balls from good to absolutely unforgettable. Paying attention to these small details is what separates decent arancini from truly great ones.
- Chill Your Balls: This is my number one rule. Chilling the breaded rice balls for at least 30 minutes in the refrigerator is crucial. This step helps them firm up, which prevents them from falling apart when they hit the hot oil. Don’t skip this; it’s the key to holding that perfect shape.
- Wet Your Hands: When you start shaping the rice mixture, it can get sticky. Keep a small bowl of water nearby and moisten your hands before handling the rice. This simple trick prevents the rice from sticking to your palms and allows you to shape the balls smoothly and easily.
- Don’t Crowd the Pan: When frying, give your arancini some space. Frying in small batches ensures that the oil temperature doesn’t drop too much. If you add too many at once, the oil cools down, and you’ll end up with oily, soggy arancini instead of light and crispy ones.
- Oil Temperature is Key: For that perfect golden-brown, crispy finish, the oil temperature must be just right. I strongly recommend using a cooking thermometer to make sure your oil is at a steady 350°F (175°C). Too hot, and the outside will burn before the cheese melts. Too cool, and they will absorb too much oil.
Don’t Have a Deep Fryer? Try the Air Fryer Method!
If you don’t have a deep fryer or simply prefer a lighter option, you can absolutely make delicious air fryer arancini. This method gives you that satisfyingly crispy exterior without using a lot of oil.
For a perfect result, preheat your air fryer to 375°F (190°C). Lightly spray your breaded rice balls with a bit of cooking oil and arrange them in the air fryer basket in a single layer, making sure they don’t touch.
Air fry them for about 12 to 15 minutes, flipping them halfway through the cooking time. They’re done when they are a beautiful golden brown and perfectly crispy all over.

Fun Variations to Try
While the classic mozzarella filling is a timeless favorite, don’t be afraid to get creative with your Arancini Rice Balls.
These fried risotto balls are the perfect canvas for a wide range of delicious fillings, so you can easily customize them to your liking. Once you master the basic technique, experimenting with different flavors is part of the fun.
Here are a few exciting variations to inspire your next batch.
- Spinach and Ricotta: For a creamy and savory vegetarian option, try a filling of spinach and ricotta. Simply mix about ½ cup of cooked and well-drained spinach with ¼ cup of creamy ricotta cheese.
- Mushroom and Thyme: If you love earthy flavors, a mushroom and thyme filling is a fantastic choice. Finely chop your favorite mushrooms and sauté them with a bit of garlic and fresh thyme until they are deeply browned and fragrant.
- Classic Ragù: To make arancini like a true Sicilian, fill them with a rich meat sauce, known as ragù. You can use my simple and flavorful Classic Ragù Recipe to create this traditional and hearty filling.
Storage and Reheating Instructions
Proper storage is key to enjoying your delicious Arancini Rice Balls later. Once they have cooled down completely, you can store them in an airtight container in the refrigerator for up to three days. This makes them a great option for preparing ahead of time for a party or gathering.
When it comes to reheating arancini, the oven is your best friend for getting back that crispy texture. Place the refrigerated arancini on a baking sheet and heat them in a preheated oven at 400°F (200°C) for about 15-20 minutes, or until they are heated through and crispy again.
While you can use a microwave for a quicker option, be aware that they will lose their signature crunch and become soft. For the best results, always choose the oven.

Troubleshooting Common Arancini Problems
Even with a great recipe, things can sometimes go wrong in the kitchen. Don’t worry, I’m here to help you troubleshoot some of the most common issues people face when making Arancini Rice Balls.
My Arancini Fell Apart
This is a classic problem, but it has an easy fix. If your arancini fall apart in the fryer, it’s usually because the rice mixture was too warm when you shaped them, or you didn’t chill them long enough before frying.
Remember my pro tip: chilling the breaded balls for at least 30 minutes is the secret to making them hold their shape beautifully.
My Cheese Didn’t Melt
There’s nothing more disappointing than a solid lump of cheese in the center of your arancini. If this happens, your oil was likely too hot, causing the outside to cook too quickly before the inside could heat through.
Make sure your oil stays at a consistent 350°F (175°C) and cut your mozzarella into small cubes so they melt easily into that perfect, gooey center.
What to Serve with Arancini
Now that you’ve crafted your perfect Arancini Rice Balls, it’s time to decide how to serve them. While they are delicious on their own, a few simple accompaniments can turn them into a truly memorable meal or appetizer.
My favorite way to serve them is with a side of my Simple Marinara Sauce for dipping; the bright tomato flavor is a perfect match for the rich, cheesy rice balls.
For a lighter pairing, a fresh arugula salad with a lemon vinaigrette offers a peppery contrast. You can also feature them as the star of an appetizer spread alongside olives, cured meats, and cheeses.
FAQs About Arancini Rice Balls
What are arancini balls made of?
At their core, arancini are made from a base of cooked, starchy rice, like Arborio, which is then cooled and mixed with cheese and eggs. They are most often filled with a small cube of mozzarella cheese or a meat sauce before being coated in breadcrumbs and fried to a golden crisp.
What is the difference between rice balls and arancini?
While “rice ball” is a general term for any ball made of rice, “arancini” specifically refers to the classic Italian dish from Sicily. Arancini are distinguished by their use of risotto-style rice and their traditional fillings, like mozzarella or ragù. So, all arancini are rice balls, but not all rice balls are arancini.
What sauce is good with arancini balls?
A simple marinara or tomato sauce is the most classic and popular pairing. The bright, slightly acidic flavor of the tomato cuts through the richness of the fried rice and cheese beautifully. A simple basil pesto or even a spicy arrabbiata sauce also works wonderfully.
What does “arancini” mean in Italian?
The word arancini is the Italian for “little oranges”. They earned this name because their round shape and golden, fried exterior make them look just like small oranges.
More Italian-Inspired Appetizers & Comfort Foods to Try
If you enjoyed these Arancini Rice Balls, here are more crispy, cheesy, and comforting Italian-style dishes your readers will love serving as appetizers, sides, or hearty meals.
- Italian Sausage with Bow Tie Pasta: A creamy, savory pasta that brings big Italian flavor to the table.
- Olive Garden Steak Gorgonzola Alfredo: A restaurant-style creamy pasta loaded with rich, bold flavors.
- Italian Sub Sliders: Mini baked sandwiches layered with meats, cheeses, and zesty dressing, perfect for parties.
- Bruschetta Chicken with Zucchini Noodles: Fresh tomatoes, herbs, and juicy chicken for a lighter Italian twist.
These dishes bring classic Italian comfort to any menu. Try one next to complement your homemade arancini!

Ready to Make the Best Arancini?
With its foolproof method, pro tips, and simple instructions, this is truly the best Arancini Rice Balls recipe you will find. You now have all the secrets to creating perfectly crispy, creamy, and cheesy arancini right in your own kitchen. I can’t wait for you to experience the magic of biting into one of these golden-brown treasures.
Now it’s your turn! Try out the recipe, and don’t forget to let me know how they turned out in the comments below. Follow me on Facebook, Instagram, and Pinterest for more delicious recipes and cooking inspiration.
Print
Arancini Rice Balls
- Total Time: 50 minutes
- Yield: 12 servings 1x
Description
These classic Italian Arancini Rice Balls are crispy on the outside and irresistibly creamy on the inside. Made with tender Arborio rice simmered in chicken broth, rich Parmesan, buttery goodness, and a hidden mozzarella center, they’re the perfect appetizer or party bite!
Ingredients
- 2 cups Arborio rice
- 4 cups chicken broth
- 1/2 cup grated Parmesan cheese
- 2 tablespoons butter
- 2 large eggs, beaten
- 1/2 cup mozzarella cheese, cut into small cubes
- 1 cup all-purpose flour
- 2 cups breadcrumbs
- Vegetable oil, for frying
- Salt and pepper to taste
Instructions
- Cook the Rice: Bring chicken broth to a boil in a large saucepan. Add Arborio rice, reduce the heat to low, and simmer for about 20 minutes, stirring occasionally, until the rice is tender and the broth is absorbed.
- Prepare the Rice Mixture: Remove from heat and stir in Parmesan, butter, salt, and pepper. Let cool slightly, then mix in the beaten eggs until fully combined.
- Shape the Rice Balls: Scoop golf-ball-sized portions of the rice mixture. Press a small mozzarella cube into the center of each and shape to fully enclose the cheese.
- Bread the Arancini: Set up three shallow dishes: flour, beaten eggs, and breadcrumbs. Roll each rice ball in flour, dip it in eggs, then coat it evenly with breadcrumbs.
- Fry the Arancini: Heat vegetable oil in a deep pot to 350°F (175°C). Fry the rice balls in batches for 3-4 minutes until golden and crispy on all sides. Do not overcrowd.
- Drain and Serve: Transfer fried arancini to a paper-towel-lined plate to drain excess oil. Serve hot with marinara sauce, if desired.
Notes
- For the best texture, allow the rice mixture to cool before shaping.
- If the mixture feels too sticky, wet your hands lightly.
- Arancini can be made ahead and refrigerated before frying.
- Prep Time: 30 minutes
- Cook Time: 20 minutes
- Category: Appetizer
- Method: Frying
- Cuisine: Italian
Nutrition
- Serving Size: 1 arancini ball
- Calories: 350
- Sugar: 1g
- Sodium: 320mg
- Fat: 14g
- Saturated Fat: 6g
- Unsaturated Fat: 6g
- Trans Fat: 0g
- Carbohydrates: 44g
- Fiber: 1g
- Protein: 10g
- Cholesterol: 60mg
Keywords: arancini, rice balls, Italian appetizers, fried rice balls, mozzarella stuffed rice balls


