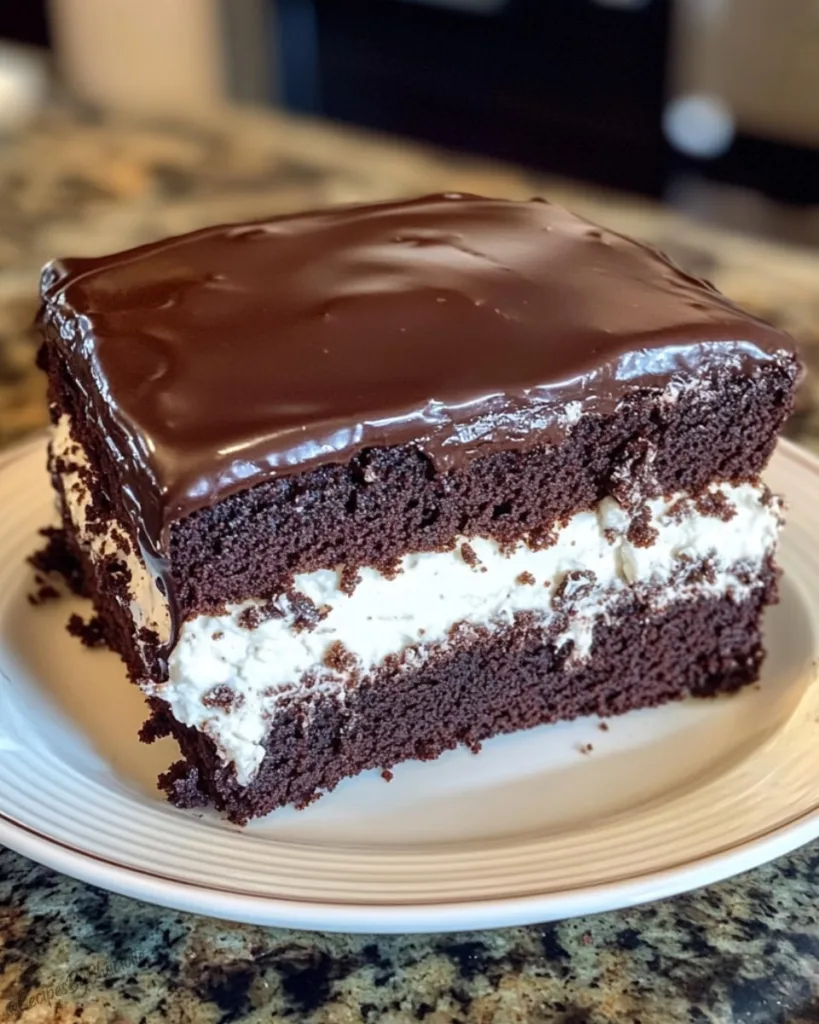
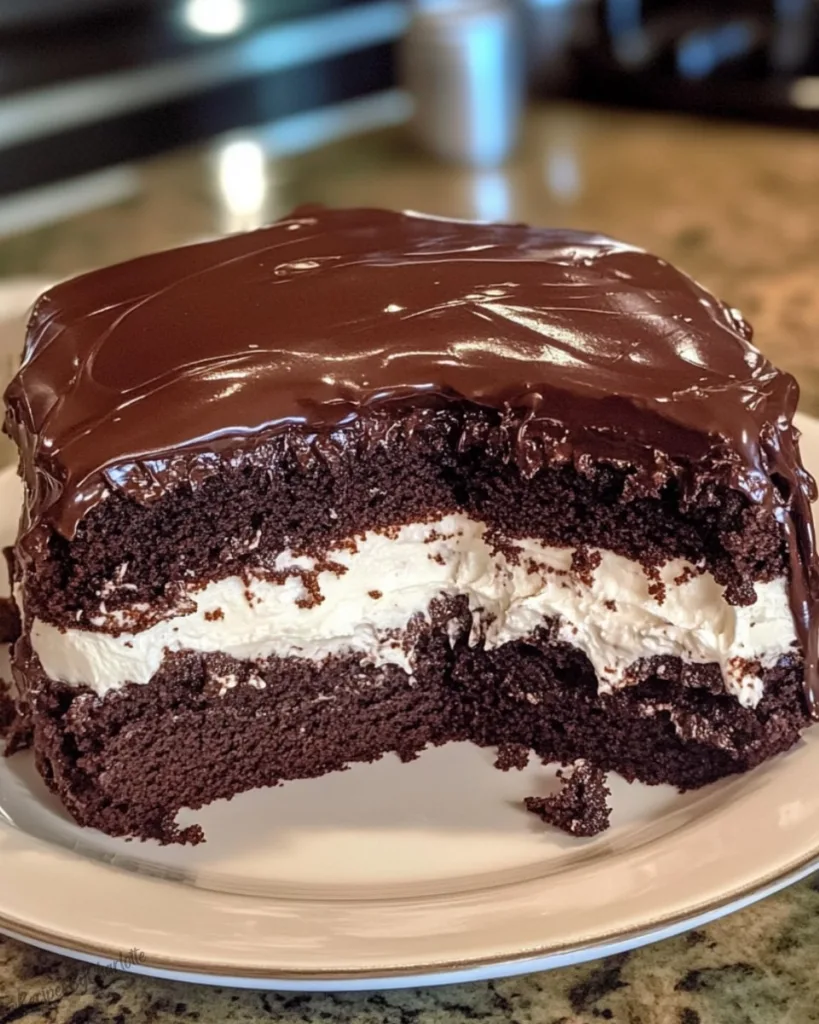
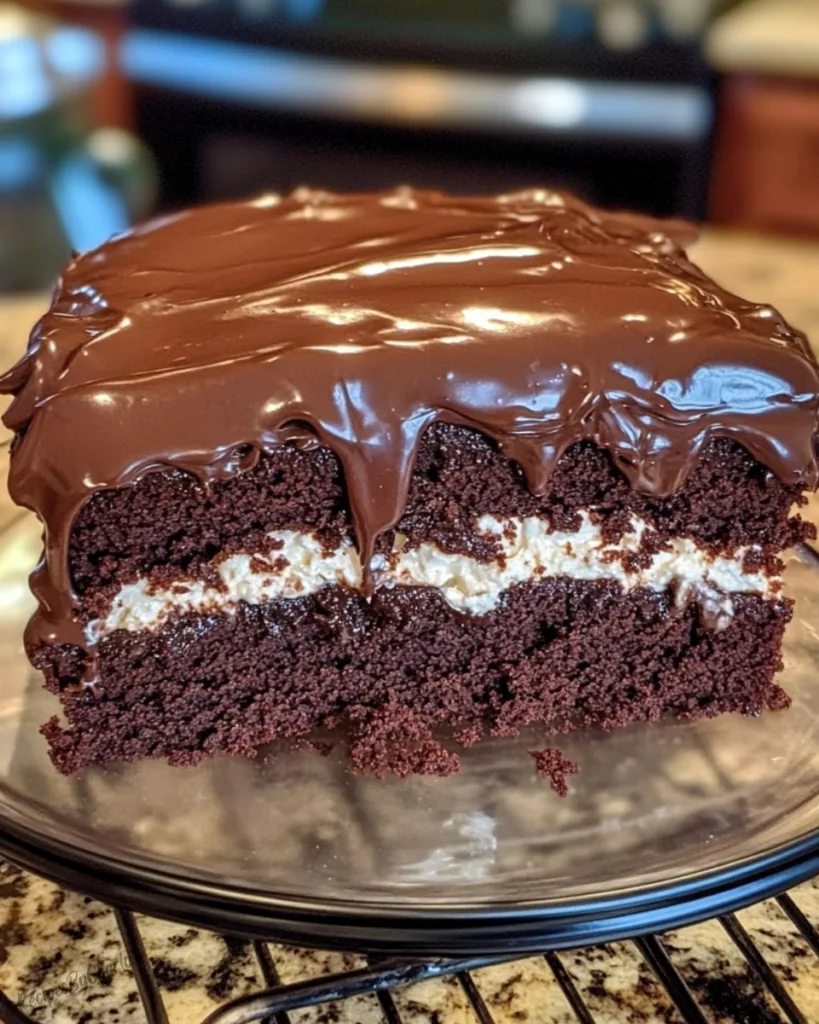
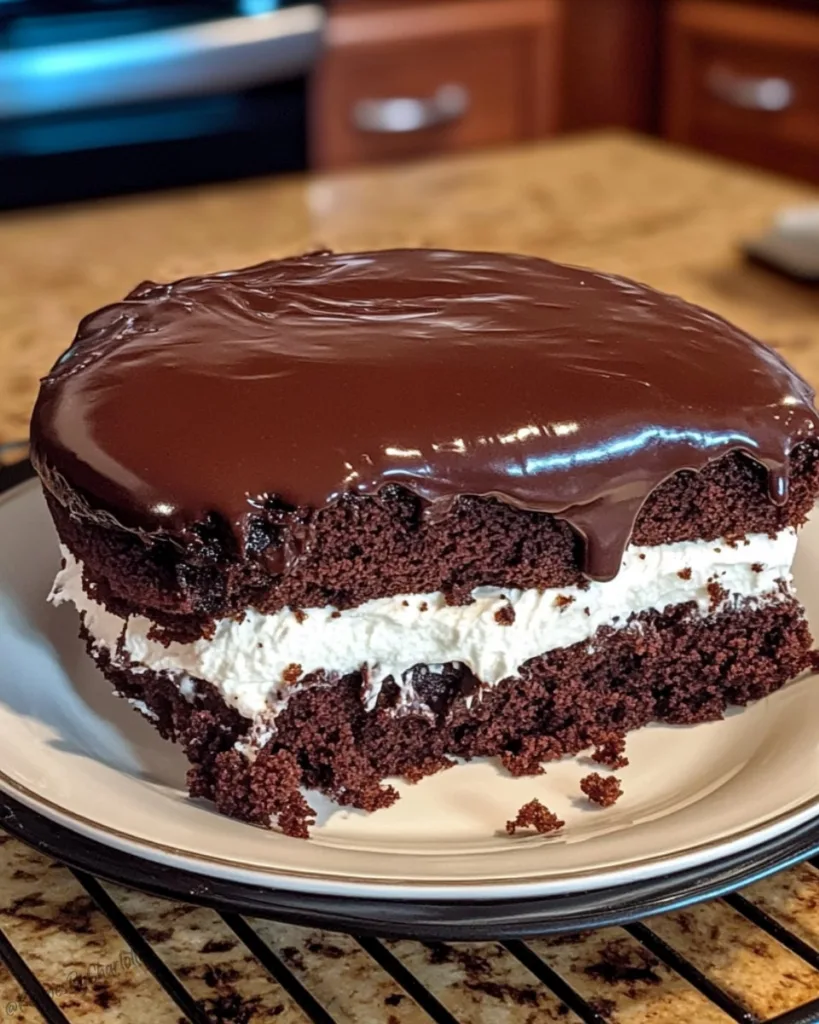
Ding Dong Cake instantly transports me back to the thrill of opening my lunchbox and finding that shiny foil wrapper. I created this recipe to capture that specific childhood magic in a dessert big enough to share. It features rich, moist chocolate layers sandwiching a fluffy, cloud-like cream filling, all coated in a silky ganache.
What I love most is that it looks impressive but is secretly easy to make. By starting with a simple mix and adding a few homemade touches, you get a decadent treat that tastes just like the original, only better. Trust me, one bite of this giant version will have your friends and family begging for the recipe.
Table of Contents
Why You’ll Love This Ding Dong Cake
Let me count the ways this cake will steal your heart (and probably your diet resolutions):
- Nostalgia in every bite: It tastes just like those foil-wrapped treats from your childhood, but better because you made it yourself
- Impressively easy: We’re using a box mix shortcut that nobody will ever guess (your secret’s safe with me)
- Crowd-pleasing magic: I’ve never brought this to a gathering without getting recipe requests
- Perfect texture: That cream cheese filling stays gloriously creamy while the chocolate layers stay moist for days
- Versatile star: Dress it up for birthdays or keep it simple for Tuesday night cravings
Trust me, once you try this cake, you’ll understand why it’s my most requested recipe!
Ingredients for Ding Dong Cake
Gather these simple ingredients and let’s make some magic happen! I promise this is one of those recipes where every item plays a special role in creating that perfect Ding Dong Cake experience.
- 1 box chocolate cake mix: Any brand works, but I’m partial to the devil’s food variety for extra richness
- 1 package (8 oz) cream cheese, softened: Leave it out for at least an hour! Cold cream cheese will leave lumps in your filling
- 3 cups powdered sugar, packed: Measure it by gently spooning into your cup and leveling off
- 1 stick margarine, softened: Or use butter if you want that extra rich flavor
- 1 container (8 oz) Cool Whip: Thawed in the fridge overnight works best
- 1 can chocolate icing: The standard size you find in the baking aisle
- 2 tablespoons milk: Any kind works, I usually grab whatever’s in my fridge
See? Nothing fancy here, just pantry staples that come together to create something extraordinary. Now let’s get baking!
How to Make Ding Dong Cake
Okay, let’s dive into the fun part! I’ll walk you through each step like we’re baking together in my kitchen. Don’t worry if you’re not a pro baker; this recipe is foolproof when you follow these simple steps. Just imagine that heavenly Ding Dong flavor waiting for you at the end!
Baking the Chocolate Cake Layers
First things first, preheat your oven according to the cake mix box instructions. I usually use a 9×13-inch pan because it’s perfect for layering, but any similar size works. Grab your favorite mixing bowl and prepare the cake batter exactly as the box directs. No fancy tricks here!
Pour that gorgeous chocolate batter into your greased pan and pop it in the oven. Set a timer for a couple of minutes less than the box suggests; we want to avoid overbaking. The cake’s done when a toothpick comes out with just a few moist crumbs clinging to it.
Here’s my golden rule: Let the cake cool in the pan for exactly 10 minutes before turning it out onto a wire rack. This prevents sticking but keeps it warm enough to release easily. Then walk away and let it cool completely, about an hour. I know it’s tempting, but slicing a warm cake leads to crumbly disasters!
Preparing the Cream Cheese Filling
While the cake cools, let’s make that dreamy filling. Remember how I said softened ingredients are key? Here’s why: cold cream cheese and margarine won’t blend smoothly with the sugar. I leave mine on the counter for at least an hour before starting.
Grab your electric mixer and beat the cream cheese and margarine together until they’re completely smooth, no lumps allowed! Gradually add the powdered sugar, about a cup at a time, mixing well after each addition. Scrape down the sides often; those sneaky sugar pockets love to hide.
Now for the magic touch: Gently fold in the thawed Cool Whip with a rubber spatula. Don’t overmix! We want to keep that light, fluffy texture. The filling should look like clouds of deliciousness when you’re done.
Assembling and Icing the Ding Dong Cake
Time for the grand finale! Carefully slice your cooled cake horizontally into two even layers. I use a long serrated knife and go slowly; it’s okay if it’s not perfect! Place the bottom layer back in your clean baking pan.
Spread all that creamy filling evenly over the bottom layer.
Pro tip: Leave about a half-inch border around the edges so the filling doesn’t squish out when you add the top layer. Gently place the second cake layer on top, ta-da! You’ve got a beautiful layered masterpiece.
For the icing, stir the canned frosting with milk until it’s spreadable but still thick. Pour it over the top and use an offset spatula to smooth it out beautifully. Don’t worry about covering the sides, the rustic look is part of the charm!
Finally, refrigerate for at least an hour before serving. I know waiting is hard, but trust me, that chilling time lets all the flavors mingle and the filling set up perfectly. Then slice, serve, and prepare for the compliments to roll in!
Tips for the Perfect Ding Dong Cake
I have baked this cake countless times, and I have learned a few secrets that turn a good dessert into a spectacular one. Follow these tricks to guarantee perfection.
- Make it Ahead: This cake actually tastes better the next day. Making it the night before gives the flavors time to deepen, making it the perfect stress-free party dessert.
- Soften Ingredients Properly: Patience pays off here. Never microwave your cream cheese or margarine to soften them, as this ruins the filling’s fluffy texture. If you are short on time, cut them into small cubes and let them sit on the counter; they will soften much faster.
- The Dental Floss Trick: For perfectly even cake layers, use a piece of unflavored dental floss. Wrap it around the cake at the halfway point, cross the ends, and pull gently through the cake. It works like magic! If your cakes have domed tops, trim them flat with a serrated knife before stacking.
- Chilling is Mandatory: Do not skip the chilling step. That hour in the fridge allows the filling to set and the flavors to meld.
- Clean Slices: For bakery-style slices, dip your knife in hot water and wipe it dry between every cut.
Variations and Substitutions
One of the best things about this Ding Dong Cake is how easily you can make it your own! Here are some of my favorite twists that keep the spirit of the original while adding personal flair:
For a richer flavor, swap the margarine with real butter in the filling. The difference is incredible! If you’re feeling fancy, homemade whipped cream works beautifully instead of Cool Whip, just whip 1 cup heavy cream with 2 tablespoons powdered sugar until stiff peaks form.
Chocolate lovers, try using dark chocolate icing or melting some chocolate chips into the canned frosting for extra decadence. And for a fun twist, sometimes I add a teaspoon of instant coffee to the cake batter, it deepens the chocolate flavor without tasting like coffee.
Serving and Storing Ding Dong Cake
Here’s the best part: Enjoying your masterpiece! I always serve this cake chilled straight from the fridge. The cool temperature makes that creamy filling extra dreamy against the rich chocolate layers. For picture-perfect slices, run your knife under hot water and wipe it dry between cuts. The heat helps glide through the filling without squishing it.
Leftovers? Ha, good one! But if you somehow have any, cover the cake tightly with plastic wrap or transfer slices to an airtight container. It keeps beautifully in the fridge for up to 4 days (if it lasts that long). The flavors actually get better by day two as everything melds together. Just resist eating it straight from the fridge at midnight… not that I’ve ever done that!
Nutritional Information
Okay, let’s be real, we’re not eating Ding Dong Cake for its health benefits! But since you asked, here’s the scoop on what you’re enjoying.
Remember, these numbers are estimates and will vary based on your specific ingredients and brands. A typical slice (about 1/12th of the cake) comes in around 400 calories with that dreamy combo of chocolate and cream cheese goodness.
I always say life’s too short to stress over dessert calories, just savor every delicious bite! But if you’re watching portions, cutting smaller slices means you can enjoy this treat more often. Now go grab another piece before it disappears!
Ding Dong Cake FAQs
Can I use homemade chocolate cake instead of a box mix?
Absolutely! My go-to shortcut is the box mix because it’s easy and reliable, but homemade cake works beautifully too. Just make sure to bake it in a 9×13-inch pan so you can slice it into perfect layers. The key is letting it cool completely before assembly.
How long does Ding Dong Cake last in the fridge?
This cake stays delicious for up to 4 days when stored properly in the refrigerator. The cream cheese filling actually gets better after a day as the flavors meld. Just keep it covered tightly with plastic wrap or in an airtight container.
Pro tip: Write the date on the container so you don’t forget when you made it!
Can I freeze Ding Dong Cake?
Yes! Wrap individual slices tightly in plastic wrap, then place them in a freezer bag. They’ll keep for about 2 months. Thaw overnight in the fridge when you’re ready to indulge. The texture might be slightly different, but the flavor will still be amazing.
What if my filling is too runny?
First, make sure all your ingredients are at room temperature before mixing. If it’s still too soft after adding the Cool Whip, pop the bowl in the fridge for 15-20 minutes to firm up before spreading. And remember, the cake needs that hour in the fridge to set properly!
Decadent Chocolate Desserts to Try
If you love the rich, creamy nostalgia of Ding Dong Cake, these indulgent chocolate treats are sure to be your next favorites.
- Chocolate Flan: A stunning dessert featuring a layer of moist chocolate cake topped with creamy caramel flan.
- Chocolate Peppermint Blossoms: Soft chocolate cookies topped with festive peppermint kisses for a perfect holiday bite.
- Chocolate Peanut Butter Rice Krispie Treats: Classic crispy treats upgraded with a rich chocolate and peanut butter topping.
- Red Velvet Oreo Cheesecake: A show-stopping dessert combining red velvet cake, Oreos, and creamy cheesecake.
Bake these crowd-pleasing chocolate delights next to satisfy your sweet tooth!
The Ultimate Nostalgic Dessert
This Ding Dong Cake successfully captures the magic of your favorite childhood snack in a giant, sliceable form. It combines moist chocolate layers with that signature creamy filling and a decadent ganache coating for a dessert that is better than the original. It is the perfect crowd-pleaser that delivers big flavor with surprisingly little effort.
Bake this impressive treat for your next gathering. Please leave a comment below to let me know if it tastes just like you remember. Don’t forget to follow me on Facebook for more delicious, easy-to-make dessert recipes.
Print
Ding Dong Cake
- Total Time: 1 hour 20 minutes (including cooling time)
- Yield: 12 servings 1x
- Diet: Vegetarian
Description
This decadent Ding Dong Cake is a delightful twist on the classic snack cake, with layers of moist chocolate cake and creamy filling, all topped with a smooth chocolate icing. Perfect for any special occasion or just to satisfy your sweet tooth!
Ingredients
- 1 box of chocolate cake mix
- 1 package (8 oz) cream cheese, softened
- 3 cups powdered sugar
- 1 stick margarine, softened
- 1 container (8 oz) Cool Whip
- 1 can chocolate icing
- 2 tablespoons milk
Instructions
- Preheat your oven according to the instructions on the chocolate cake mix box.
- Follow the instructions on the box to prepare and bake the cake.
- Once the cake is done, let it sit in the pan for 10 minutes to cool slightly.
- Turn the cake out onto a cooling rack and let it cool completely.
- While the cake is cooling, beat the softened cream cheese, powdered sugar, and softened margarine together in a large mixing bowl until smooth and creamy.
- Gently fold in the Cool Whip until fully combined.
- Once the cake has cooled, carefully slice it in half horizontally to create two layers.
- Place the bottom half of the cake back into the baking pan.
- Spread the cream cheese mixture evenly over the bottom layer.
- Place the top half of the cake back on top of the filling layer.
- In a small bowl, stir the chocolate icing together with the 2 tablespoons of milk until smooth and spreadable.
- Spread the chocolate icing evenly over the top of the cake.
- Cover the cake and place it in the refrigerator for at least 1 hour to allow the flavors to meld and the filling to set.
- Once chilled, slice the cake and serve.
- Keep any leftovers in the refrigerator.
Notes
- Softening Ingredients: Make sure the cream cheese and margarine are fully softened to ensure a smooth filling.
- Butter Substitute: For a richer flavor, you can use butter instead of margarine.
- Adjust Sweetness: If you prefer a less sweet filling, reduce the amount of powdered sugar to 2 cups.
- Prep Time: 20 minutes
- Cook Time: Follow box instructions
- Category: Dessert
- Method: Baking
- Cuisine: American
Nutrition
- Serving Size: 1 slice
- Calories: 400 kcal
- Sugar: 35g
- Sodium: 300mg
- Fat: 20g
- Saturated Fat: 10g
- Unsaturated Fat: 8g
- Trans Fat: 0g
- Carbohydrates: 50g
- Fiber: 2g
- Protein: 4g
- Cholesterol: 30mg
Keywords: Ding Dong Cake, chocolate cake, cream cheese filling, dessert recipe


