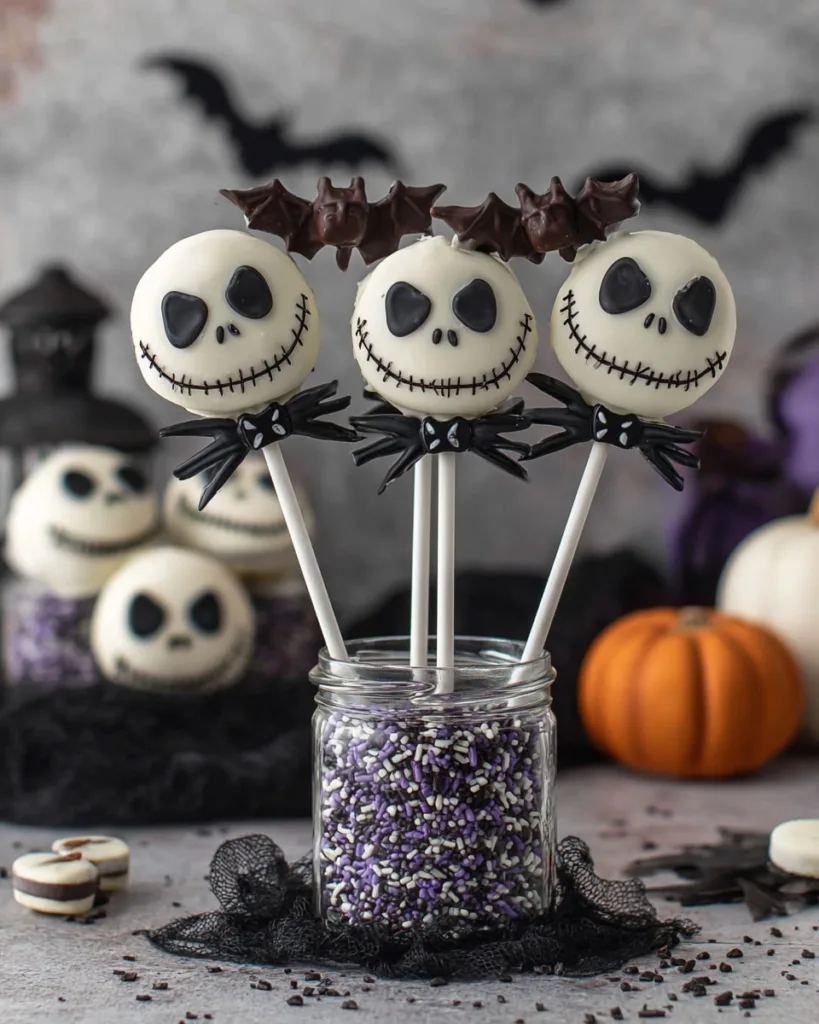
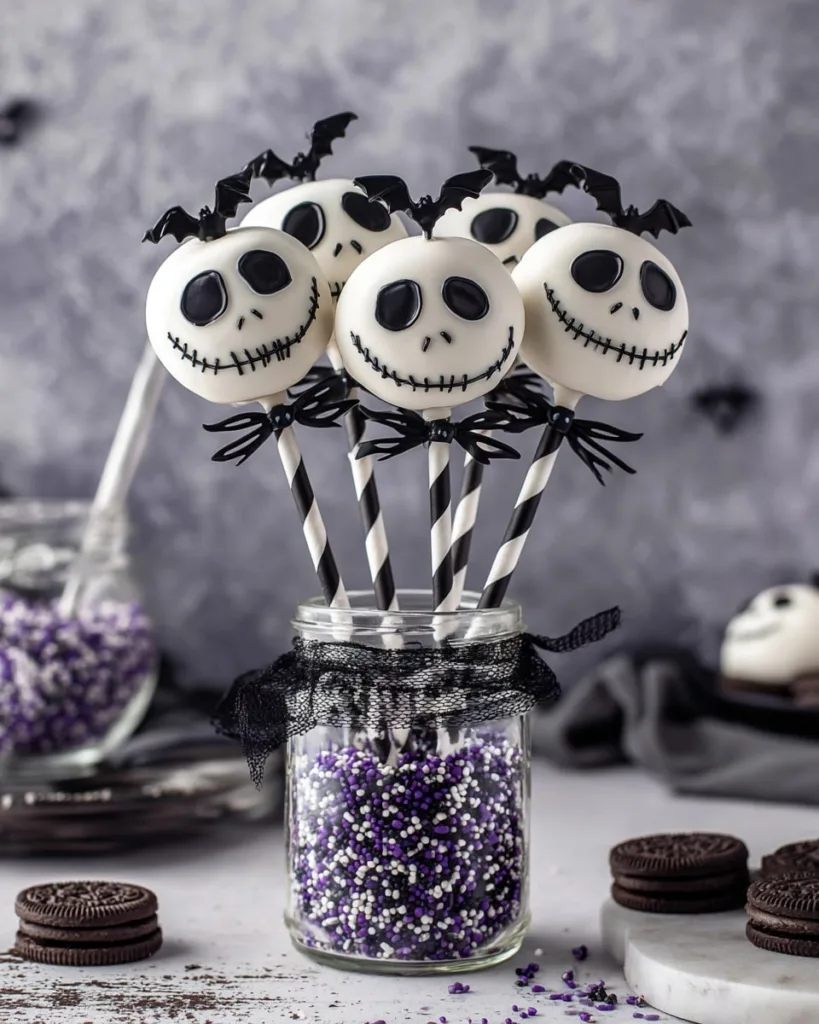
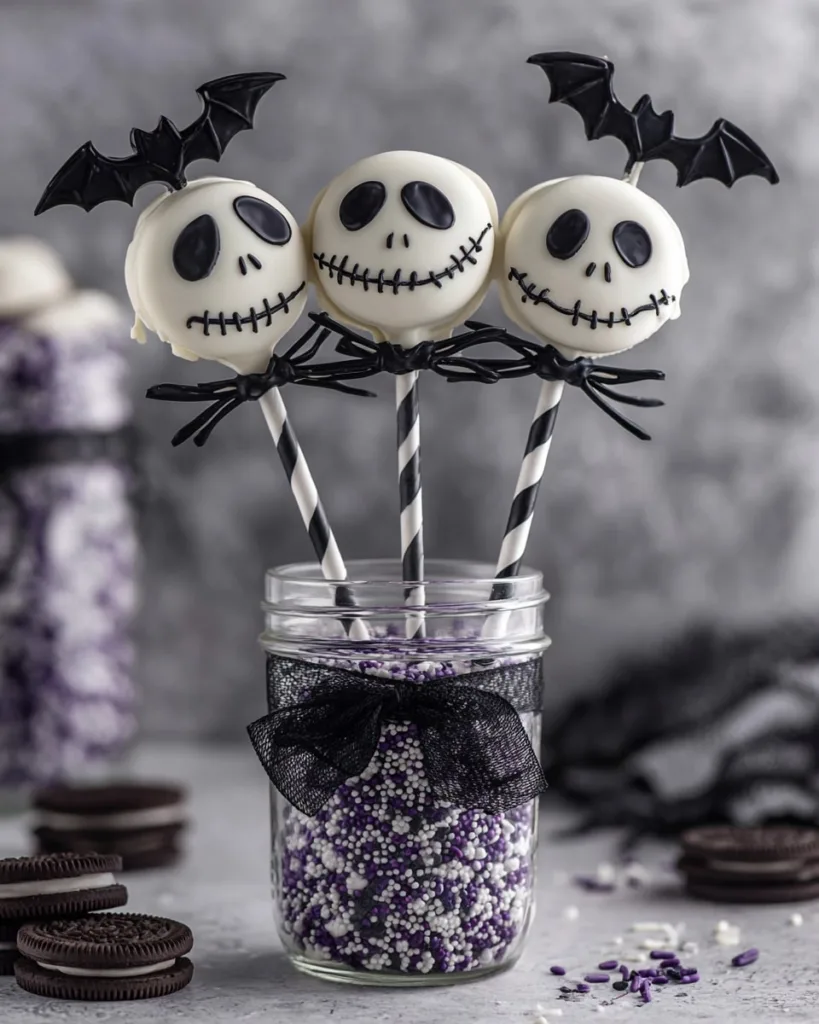
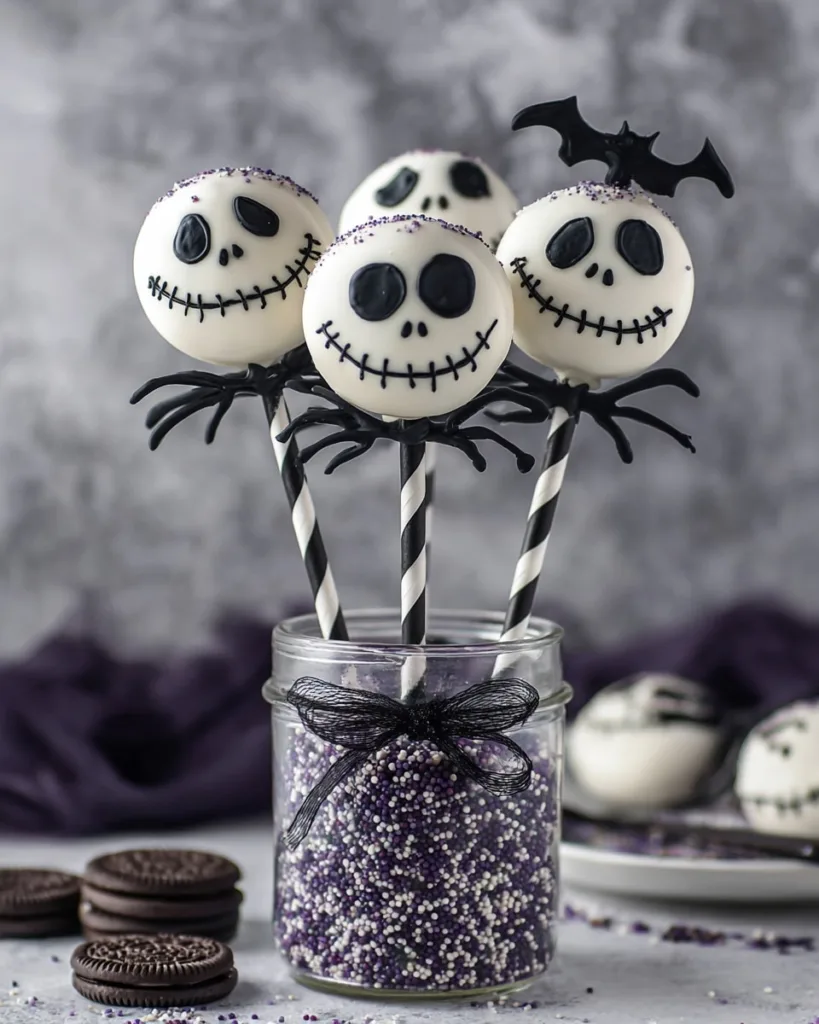
Get ready to transport your kitchen straight to Halloween Town with these incredibly fun and delicious Jack Skellington Oreo Pops! If you’re looking for an easy, no-bake Halloween treat that will have everyone buzzing, you’ve found it. Inspired by the Pumpkin King himself, this recipe transforms classic Oreo cookies into the ultimate Nightmare Before Christmas dessert.
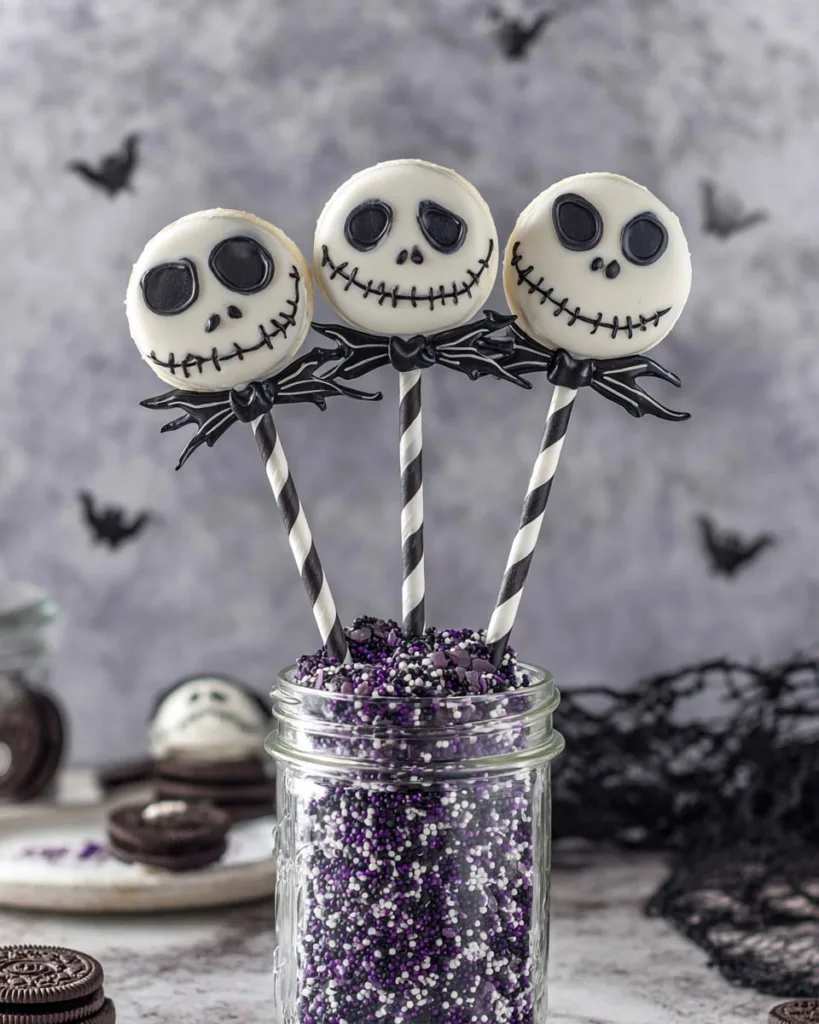
I’ll never forget the first time I made these for our annual Halloween movie night. The moment I brought them out, a hush fell over the room, followed by a chorus of delighted gasps. Seeing Jack Skellington’s iconic, stitched grin on a dessert everyone loves is pure magic! They look impressive enough to be the star of any party dessert table, but here’s the secret: they are surprisingly simple to create.
What makes this recipe a true favorite is its blend of spooky, festive fun and irresistible cookies-and-cream flavor. Whether you’re a die-hard Tim Burton fan or just need a creative treat for a school party, these Jack Skellington Oreo Pops are your ticket to becoming a holiday hero. They’re the perfect edible craft to bridge that magical gap between Halloween and Christmas.
Table of Contents
Why You’ll Love These Jack Skellington Oreo Pops
Listen, I know what you’re thinking, “Those look amazing, but are they a huge pain to make?” Nope! These little guys are secretly one of the easiest (and most satisfying) treats you’ll ever whip up. Here’s why they’ve become my go-to for every spooky, or snowy, season:
They’re foolproof no-bake magic
Zero oven time means zero stress. Just melt, dip, and decorate, perfect for when you’re short on time (or patience). Even if your piping skills are more “kindergarten art class” than “patisserie pro,” Jack’s charmingly imperfect face still looks adorable. My first batch had lopsided eyes that somehow made them even more Nightmare Before Christmas-worthy!
Instant party wow factor
That moment when you reveal these pops? Pure magic. The bats add drama, the white coating glows under blacklight, and those stitched smiles make everyone grin right back. Last Halloween, I caught three adults having an impromptu photoshoot with them before eating!
Kid (and grown-up) approved
Kids go wild for the Oreo center (obviously), while adults appreciate the bittersweet chocolate bats. I’ve even turned decorating into a fun activity, set up a “make your own Jack” station with extra icing and edible markers. Warning: you might need to hide a few for yourself before they disappear!
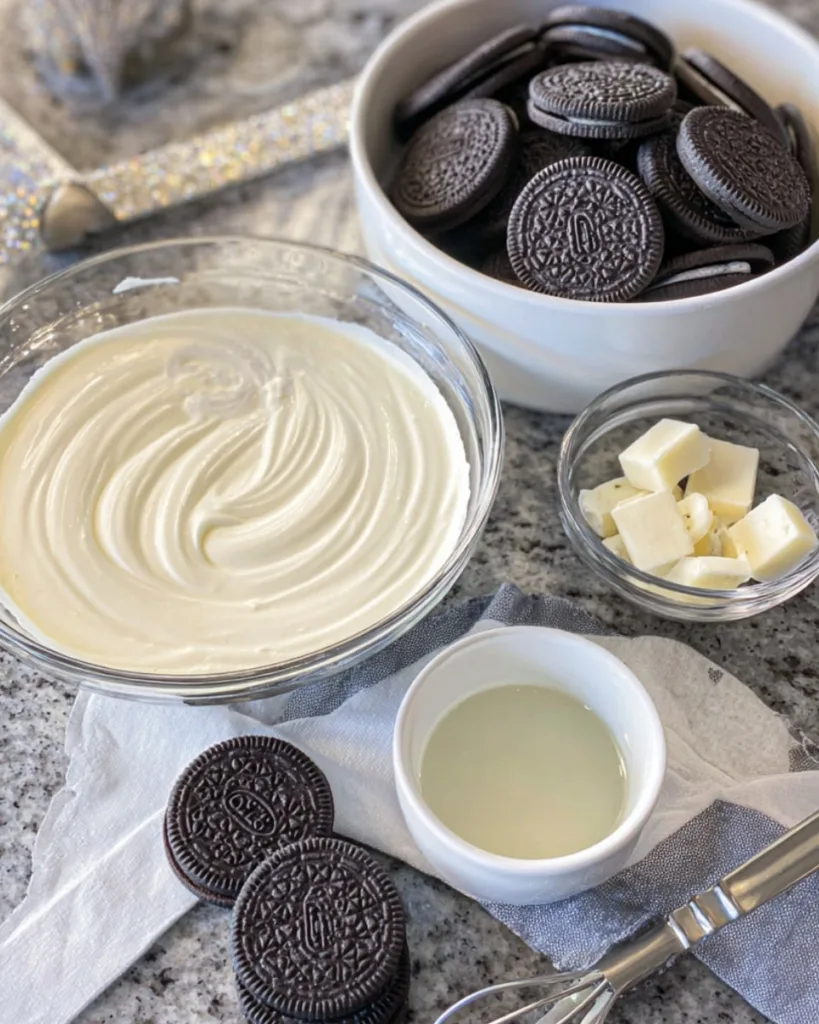
The Perfect Ingredients for Spooky-Tasty Jack Skellington Oreo Pops
Now, I’ll let you in on a little secret, the magic of these pops isn’t just in the decorating (though that’s the fun part). It all starts with gathering the right ingredients. After three years of tweaking this recipe, I’ve learned exactly what works and what leaves you with a melty mess. Here’s everything you’ll need, organized so you can grab-and-go at the store:
The Oreo Dream Team
- 12 Double Stuf Oreos – Trust me, the extra cream filling helps the sticks stay put! Regular Oreos tend to crack when you insert the sticks.
- 2 cups white candy melts – Not white chocolate! Candy melts set firmer and give that perfect ghostly white base. I like the Ghirardelli brand, they melt smoother than most.
- 1/2 teaspoon coconut oil – Just a tiny bit mixed into the candy melts makes them dip like a dream without cracking.
Jack’s Signature Face Supplies
- 1/2 cup black royal icing – Store-bought works fine (Wilton’s is reliable), but if you’re making your own, add a pinch of cocoa powder to deepen the black color.
- 1 black edible marker – The FoodWriter brand gives the cleanest lines for Jack’s stitched smile. Keep it horizontal while drawing, it bleeds less than holding it vertically.
Batty Bonus Ingredients
- 4 oz bittersweet chocolate chips – The darker chocolate balances the sweetness. Guittard’s 63% works beautifully for molding.
- Bat-shaped silicone molds – About 1-inch wide. If you can’t find bats, spider or ghost molds make fun alternatives!
- 12 lollipop sticks – The 6-inch ones give the best handle length.
Pro tip: Look for food-safe paper sticks if you prefer no plastic.
See? Nothing too crazy! Most of this you might already have in your pantry (I always have extra Oreos…for “quality testing,” obviously). The key is using Double Stuf Oreos, they’re the unsung heroes that keep everything from falling apart when you dip them. Now let’s get to the fun part!
Equipment You’ll Need
Okay, confession time, the first year I made these, I tried to wing it without proper tools. Let’s just say my “piping bag” was a Ziploc with the corner snipped off, and my “bat molds” were… well, nonexistent (RIP, lumpy chocolate blobs). Learn from my mistakes! Here’s the dream team of equipment that’ll make your Jack Skellington pops look pro-level:
The Must-Haves
- Lollipop sticks (6-inch) – These give you the perfect handle length for dipping and displaying. I buy the food-safe paper ones in bulk, they’re sturdier than they look!
- Parchment paper – Non-negotiable for setting your dipped Oreos. Wax paper can stick, and foil sometimes leaves weird marks. Trust me, I’ve cried over stuck Oreos before.
- Small piping bag with round tip #3 – For Jack’s delicate eyes and nostrils. If you’re in a pinch, those plastic condiment bottles with narrow tips work surprisingly well.
The Game-Changers
- Silicone bat molds (1-inch size) – The secret to those Instagram-worthy bats! Silicone pops them out cleanly, unlike my old metal mini muffin tin disaster of 2018.
- Tall, narrow glass or mug – For holding melted candy melts while dipping. The narrower the better, it gives you deeper coverage without wasting coating.
- Foam block or styrofoam – To stand your pops upright while drying. I repurpose the foam from floral arrangements (after a good wash, obviously).
Bonus tip: Keep a toothpick and damp paper towel nearby for quick piping fixes. Because nothing’s worse than realizing Jack’s left eye wandered halfway off his face! With these tools, you’re basically a Nightmare Before Christmas pastry chef, minus the stress.
How to Make Jack Skellington Oreo Pops
Alright, let’s turn those ingredients into edible Nightmare Before Christmas magic! I’ll walk you through each step with all the little tricks I’ve learned (usually the hard way). Don’t worry, even if your first few Jacks look a bit… “experimental,” they’ll still taste amazing. Here’s how to create pops that’ll make Sally jealous:
Step 1: Prepare the Oreo Bases
First things first, let’s get those Oreos ready for their ghostly makeover. Grab your lollipop sticks and gently twist them into the cream filling of each Double Stuf Oreo. Push about halfway in, too far and they’ll crack, not enough and they’ll wobble. If you hit a stubborn one, try microwaving the stick for 5 seconds to warm it slightly (game changer!).
Now, melt your white candy melts with the coconut oil in 30-second bursts, stirring between each. Overheating makes the coating seize up faster than Oogie Boogie in sunlight! When it’s smooth, hold an Oreo by the stick and dip quickly, letting excess drip off. Twirl it gently, this prevents those annoying “dripsicles” on the bottom. Set them on parchment paper and pop in the fridge for 10 minutes to harden. Resist the urge to peek!
Step 2: Decorate Jack’s Face
Time for the fun part, bringing Jack to life! I always practice the face on parchment first (my early attempts looked more like “concerned marshmallows”). Use the black edible marker to draw his stitched smile, short diagonal lines with tiny dots between them.
Pro tip: Breathe lightly while drawing to prevent shaky hands!
Next, pipe the eyes and nostrils with black royal icing. I make two oval eyes (slightly uneven adds character!), then three tiny dots for each nostril. If the icing blobs, use a toothpick to nudge it into shape. Let these dry for 15 minutes before adding the final touch: trace over the mouth stitches with icing, but leave the marker lines visible between them. This gives that perfect “stitched” effect!
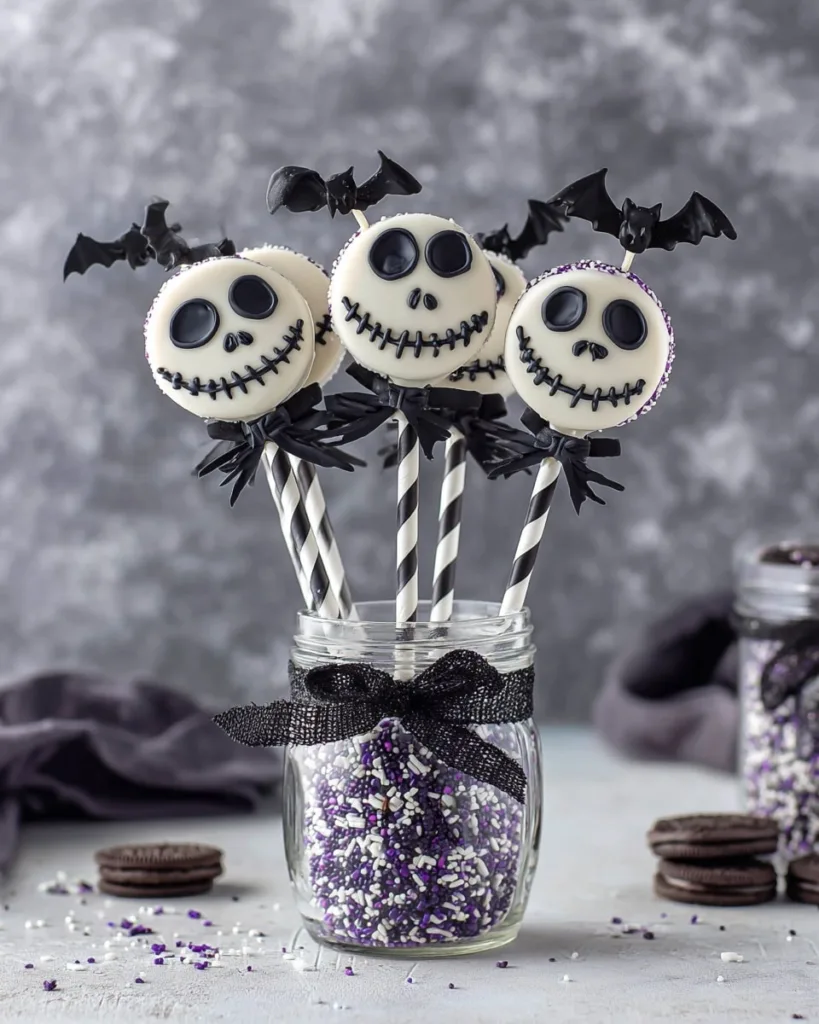
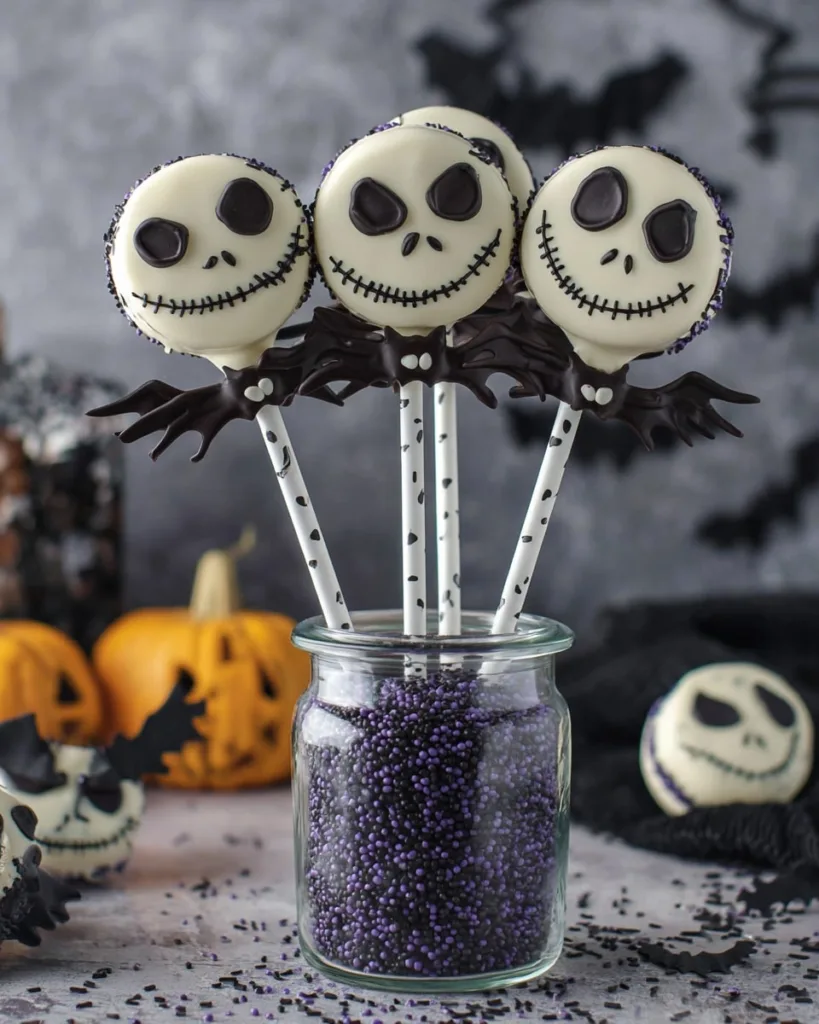
Step 3: Add Chocolate Bats
No Nightmare creation is complete without bats! Melt your bittersweet chocolate with a teaspoon of coconut oil (this makes them shiny and easy to release). Pour into the molds, tap out air bubbles, and freeze for 7 minutes. They should pop right out, if they stick, freeze another 2 minutes.
Attach each bat to the lollipop stick with a tiny dab of melted chocolate. Hold it for 10 seconds until set. Warning: this step may cause spontaneous singing of “This Is Halloween.” Let your pops dry upright in a foam block for 1-2 hours, no fridge, or the icing might sweat!
Tips for Perfect Jack Skellington Oreo Pops
Alright, let’s talk about the little secrets that take these pops from “cute” to “showstopper” status. I’ve made every mistake possible with these, from melty faces to bats that looked more like Rorschach tests, so you don’t have to! Here are my hard-earned tricks for Nightmare-worthy perfection:
Keep your kitchen cool (like Jack’s demeanor)
If your candy coating starts looking more like lava than frosting, turn down the thermostat! I’ve learned the hard way that anything above 72°F turns decorating into a race against time. In summer, I’ll even pop my royal icing in the fridge between piping sessions, just 5 minutes to keep it from becoming a runny mess.
Toothpicks are your decorating BFF
That tiny dot of icing for Jack’s nostril turned into a blob? No panic! Keep a toothpick handy to gently scrape away mistakes or nudge icing into place. For the eyes, I’ll sometimes use the toothpick to “draw” the shape first before piping, like a edible pencil sketch. Works like a charm!
The 10-second rule for dipping
When coating your Oreos, work in batches of three. Why? Because candy melts start thickening around the 90-second mark. If you take longer, you’ll get that dreaded “bumpy coat” texture (ask me how I know). Dip one, twirl off excess, set it down, then immediately move to the next. Three at a time keeps everything smooth as Sally’s stitching.
Let Jack dry with dignity
Resist the urge to move your pops too soon! That first hour of drying is crucial. I prop mine in a foam block near a fan (not directly, we’re not making popsicles) for gentle air circulation. And whatever you do, don’t cover them, condensation is the arch-nemesis of crisp icing details. Patience rewards you with pops that look like they came straight from Halloweentown!
Storing and Serving Suggestions
Okay, here’s the deal, you’ve put all this love into your Jack Skellington pops, so let’s make sure they stay picture-perfect until showtime! These aren’t your average cookies that can just hang out in a Tupperware. Here’s how I keep mine looking fresh and fabulous:
The Golden Rule: No Fridge!
I know it’s tempting to shove these in the fridge, but condensation is the enemy. That beautiful icing will sweat faster than Lock, Shock, and Barrel running from Oogie Boogie! Instead, store them at room temp in an airtight container with parchment between layers. They’ll stay crisp for up to 3 days this way, if they last that long!
Display Like a Pro
For parties, I stick my pops upright in a foam block (those floral arrangement ones work great). Want next-level Halloween vibes? Surround the base with dry ice for a spooky fog effect, just keep it brief so the pops don’t get damp. Another fun idea: arrange them in a tall glass filled with black and white candies like a creepy centerpiece!
Serving Hack for Big Crowds
If you’re making these for a classroom or office, here’s my trick: pre-wrap them in cellophane bags tied with black ribbon. Not only does it protect the designs, but it also lets guests grab-and-go without sticky fingers. Bonus? The crinkly sound makes them feel extra gift-like when little hands unwrap them!
Pro tip: If your kitchen runs warm, stash the container in the coolest spot (my basement stairs are perfect). And whatever you do, don’t stack them unless you want Jack’s face imprinted on his neighbor’s back. Learned that one the hard way!
Jack Skellington Oreo Pops Variations
Here’s the fun part, once you’ve mastered the classic Jack pops, the spooky possibilities are endless! I love playing with different versions depending on my mood (or whatever random ingredients I have left in my pantry). Here are some of my favorite twists that still capture that Nightmare Before Christmas magic:
Oreo Swap-outs
Try using dark cocoa Oreos for an extra eerie look, the darker cookie peeking through the white coating gives a cool “shadow” effect. For Christmas, I’ve used peppermint Oreos (red filling peeking through the stitches = instant Sandy Claws vibes!). My niece once begged me to make them with golden Oreos, and honestly? Jack looked fantastic in “blonde.”
Bat Alternatives
No bat molds? No problem! Pipe little white chocolate ghosts instead, just drizzle melted white chocolate in blobby shapes on parchment and add eyes with icing. For Christmas, I’ve done tiny black icing Christmas trees or even mini fondant pumpkins. One year I got lazy and just stuck on black sprinkles, voilà, instant “flying bats” effect!
Color Play
For Halloween parties, I’ll sometimes mix a drop of purple food coloring into the white candy melts, gives them an eerie glow under black lights! My sister once made “Sally” versions with blue coating and red icing stitches (though her attempt at yarn hair was… ambitious). Around Christmas, a dusting of edible silver glitter makes them look frosty and magical.
The beauty of these pops is how forgiving they are, mess up Jack’s face? Suddenly it’s an “experimental Halloween monster”! No matter how you tweak them, that Oreo center always delivers the deliciousness. Now go forth and create your own spooky (or sparkly) variations, I can’t wait to see what you dream up!
Nutritional Information
Okay, let’s be real, these Jack Skellington Oreo pops aren’t exactly health food (unless joy counts as a nutrient, which in my kitchen it totally does). But if you’re curious about what you’re biting into, here’s the breakdown per pop, just remember these are rough estimates since brands vary:
- Calories: 210 kcal (Blame the Double Stuf, worth every bite!)
- Sugar: 15g (Jack’s sweet tooth is legendary)
- Fat: 10g (Mostly from that silky chocolate coating)
- Carbs: 25g (Oreos gonna Oreo)
- Protein: 2g (Surprise! Those bats pack a tiny punch)
Note: Numbers shift based on your specific ingredients, like if you go wild with extra icing (no judgment) or swap in milk chocolate bats. I once calculated my “practice pops” (ahem, the ones I “accidentally” ate while decorating) and let’s just say… maybe don’t track those. Happy haunting, I mean, eating!
FAQs About Jack Skellington Oreo Pops
Can I use milk chocolate instead of bittersweet for the bats?
Absolutely! The bittersweet chocolate balances the sweetness, but milk chocolate works great too, especially if these are for kids. Just add 1/2 teaspoon extra coconut oil to help it release from molds cleanly. White chocolate bats look amazing too, though they might blend into the pops a bit.
How far ahead can I make these?
The good news? They hold up beautifully! Undecorated dipped Oreos last up to 2 weeks in an airtight container. Once decorated, they’re best within 3 days (the icing stays crisp).
Pro tip: Make the bats up to a month ahead and freeze them, they thaw in minutes when you’re ready to assemble!
Help! My candy coating cracked, can I fix it?
Don’t panic, this happens to me whenever I get impatient and skip the coconut oil! Gently re-dip just the cracked area using a spoon to drizzle coating over it. If it’s a tiny crack, sometimes I’ll camouflage it by piping an extra icing “stitch” there. Jack’s face is supposed to look a little imperfect anyway!
What’s the easiest way to transport these to a party?
After losing a battle with a cupcake carrier once, I now swear by sturdy disposable cups! Place each pop in a 9-oz plastic cup (the kind you’d use for soda), then arrange the cups in a box lined with crumpled parchment paper to prevent sliding. The bats stay safe, and no smushed faces!
Can I make these vegan or gluten-free?
You bet! Use gluten-free Oreos (yes, they exist!) and check that your candy melts are vegan (some contain milk). For the bats, Enjoy Life makes great dairy-free chocolate chips. Just note: royal icing typically contains egg whites, but you can find vegan versions online or substitute thick black frosting.

Why These Jack Skellington Oreo Pops Are the Best
These Jack Skellington Oreo Pops are the perfect no-bake Halloween treat, fun, festive, and easy enough for both kids and adults to make. With just a few simple ingredients, you can transform classic Oreos into spooky character pops that double as party favors or dessert table decorations. They’re budget-friendly, quick to prepare, and guaranteed to bring a smile to any Nightmare Before Christmas fan.
If you’re looking for a creative and delicious Halloween recipe, this one is a must-try! Give it a go, then share your results in the comments below. And don’t forget to follow along on Facebook, Instagram, and Pinterest for more spooky sweets and holiday inspiration.
More Halloween Recipes You’ll Love
If you enjoyed these Jack Skellington Oreo Pops, you’ll love trying more spooky treats to complete your Halloween spread. These recipes are easy, festive, and sure to wow your family and friends:
Each recipe adds a playful touch to your Halloween menu, making it easier than ever to serve a spread that’s both spooky and delicious.
Print
Jack Skellington Oreo Pops
- Total Time: 3 hours
- Yield: 12 pops 1x
- Diet: Vegetarian
Description
These Jack Skellington Oreo pops are a fun and festive treat for Halloween or Christmas. Made with Oreos, candy melts, and a touch of creativity, they’re perfect for parties, movie nights, or as a themed edible craft for kids and adults alike.
Ingredients
- 12 Double Stuf Oreos
- 2 cups white candy melts
- 1/2 cup black royal icing
- 1 black edible marker
- 12 oz bittersweet chocolate (for bats)
- 2 teaspoons coconut oil
Instructions
- Carefully insert lollipop sticks into the center of each Oreo.
- Melt white candy melts with coconut oil until smooth. Dip each Oreo into the melted coating until fully covered. Place on a parchment-lined tray and refrigerate for about 10 minutes, until set.
- Once hardened, slide decorative straws over the lollipop sticks for a finished look.
- Use a black edible marker to draw Jack’s signature stitched smile. With black royal icing, pipe on the eyes and nostrils. Trace over the mouth lines with icing, but leave the stitches as marker lines.
- Make chocolate bats: melt bittersweet chocolate, pour into bat-shaped molds, and refrigerate until firm. Carefully remove from molds.
- Attach chocolate bats to the straws with a small dab of melted chocolate.
- Allow icing to harden at room temperature for 1–2 hours. Do not refrigerate after decorating, as condensation can affect the design.
Notes
- Store in a cool, dry place to prevent melting.
- Use a steady hand for decorating to achieve clean lines.
- Keep pops upright while drying to avoid smudging.
- Prep Time: 1 hour
- Cook Time: 0 minutes
- Category: Halloween
- Method: No-Bake
- Cuisine: American
Nutrition
- Serving Size: 1 pop
- Calories: 210 kcal
- Sugar: 15g
- Sodium: 85mg
- Fat: 10g
- Saturated Fat: 6g
- Unsaturated Fat: 3g
- Trans Fat: 0g
- Carbohydrates: 25g
- Fiber: 1g
- Protein: 2g
- Cholesterol: 5mg
Keywords: Jack Skellington Oreo Pops, Halloween treats, no-bake dessert, Oreo pops


