Oh my goodness, let me tell you about my obsession with Twix Cookies! It all started when I accidentally burned a batch of shortbread (oops!) and decided to cover my shame with caramel and chocolate.
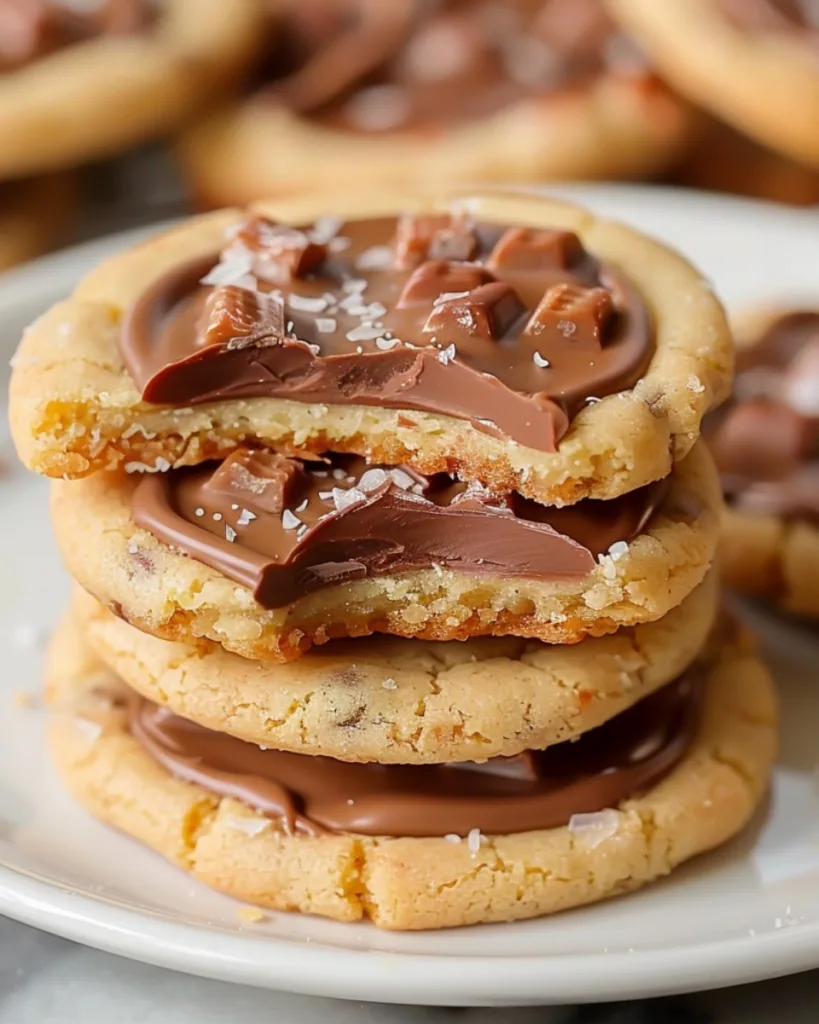
What emerged from that kitchen disaster became my most requested treat: buttery shortbread that crumbles just right, sticky-sweet caramel that makes your teeth happy, and that smooth milk chocolate finish that feels like a hug.
These aren’t just any cookies; they’re little bites of nostalgia that remind me of sneaking candy bars after school. The magic happens when three simple layers come together in perfect harmony.
Trust me, once you try Homemade Twix Cookies, the store-bought version just won’t compare. They disappear faster than I can make them whenever friends come over!
Table of Contents
Why You’ll Love These Twix Cookies
Okay, let me count the ways these Twix Cookies will steal your heart (and probably your willpower)!
- They’re ridiculously easy: No fancy equipment or pastry chef skills needed. If you can mix, spread, and drizzle, you’re golden!
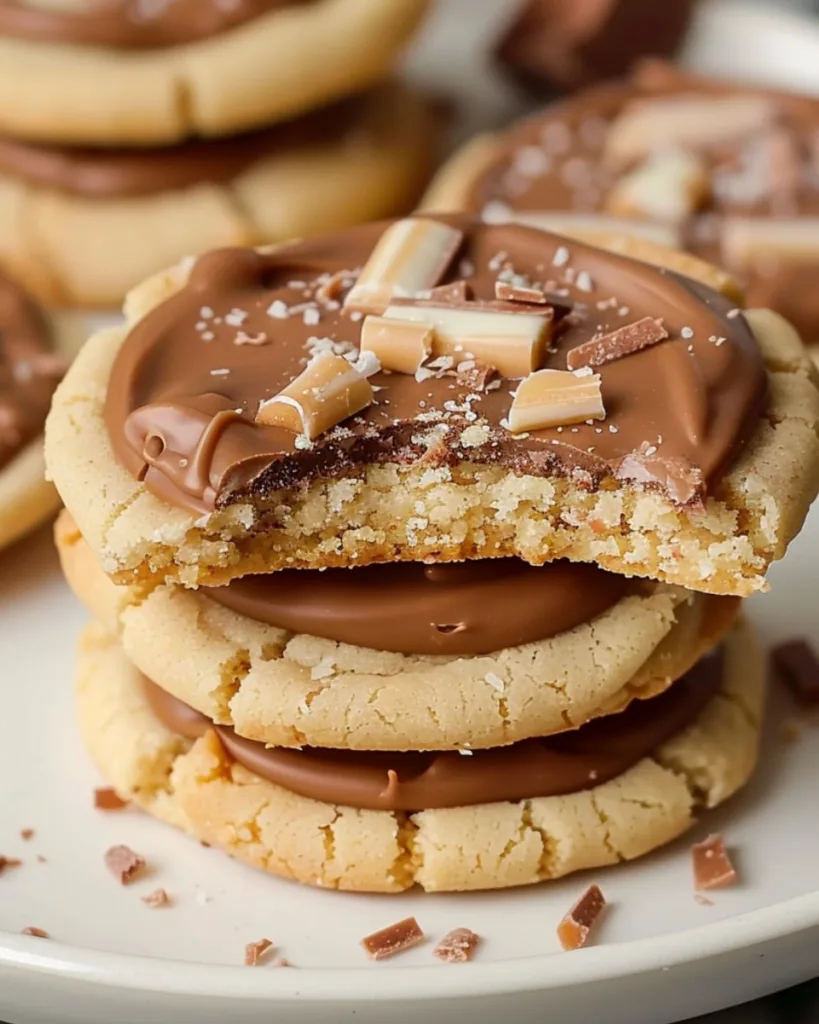
- That perfect texture contrast: The crisp shortbread base, oozy caramel middle, and snap of chocolate? Pure magic in every bite.
- Always a crowd-pleaser: I’ve brought these to bake sales, potlucks, and even a book club meeting once, always the first treat to disappear!
- Better than store-bought: No waxy chocolate or artificial flavors here. You control the quality of every ingredient.
- Endless customization: Feeling fancy? Add sea salt. Craving dark chocolate? Go for it! This recipe loves to play dress-up.
Seriously, these Twix Cookies check all the boxes: Simple enough for weeknight baking, impressive enough for special occasions. My neighbor’s kids now call them “magic circles” because they vanish so fast!
Ingredients for Twix Cookies
Gathering your ingredients is like assembling the dream team; each one plays a crucial role in creating that perfect Twix Cookie experience. Here’s what you’ll need to raid your pantry for:
- 1 cup (2 sticks) unsalted butter, softened: And I mean properly softened! Leave it out for about 30 minutes until it gives slightly when you press it. This makes all the difference for that melt-in-your-mouth shortbread.
- 1/2 cup granulated sugar: Just enough sweetness to balance the rich caramel and chocolate. I’ve tried reducing it, don’t. The cookies lose their magic!
- 2 cups all-purpose flour: Spoon and level it, friends! No packing the measuring cup, or you’ll end up with hockey pucks instead of cookies.
- 1/2 teaspoon salt: The secret background singer that makes all the other flavors shine brighter.
- 1 teaspoon pure vanilla extract: Splurge on the good stuff here. That artificial vanilla just doesn’t give the same warm, cozy flavor.
- 1 cup thick caramel sauce: Homemade or store-bought both work! If using store-bought, look for the thickest one you can find so it doesn’t ooze everywhere.
- 2 cups milk chocolate chips: My personal favorite is Ghirardelli, but use whatever makes your taste buds happy. Keep some extra on hand for “quality control” snacking while you bake!
See? Nothing too fancy, just quality ingredients that come together to create something extraordinary. Now let’s get mixing!
Equipment You’ll Need
Before we dive into making these heavenly Twix Cookies, let’s round up our kitchen squad! You probably have most of these tools already, no fancy gadgets required. Here’s what you’ll want to grab:
- Large mixing bowl: Where all the magic starts. I like using my trusty glass bowl so I can see when the butter and sugar turn perfectly fluffy.
- Electric mixer or sturdy wooden spoon: If you’ve got a hand mixer, great! But don’t worry, I’ve made these with just a spoon and some elbow grease when my mixer died mid-recipe (true story).
- Baking sheets: Two is ideal unless you want to bake in batches. No need for anything fancy, your basic half-sheet pans work perfectly.
- Parchment paper: My lifesaver for easy cleanup and preventing any cookie casualties. Wax paper works in a pinch, but parchment is the real MVP
- Microwave-safe bowl: For melting that glorious chocolate. I use my favorite little glass Pyrex, just big enough for the chocolate chips with room to stir.
- Spatula or butter knife: For spreading that caramel like you’re frosting tiny edible masterpieces.
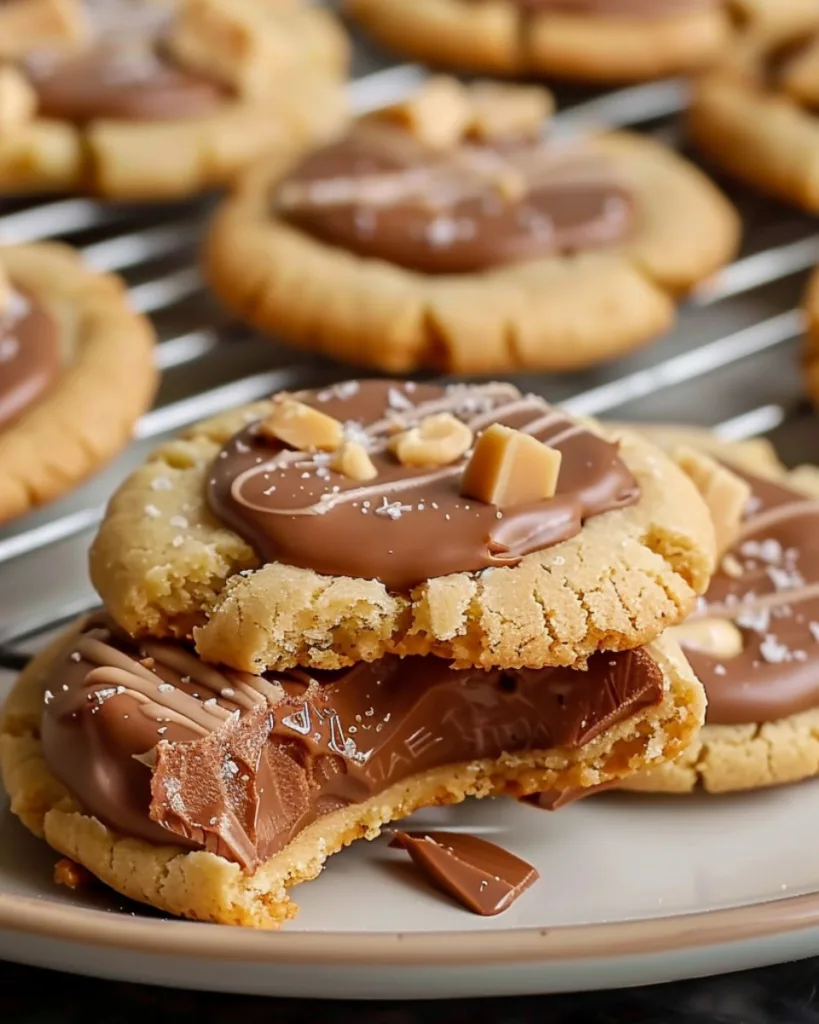
- Wire cooling rack: Crucial for letting the cookies cool properly before their caramel and chocolate makeover. No rack? Just flip another baking sheet upside down, improvise!
That’s it! No special cookie presses or pastry bags needed. Just simple tools that help create something extraordinary. Now let’s get baking!
How to Make Twix Cookies
Alright, let’s get to the fun part, transforming these simple ingredients into cookie magic! I’ll walk you through each step like I’m right there in the kitchen with you. Don’t worry if you’re not a baking pro, my first batch was a hilarious mess, and they still disappeared fast!
Preparing the Shortbread Base
First things first, heat that oven to 350°F (175°C). While it’s warming up, let’s make that buttery shortbread base that’ll make your taste buds sing!
- Cream the butter and sugar: In your mixing bowl, beat the softened butter and sugar together until light and fluffy. This should take about 2-3 minutes with a mixer, or 4-5 if you’re going old-school with a spoon. You’ll know it’s ready when it looks like pale yellow clouds!
- Mix in the vanilla: Add that vanilla extract and give it another quick mix. Your kitchen should smell amazing already!
- Combine the dry ingredients: Gradually add the flour and salt to the butter mixture. Mix just until the dough comes together; don’t overdo it or your cookies will be tough. The dough should look crumbly but hold together when squeezed.
- Shape your cookies: Roll tablespoon-sized portions into balls (about 1-inch diameter) and place them on your parchment-lined baking sheet. Gently press each ball to flatten slightly, not too thin though! Leave about 2 inches between cookies as they’ll spread a bit.
- Bake to golden perfection: Slide them into the oven for 14-16 minutes. Watch for lightly golden edges, that’s your cue they’re done. They’ll continue firming up as they cool, so don’t wait for them to brown completely!
- Cool completely: Let them sit on the baking sheet for 5 minutes before transferring to a wire rack. Patience is key here, if you add caramel to warm cookies, you’ll have a melty mess on your hands!
See? That wasn’t so hard! Now you’ve got the perfect base ready for its caramel and chocolate makeover.
Adding the Caramel Layer
This is where things get really fun and sticky! Here’s how to nail that gooey caramel middle:
- Choose your caramel weapon: If your caramel sauce is thick, you’re golden. If it’s runny, pop it in the fridge for 15-20 minutes to firm up slightly.
- Spread with care: Use a small spoon or butter knife to spread about 1 teaspoon of caramel onto each cooled cookie. I like to make a little well in the center of each cookie first so the caramel stays put.
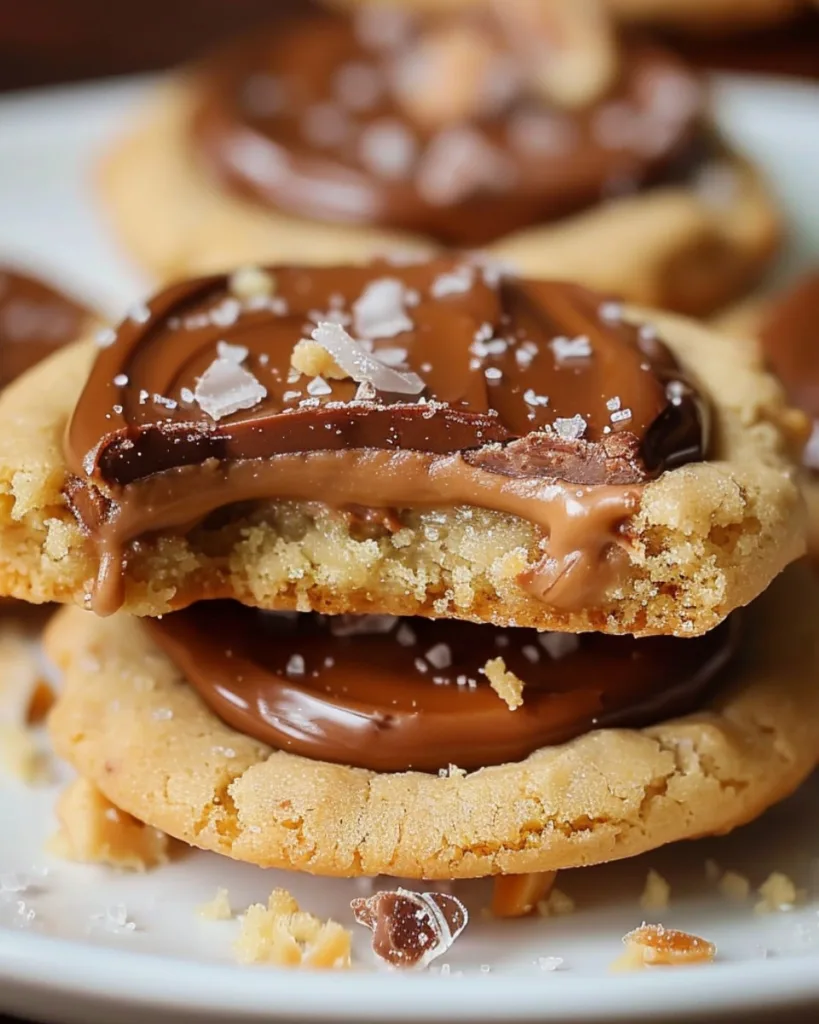
- The optional salty twist: If you’re feeling fancy, sprinkle a tiny pinch of sea salt over the caramel. It’s like a flavor firework in your mouth!
- Let it set: Give the caramel 5-10 minutes to firm up slightly before adding chocolate. This prevents the layers from mixing together.
Pro tip: If your caramel starts getting too firm to spread, warm the jar slightly in a bowl of warm water. Too runny? More fridge time!
Finishing with Chocolate
The grand finale! Here’s how to get that perfect chocolate coating:
- Melt the chocolate: Place chocolate chips in your microwave-safe bowl. Heat in 30-second bursts, stirring well between each, until smooth. Don’t overheat or it’ll seize up, better to take a little longer than rush it!
- Drizzle or dunk: You’ve got options here! Either drizzle the chocolate over the caramel with a spoon (messy but fun), or carefully dip each cookie into the chocolate. For extra pizzazz, use a fork to create those fancy chocolate lines like on real Twix bars.
- Let them set: Allow the chocolate to harden at room temperature. If you’re impatient like me, you can pop them in the fridge for 15 minutes, but bring them back to room temperature before serving for the best texture.
And voilà! You’ve just created Homemade Twix Cookies that’ll make you the hero of any gathering. Now comes the hardest part, waiting for the chocolate to set before devouring it!
Tips for Perfect Twix Cookies
Alright, let me share all my hard-earned cookie wisdom with you! After burning more batches than I’d like to admit (and eating my mistakes anyway), here are the secrets to Twix Cookie success:
- Butter temperature is EVERYTHING: Your butter should be cool to the touch but soft enough to leave a fingerprint when pressed. Too cold and your dough won’t cream properly. Too warm and your cookies will spread into puddles!
- Watch those bake times like a hawk: Ovens lie! Start checking at 12 minutes; you want just the faintest golden hue around the edges. They’ll continue cooking in the pan, so pull them when they look slightly underdone.
- Cooling patience pays off: I know it’s tempting to slather on caramel immediately, but let those cookies cool completely, or you’ll have caramel rivers running everywhere. Voice of experience talking here!
- Chocolate melt magic: Add a teaspoon of coconut oil to your chocolate chips before melting for extra smoothness and shine. And always, always stir between microwave bursts, chocolate burns faster than my last diet resolution.
- The caramel thickness test: Dip a spoon in your caramel and let it drip back into the jar. If it falls off in ribbons, it’s perfect. If it pours like water, chill it first. If it doesn’t move at all, warm it slightly.
- Storage smarts: Layer cookies between parchment paper in an airtight container. They’ll keep for a week… if they last that long! The caramel actually makes them better on day two.
Remember: Even “ugly” Twix Cookies taste amazing. My first batch looked like cookie crime scenes but disappeared faster than you could say “seconds please!” Baking is supposed to be fun, so don’t stress, just enjoy the process (and the delicious results).
Variations and Substitutions
One of my favorite things about this Twix Cookie recipe is how easily it adapts to different tastes and dietary needs! I’ve played around with countless variations over the years. Here are some of my absolute favorites that still stay true to the spirit of these delicious cookies.
- Chocolate lovers’ dream: Swap the milk chocolate for dark chocolate chips (I like 60% cacao) or even white chocolate for a fun twist. Feeling extra indulgent? Mix chocolate types for a marbled effect!
- Homemade caramel warriors: If you’ve got time to spare, homemade caramel takes these to another level. My go-to is just 1 cup sugar melted into golden amber, then whisked with 6 tbsp butter and 1/2 cup heavy cream. So worth the effort!
- Nutty buddies: Add 1/2 cup finely chopped toasted pecans or almonds to the shortbread dough for extra crunch. The nuttiness pairs amazingly with the caramel.
- Gluten-free friends: Use a 1:1 gluten-free flour blend instead of all-purpose. Just make sure it contains xanthan gum, or add 1/2 teaspoon per cup of flour.
- Dairy-free option: Substitute vegan butter and use coconut cream in homemade caramel. For chocolate, Enjoy Life makes great dairy-free chips.
- Spice it up: Add 1/2 teaspoon cinnamon or a pinch of cayenne to the shortbread for a surprising kick. Trust me, the heat plays beautifully with sweet caramel.
- Cookie shape fun: Instead of rounds, press the dough into mini muffin tins before baking to create “Twix cups”, perfect for portion control (in theory… I still eat three at a time).
The beauty of these cookies is how forgiving they are. I’ve yet to find a variation that doesn’t work! My advice? Start with the classic version first, then let your creativity run wild. Just maybe write down what you do, my “amazing” coffee-caramel-chocolate experiment from last year was so good I can’t remember how I made it, and I’ve been chasing that flavor ever since!
Storage and Serving Suggestions
Okay, let’s talk about the best ways to keep these Twix Cookies fresh (if they last that long!) and how to serve them for maximum enjoyment. I’ve learned a few tricks through trial and error, mostly error, if we’re being honest!
Storage secrets: These cookies keep beautifully in an airtight container at room temperature for up to a week. Here’s my foolproof method: layer them between sheets of parchment paper so they don’t stick together. The caramel actually helps keep them moist, but if you live somewhere humid, you might want to stash them in the fridge after day 3. Just let them come to room temperature before serving, cold caramel loses its ooey-gooey magic!
Freezing for later: Yes! These freeze amazingly well. Just arrange them in a single layer on a baking sheet to freeze solid first (about 2 hours), then transfer to a freezer bag. They’ll keep for up to 3 months. Thaw at room temperature for an hour or so when the cookie craving strikes.
Serving suggestions: These are perfect with a glass of cold milk (classic!) or a hot cup of coffee; the bitterness cuts through the sweetness beautifully. For special occasions, I love arranging them on a platter with some fresh berries for color contrast. They’re also fantastic crumbled over vanilla ice cream, just saying!
Pro tip: If you’re gifting these (lucky recipients!), pack them in a cute box lined with parchment. Add a little note about letting them come to room temperature if they’ve been refrigerated. Trust me, you’ll get requests for the recipe!
Nutritional Information
Now, I’m no dietitian, but I know some folks like to keep track of what they’re eating, especially when faced with irresistible cookies like these! Here’s the nutritional breakdown per cookie (based on making 24 from this recipe):
- Calories: About 280 kcal, but let’s be real, nobody stops at just one!
- Fat: 12g (7g saturated), that buttery shortbread goodness
- Carbs: 35g, mostly from that dreamy caramel and chocolate combo
- Sugar: 15g, the sweet spot between indulgence and “maybe I should share”
- Protein: 3g, consider it fuel for your next cookie craving
- Sodium: 50mg, unless you added that fancy sea salt, then maybe a touch more
Important note: These numbers are estimates based on standard ingredients. Your actual counts might vary depending on exact brands and measurements, baking isn’t an exact science, and that’s part of the fun! If you’re watching specific nutrients, I recommend entering your exact ingredients into a nutrition calculator.
My personal philosophy? Life’s too short to count every calorie in something as joyful as homemade cookies. Enjoy them mindfully, share them generously, and maybe take an extra walk tomorrow if you ate three (or four… no judgment here). After all, happiness has no nutritional label!
FAQs About Twix Cookie
Can I use store-bought caramel sauce?
Absolutely! I often use store-bought caramel myself when I’m short on time. Just look for the thickest variety you can find, the kind that barely moves when you tilt the jar. My grocery store’s baking aisle usually has great options. That said, homemade caramel does take these cookies to the next level if you’ve got an extra 15 minutes!
How long do these cookies stay fresh?
In an airtight container at room temperature, they’re delicious for up to a week (if they last that long!). The caramel actually helps keep them moist. For longer storage, freeze them; they’ll keep beautifully for 3 months. Just thaw at room temperature when the craving hits!
My chocolate seized up, help!
Oh no! Been there. If your melted chocolate gets grainy, stir in a teaspoon of vegetable oil or coconut oil to smooth it out. And next time, remember to microwave in short bursts (I stick to 30 seconds max) and stir well between each heating. Chocolate is diva, it demands patience!
Can I make these gluten-free?
You bet! Use a 1:1 gluten-free flour blend (I like the ones with xanthan gum already added). The texture might be slightly different, but they’ll still be delicious. Just be sure to check that your other ingredients (like caramel) are GF too if that’s important for you.
Why did my cookies spread too much?
Most likely, your butter was too warm when you started. Next time, make sure your butter is just soft enough to leave an indent when pressed, not melty. Also, don’t skip chilling the dough if your kitchen is warm. And always use parchment paper, it helps prevent spreading.
More Irresistible Cookie Recipes to Try
If these Twix Cookies disappeared fast, you’ll love these other rich, chewy, and chocolatey cookie recipes that satisfy every sweet craving.
- Cosmic Brownie Cookies: Soft, fudgy cookies topped with chocolate ganache and colorful sprinkles.
- Churro Cookies: Soft, buttery cookies coated in cinnamon sugar for a melt-in-your-mouth treat.
- Chocolate Chip Pecan Cookies: Classic chewy cookies with crunchy pecans and gooey chocolate chips.
- Chocolate Peanut Butter Fudge Bars: Rich layers of chocolate and peanut butter that taste like pure indulgence.
These cookie recipes are decadent, simple, and guaranteed to impress, bake one next and enjoy every bite!
Time to Try These Twix Cookies
I’d love to hear how your Twix Cookie adventure goes! Tag me on Instagram if you share photos, I live for seeing your delicious creations (and your happy faces enjoying them). Now go forth and bake some cookie magic!
Print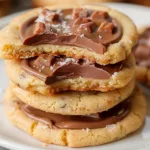
Homemade Twix Cookies
- Total Time: 36 minutes
- Yield: 24 cookies 1x
- Diet: Vegetarian
Description
Delicious Homemade Twix Cookies with buttery shortbread, rich caramel, and smooth chocolate.
Ingredients
- 1 cup unsalted butter, softened
- 1/2 cup sugar
- 2 cups all-purpose flour
- 1/2 teaspoon salt
- 1 teaspoon vanilla extract
- 1 cup caramel sauce
- 2 cups milk chocolate chips
Instructions
- Preheat your oven to 350°F (175°C). Line a baking sheet with parchment paper.
- In a large bowl, cream together the butter and sugar until light and fluffy. Beat in the vanilla extract.
- Gradually mix in the flour and salt until the dough comes together.
- Roll the dough into 1-inch balls and place them on the prepared baking sheet. Press down each ball slightly to flatten.
- Bake for 14-16 minutes or until the edges are lightly golden. Let them cool on the baking sheet for 5 minutes before transferring to a wire rack to cool completely.
- Once cooled, spread caramel sauce on top of each cookie.
- Melt the chocolate chips in a microwave-safe bowl, stirring every 30 seconds until smooth.
- Spoon or drizzle melted chocolate over the caramel layer on each cookie.
- Allow the chocolate to set before serving.
Notes
- For a salted caramel twist, sprinkle a tiny bit of sea salt over the caramel before adding the chocolate.
- Use a double boiler to melt the chocolate if you prefer a more controlled melting process.
- Store the cookies in an airtight container to keep them fresh for up to a week.
- Prep Time: 20 minutes
- Cook Time: 16 minutes
- Category: Dessert
- Method: Baking
- Cuisine: American
Nutrition
- Serving Size: 1 cookie
- Calories: 280 kcal
- Sugar: 15g
- Sodium: 50mg
- Fat: 12g
- Saturated Fat: 7g
- Unsaturated Fat: 4g
- Trans Fat: 0g
- Carbohydrates: 35g
- Fiber: 1g
- Protein: 3g
- Cholesterol: 20mg
Keywords: Twix Cookies, caramel cookies, chocolate cookies


