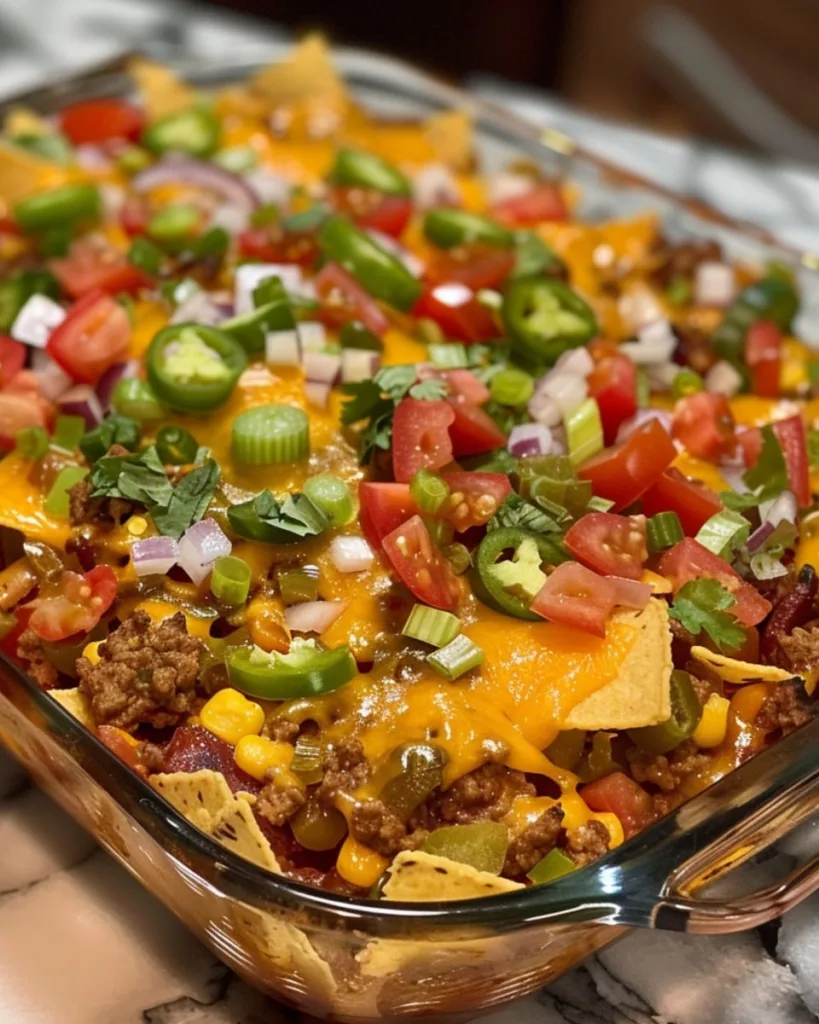
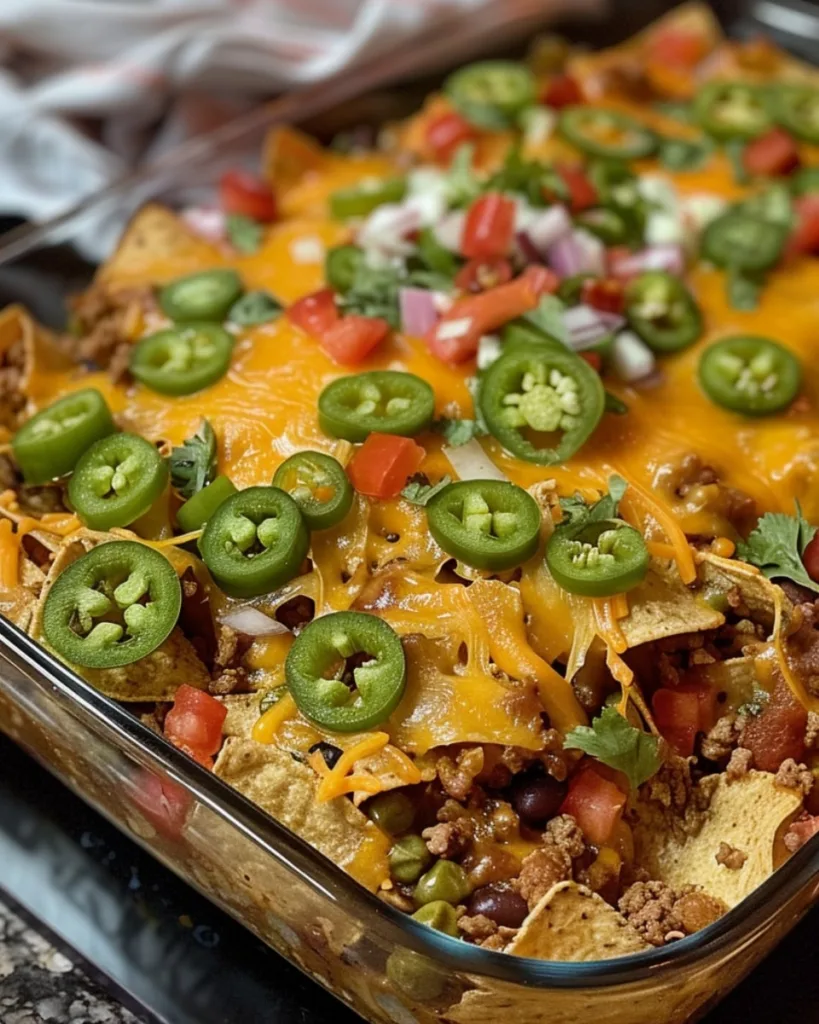
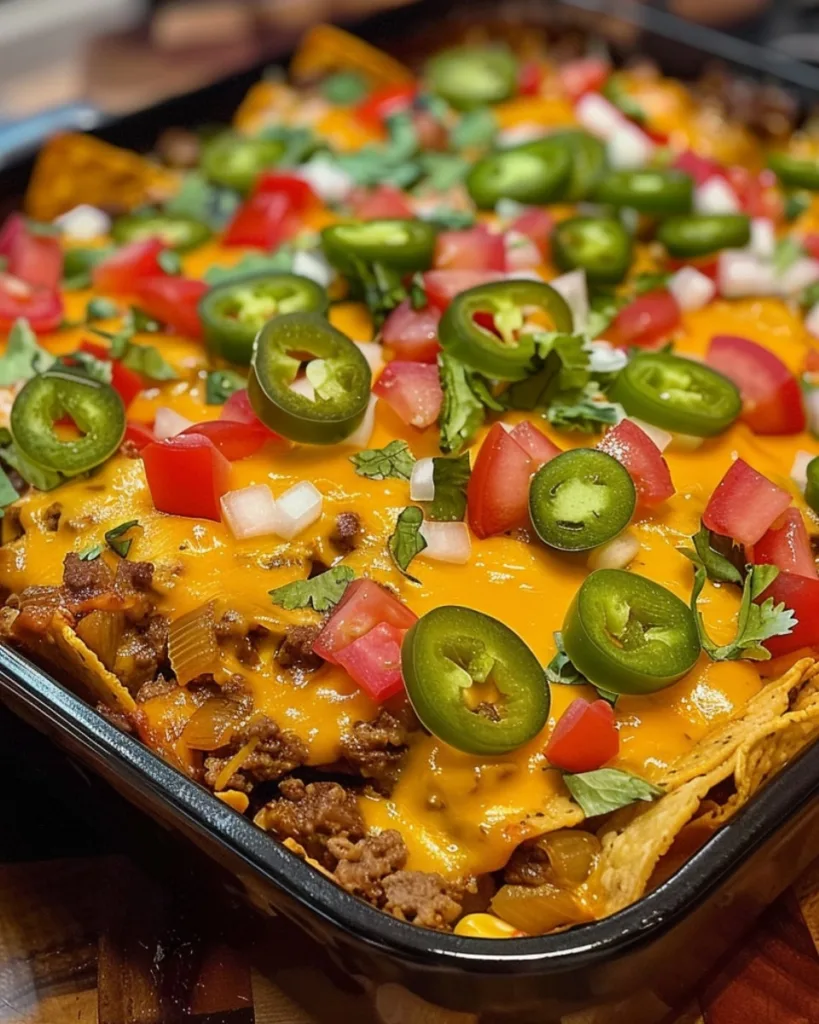
Let me introduce you to my ultimate secret weapon for busy weeknights: this incredible Walking Taco Casserole! It captures all the fun and flavor of a classic walking taco, a brilliant snack often served in a chip bag at fairs and sporting events, and turns it into an easy, crowd-pleasing meal. I first made this for a last-minute family dinner, and it was love at first bite.

This dish takes all the best parts of taco night, the savory seasoned beef, crunchy Fritos, and gooey, melted cheese, and bakes them together into one delicious casserole, minus all the mess. It’s the perfect fun and flavorful meal that comes together in under an hour. My kids go crazy for it, and I know your family will too. Get ready for your new favorite weeknight dinner
Table of Contents
Why You’ll Love This Walking Taco Casserole
Let me count the ways this recipe will become your new best friend in the kitchen:
- Weeknight superhero: From fridge to table in under an hour – even when you’re juggling homework, laundry, and that one kid who suddenly remembers they have a science project due tomorrow.
- Crowd-pleaser magic: Perfect for game nights, potlucks, or when your teenager’s entire friend group descends on your kitchen unannounced (speaking from experience here).
- No-fuss deliciousness: All the flavor of a taco bar without the mess of individual toppings everywhere. My floors thank me every time I make this!
- Customizable: Swap ingredients based on what’s in your pantry – it’s practically foolproof.
- Kid-approved: The Fritos make it fun, and let’s be honest – anything covered in melty cheese gets devoured in my house.
Ingredients for Walking Taco Casserole
Here’s everything you’ll need to make this taco casserole magic happen. I promise, it’s all super simple and easy to find, no fancy ingredients here! Just make sure you’ve got these staples ready to go:
- 1 1/2 pounds ground beef: I usually go for lean, but regular works great too, just drain the fat after browning.
- 1/3 large onion, chopped: Yellow or white onion works best here. Trust me, it adds so much flavor!
- 1 small can (4 ounces) green chilies: Don’t drain these, that extra liquid keeps everything moist.
- 1 can (10 ounces) enchilada sauce: Mild or medium, depending on your spice tolerance. I love the red sauce for that classic taco vibe.
- 2 ounces cream cheese: This is the secret weapon for that creamy, dreamy texture.
- 1 bag (9.25 ounces) Fritos corn chips: The star of the show! Use the original flavor for that perfect crunch.
- 1 bag (8 ounces) shredded cheese: Cheddar or a Mexican blend, both are amazing. Shred your own if you’re feeling fancy, but pre-shredded works just fine.
- 3/4 cup lettuce, shredded: Iceberg or romaine, whatever you’ve got on hand.
- 1/2 cup fresh tomato, diced: Add this right before serving for that fresh pop of flavor.
- 16 ounces salsa: Use your favorite brand or make your own if you’re feeling adventurous.
- 8 ounces sour cream: A dollop on top makes everything better, right?
Seriously, that’s it! Most of these are pantry staples, and you can tweak things to suit your taste. Let’s get cooking!
Equipment Needed for Walking Taco Casserole
Don’t worry, you won’t need any fancy gadgets for this recipe! Just grab these basic kitchen essentials:
- Large skillet: For browning that beef and onion to perfection.
- 9×13-inch baking dish: The perfect size for all those delicious layers.
- Wooden spoon or spatula: For stirring and mixing everything together.
- Oven: Preheated to 350°F – your magic temperature for melty cheese goodness.
That’s it! See? I told you this recipe was easy. Now let’s get to the fun part, making it!

How to Make Walking Taco Casserole
Okay, let’s get cooking! This is seriously one of the easiest recipes you’ll ever make, but I’ll walk you through each step so it turns out perfect every time. Just follow along and you’ll have everyone begging for seconds!
Browning the Beef and Onion
First things first, grab your big skillet and crank that heat to medium-high. Toss in your ground beef and chopped onion (don’t be shy with the onion, it adds so much flavor!). Break up the beef with your spoon as it cooks until it’s nice and browned, about 5-7 minutes. Once it’s done, drain off any extra grease (my grandma always said this step keeps your casserole from getting soggy).
Adding Chilies, Sauce, and Cream Cheese
Now for the flavor boosters! Stir in those green chilies (juice and all) along with the enchilada sauce. Let everything simmer together for 2-3 minutes – you’ll know it’s ready when your kitchen smells amazing. Here’s my favorite part – drop in that cream cheese and stir until it melts completely into the mixture. Trust me, this is what makes the filling so creamy and dreamy!
Layering and Baking the Casserole
While your beef mixture simmers, preheat your oven to 350°F. Grab your baking dish and make your first layer – Fritos! Spread them evenly across the bottom (try not to eat too many while you’re at it). Next, pour that delicious beef mixture right over the chips – try to cover them completely. Now comes the cheesy magic – sprinkle that shredded cheese generously over the top!
Pop it in the oven for 20-25 minutes. You’ll know it’s done when the cheese is all bubbly and golden brown around the edges. Resist the urge to dive right in – let it sit for about 5 minutes so everything sets up perfectly.
Adding Fresh Toppings
The finishing touches! Right before serving, sprinkle on that fresh lettuce and tomatoes – they add such a nice crunch and freshness. Go wild with salsa and dollops of sour cream (I always make little swirls because it’s prettier). And that’s it, your Walking Taco Casserole masterpiece is ready!

Tips for Perfect Walking Taco Casserole
After making this Walking Taco Casserole more times than I can count (seriously, my family requests it weekly!), I’ve picked up some tricks that take it from good to “Oh my gosh, can I get this recipe?” level:
- Chips matter: Use slightly stale Fritos if you’ve got them – they hold up better under all that saucy goodness without getting soggy.
- Temperature is key: Let your cream cheese soften at room temp before adding – it’ll melt into the beef mixture like a dream.
- Cheese strategy: Mix half the cheese INTO the beef mixture before layering, then top with the rest. Double cheesy goodness!
- Fresh toppings: Add lettuce and tomatoes RIGHT before serving – they stay crisp and bright that way.
- Make-ahead magic: Prep the beef mixture up to 2 days ahead, then just assemble and bake when you’re ready!
The best tip? Have fun with it! This recipe is practically foolproof, so don’t stress about perfection. Some of my best versions happened when I improvised with what I had!
Variations for Walking Taco Casserole
One of my favorite things about this recipe is how easily you can mix it up! Here are some delicious twists I’ve tried when I’m feeling adventurous or just working with what’s in my pantry:
- Chip swap: Out of Fritos? Use tortilla chips, Doritos, or even crushed up taco shells for a fun change in texture.
- Protein options: Ground turkey or chicken work great if you’re not feeling beef. For vegetarians, black beans or lentils are amazing!
- Cheese dreams: Try pepper jack for some heat, or mix in some crumbled queso fresco for authentic Mexican flair.
- Extra veggies: I love tossing in sautéed peppers or mushrooms with the beef mixture – sneaky way to add nutrition.
- Breakfast version: Use breakfast sausage, scrambled eggs, and top with avocado – perfect for brunch gatherings!
The possibilities are endless, that’s why this casserole never gets old in my house!
Serving Suggestions for Walking Taco Casserole
This Walking Taco casserole is seriously a meal all on its own (my kids never leave room for sides!), but if you’re feeding a crowd or just want to go all out, here are my favorite things to serve alongside:
- Fresh guacamole: because can you ever really have too much avocado?
- Spanish rice: the perfect way to soak up any extra sauce
- Simple green salad: a crisp contrast to all that cheesy goodness
- Chilled margaritas: okay, maybe just for the adults, but trust me on this one
Pro tip: Set up a little topping bar with extra salsa, hot sauce, and lime wedges – it makes dinner feel like a party!
Storage and Reheating Instructions
Here’s the good news, leftovers taste just as amazing the next day! Store cooled portions in an airtight container in the fridge for up to 3 days. When reheating, I suggest popping individual servings in the microwave for about 90 seconds, then adding fresh toppings. The chips won’t stay crunchy, but the flavors meld together beautifully!

Nutritional Information for Walking Taco Casserole
Here’s the general nutritional breakdown per serving (but remember, this can vary depending on your ingredients!):
- Calories: Around 400 kcal
- Protein: 20g (thanks to all that beef and cheese!)
- Carbs: 30g
- Fiber: 3g
- Sugar: 5g
- Fat: 25g
Just a heads up, these numbers are estimates based on standard ingredients. Your exact nutrition will depend on the brands you use and how generous you are with cheese (no judgment here – I always add extra!). If you’re counting macros or have dietary restrictions, you’ll want to calculate based on your specific ingredients.
FAQs About Walking Taco Casserole
Can I use ground turkey instead of beef?
Absolutely! I’ve made this with ground turkey plenty of times when we’re trying to lighten things up. Just be sure to add an extra tablespoon of taco seasoning since turkey tends to be milder in flavor. The texture works perfectly though!
How long can I store leftovers?
The baked casserole (without fresh toppings) keeps beautifully in the fridge for 3 days. Store it covered tightly with foil or in an airtight container. The chips will soften, but the flavors actually get better as they mingle!
Can I make this Walking Taco Casserole ahead?
Yes! Here’s my favorite trick: prepare the beef mixture up to 2 days in advance. When you’re ready to eat, just layer with chips and cheese, then bake as directed. It cuts the prep time in half on busy nights!
What can I use instead of Fritos?
Any sturdy corn chip works great! I’ve used tortilla chips, Doritos, even crushed up taco shells in a pinch. Just avoid anything too thin – you want that satisfying crunch.
Is this recipe freezer-friendly?
You can freeze the baked casserole (without fresh toppings) for up to 2 months. Thaw overnight in the fridge, then reheat at 350°F until warmed through. Add fresh toppings after reheating!
More Irresistible Recipes to Bake
If you loved how easy and fun this Walking Taco Casserole was, you’re going to be obsessed with these other delicious, family-friendly meals. They’re packed with cheesy, savory goodness and are perfect for your weeknight dinner rotation.
- Mexican Ground Beef Casserole
- Chicken Enchilada Casserole
- Taco Soup
- Cheesy Taco Pasta
- Taco Stuffed Shells
Share Your Experience with Walking Taco Casserole
I’d LOVE to hear how your Walking Taco Casserole turns out! Did your kids gobble it up? Try any fun variations? Snap a pic and tag me on Instagram, nothing makes me happier than seeing your kitchen creations. Don’t forget to rate the recipe below if you loved it as much as we do!
Print
Walking Taco Casserole
- Total Time: 45 minutes
- Yield: 6 servings 1x
- Diet: Low Lactose
Description
This Walking Taco Casserole is like having a taco bar in one dish. It’s perfect for busy weeknights or casual gatherings.
Ingredients
- 1 1/2 pounds ground beef
- 1/3 large onion, chopped
- 1 small can green chilies
- 1 can enchilada sauce
- 2 ounces cream cheese
- 1 bag Fritos corn chips
- 1 bag shredded cheese (cheddar or Mexican blend recommended)
- 3/4 cup lettuce, shredded
- 1/2 cup fresh tomato, diced
- 16 ounces salsa
- 8 ounces sour cream
Instructions
- Brown the Beef: In a large skillet over medium-high heat, cook the ground beef and chopped onion until the beef is browned and the onion is tender. Drain any excess fat.
- Add Chilies and Sauce: Stir in the green chilies and enchilada sauce. Cook for another 2 to 3 minutes until heated through.
- Add Cream Cheese: Add the cream cheese and stir until melted and well combined.
- Preheat Oven: Preheat your oven to 350°F (175°C).
- Layer Ingredients: In a 9×13-inch baking dish, spread a layer of Fritos corn chips on the bottom. Pour the beef mixture over the chips, spreading it evenly. Sprinkle a generous layer of shredded cheese on top of the beef mixture.
- Bake: Bake in the preheated oven for 20 to 25 minutes, or until the cheese is melted and bubbly.
- Add Fresh Toppings: Once the casserole is baked, remove it from the oven and let it cool for a few minutes. Top with shredded lettuce, diced tomatoes, salsa, and dollops of sour cream.
- Serve and Enjoy: Serve the Walking Taco Casserole hot.
Notes
- Use fresh ingredients for the best flavor.
- Adjust the amount of cheese to your preference.
- Serve immediately after adding fresh toppings.
- Prep Time: 20 minutes
- Cook Time: 25 minutes
- Category: Casserole
- Method: Baking
- Cuisine: Mexican
Nutrition
- Serving Size: 1 serving
- Calories: 400 kcal
- Sugar: 5g
- Sodium: 800mg
- Fat: 25g
- Saturated Fat: 10g
- Unsaturated Fat: 12g
- Trans Fat: 1g
- Carbohydrates: 30g
- Fiber: 3g
- Protein: 20g
- Cholesterol: 70mg
Keywords: Walking Taco Casserole, Mexican Casserole, Easy Dinner Recipe, Taco Casserole, Weeknight Dinner


