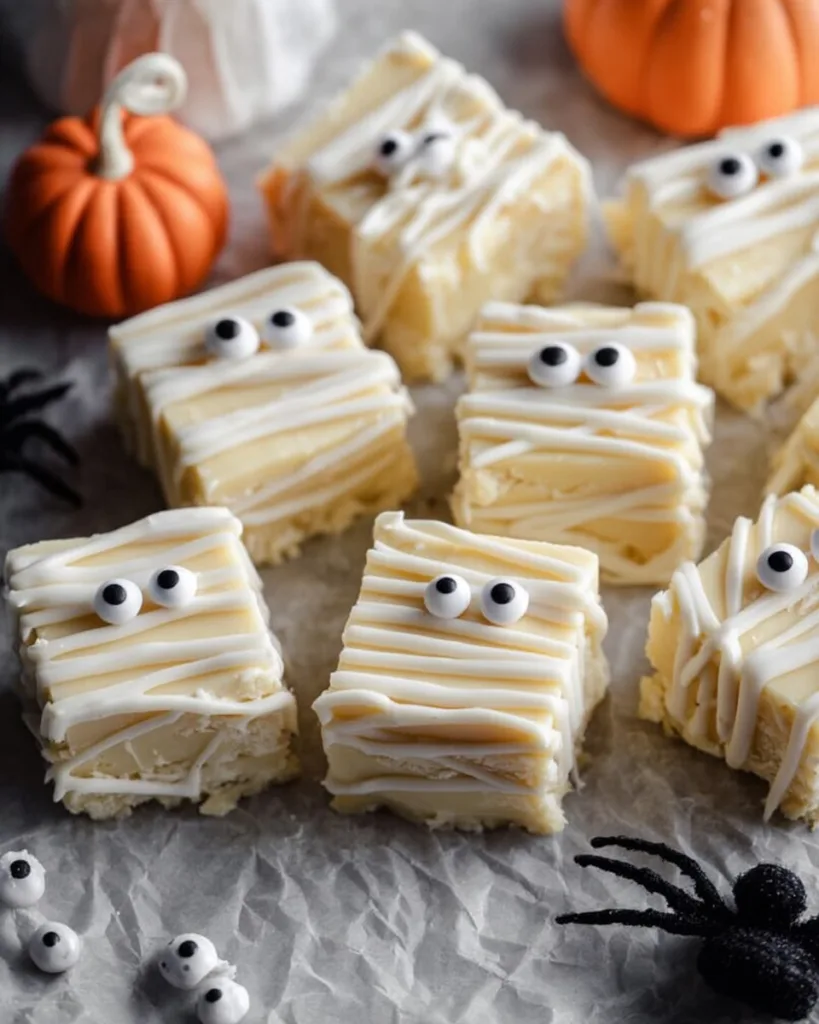
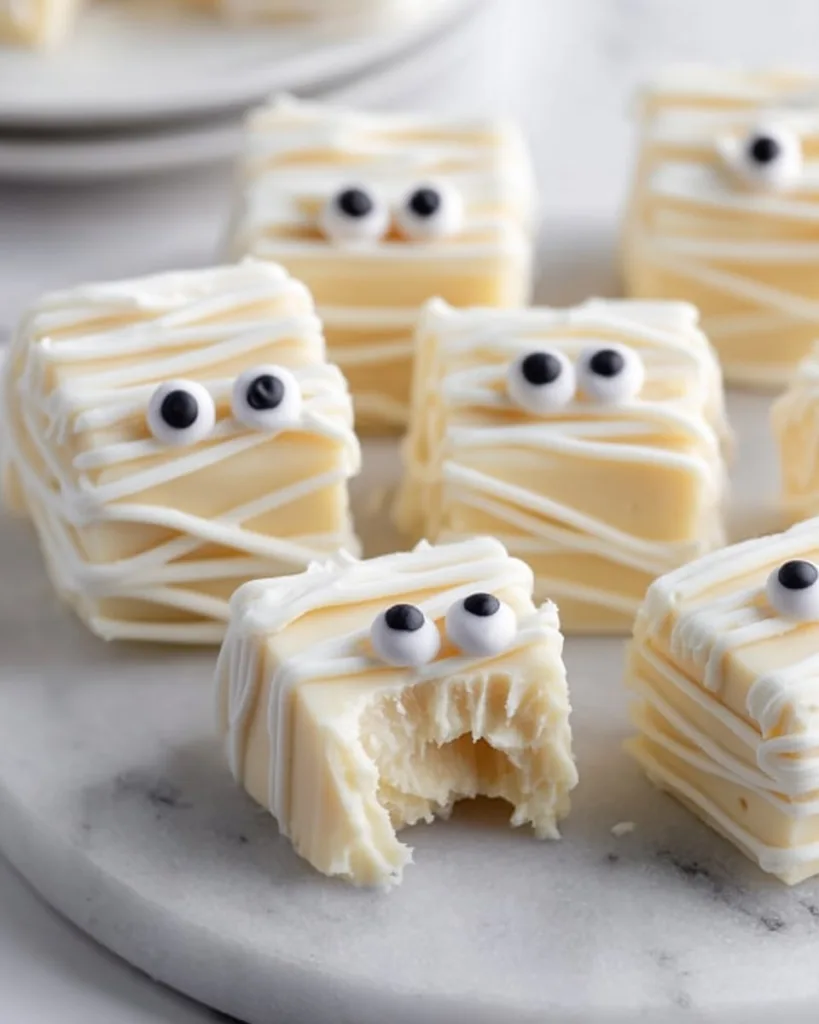
Every October, my kitchen turns into a mad scientist’s lab of spooky sweets, and nothing gets more squeals of delight than my mummy fudge. Picture this: creamy white chocolate squares wrapped in “bandages” of almond bark, with mischievous candy eyes peeking through, it’s Halloween magic on a plate!
I’ll never forget the first time my niece helped me make these; she was so proud arranging those silly googly eyes that we ended up with one mummy winking and another cross-eyed. That’s the beauty of this recipe: it’s foolproof enough for little hands to decorate, yet impressive enough to be the star of any Halloween party spread.
What makes this mummy fudge special is how it transforms simple ingredients into edible art. The sweetened condensed milk gives it that classic fudge chewiness we all love, while the almond bark drizzle hardens into perfect “mummy wrappings” that crackle when you bite into them. Trust me, once you see how easy it is to create these adorable treats (no baking required!), you’ll want to make them every spooky season. They disappear faster than ghosts at sunrise whenever I bring them to school events or neighborhood gatherings.
Best part? You probably have most ingredients already, white chocolate, condensed milk, and that half-used bag of candy eyes from last year’s cupcake decorating. Let me show you how to turn them into the most boo-tiful fudge your Halloween party table has ever seen!
Table of Contents
Why You’ll Love This Mummy Fudge
This adorable Halloween treat is my go-to recipe for so many reasons, just wait until you see how easy and fun it is to make! Here’s why you won’t be able to resist whipping up a batch (or three):
- No oven required: Perfect for when you’re already baking six dozen cookies and just can’t handle another tray in the oven. The microwave and fridge do all the work!
- Kid-friendly magic: Little hands love pressing on the candy eyes and “wrapping” their mummies with almond bark bandages, even my 4-year-old nephew can decorate these like a pro.
- Party superstar: These cuties always steal the show at Halloween gatherings. Last year, mine disappeared before the pumpkin bread even got a second glance!
- Better than store-bought: That grainy, overly sweet fudge from the supermarket? Not even close to our creamy homemade version with real white chocolate.
Seriously, once you see how these adorable mummies come together, and taste that first bite of silky fudge, you’ll understand why this recipe has been haunting my Halloween lineup for years!
Ingredients for Mummy Fudge
Grab these simple ingredients, you might already have most in your pantry! Exact measurements matter here for that perfect fudge texture:
- 2 cups white baking chips (one 11-oz bag), the base of our creamy fudge
- 20 oz white almond bark, divided, 8 oz for the fudge, 12 oz for decorating
- 1 can (14 oz) sweetened condensed milk, that magic ingredient for richness
- 1 teaspoon vanilla extract, just enough to enhance the sweetness
- 1/8 teaspoon salt, trust me, it balances the flavors perfectly
- 32 candy eyes (about 2 packages), the more googly, the better!
Ingredient Notes & Substitutions
No white baking chips? You can use 16 oz high-quality white chocolate chopped small instead, just avoid “white confectionery coating” if you want real chocolate flavor. Out of almond bark? Swap in more white chocolate chips plus 1 tablespoon coconut oil for the drizzle, it won’t harden quite as crisp but still works.
For the eyes, get creative! Mini chocolate chips or sprinkles make cute alternatives. And if your almond bark seems too thick when melting (it happens!), stir in ½ teaspoon vegetable oil at a time until it flows smooth.
Pro tip: Buy extra candy eyes, I always “lose” a few to tiny snackers while decorating!
Equipment Needed for Mummy Fudge
You won’t need any fancy gadgets for this recipe, just these trusty kitchen staples:
- 9×9-inch baking pan (metal or glass works, but metal conducts cold better for setting)
- Parchment paper with overhang, your lifeline for lifting out perfect fudge squares
- Double boiler (or make your own with a heatproof bowl over a saucepan of simmering water)
- Rubber spatula for scraping every last bit of that creamy fudge mixture
- Microwave-safe bowl and zip-top bag (or piping bag) for the almond bark drizzle
That’s it! No stand mixer, no candy thermometer, just simple tools that probably already live in your kitchen drawers.

How to Make Mummy Fudge
Ready to create the cutest little mummies you’ve ever eaten? Let’s dive into the step-by-step magic! I’ll walk you through every stage, from that first melt of white chocolate to the final “boo-tiful” drizzle. Just follow along, and you’ll have Halloween treats that’ll make all the neighborhood ghosts and goblins squeal with delight.
Preparing the Fudge Base
First things first, let’s get that creamy fudge base perfect. Here’s how I do it:
Line your pan like a pro: Take that 9×9-inch pan and press in a sheet of parchment paper, leaving about 2 inches hanging over two opposite sides. This little “handle” will save you so much frustration later, trust me, wrestling with stuck fudge is no one’s idea of Halloween fun!
Melt with care: Set up your double boiler (or DIY version with a heatproof bowl over simmering water, just make sure the bowl doesn’t touch the water). Toss in the white baking chips, 8 oz of almond bark, and the whole can of sweetened condensed milk. Now, here’s my secret, medium-low heat only! High heat makes the chocolate seize up faster than a vampire at sunrise.
Stir gently with that rubber spatula as everything melts together. You’ll see it go from lumpy to glossy in about 5-7 minutes. When just a few small chunks remain, pull it off the heat, the residual heat will finish melting them as you stir. This prevents that dreaded grainy texture. Stir in the vanilla and salt last, they’re like the magic potion that makes all the flavors pop!
Pour with love: Quickly scrape every last bit into your prepared pan. I like to tilt the pan gently to spread it evenly, no need to be perfect here, as long as it’s roughly level. Now the hard part: walk away! Let it chill in the fridge for at least 2 hours (or 4 at room temp). I know, I know, the waiting is killer, but firm fudge means clean cuts and happy decorating!
Decorating the Mummies
Here’s where the real Halloween fun begins! Let’s turn these plain squares into adorable wrapped mummies:
Cut with confidence: Use the parchment “handles” to lift your fudge slab onto a cutting board. A sharp knife (wiped clean between cuts) gives you 16 perfect squares, about 2×2 inches each.
Pro tip: Run your knife under hot water first for smoother cuts!
Melt your “bandages”: Break the remaining 12 oz almond bark into chunks and microwave in 20-second bursts, stirring after each. It should take about 1 minute total, stop when just a few lumps remain (they’ll melt as you stir). Too hot? It’ll be runny and hard to control. Transfer to a zip-top bag and snip a tiny corner, smaller than you think! You can always make it bigger if needed.
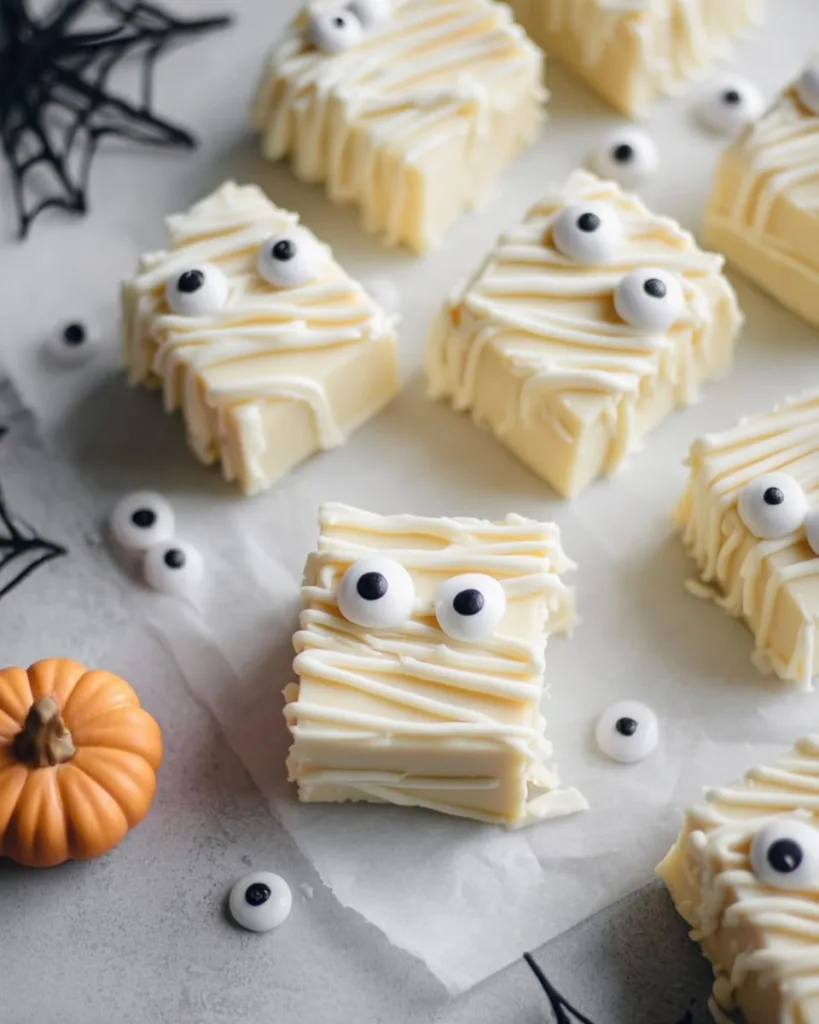
Eye spy perfection: Now the fun part! Pipe two little dots of melted almond bark where you want the eyes, then gently press two candy eyes onto each. I like to give mine personality, some close together, some far apart, maybe one with a lazy eye for comedy effect! Let these set for 5 minutes before the next step.
Wrap ’em up: Time for the mummy bandages! Holding your bag about 6 inches above each square, drizzle back and forth in quick zigzags. Don’t overthink it, messy is better! The uneven lines look more like real wrappings. Some of my best mummies have “bandages” going every which way. Let them set at room temp for 15 minutes (or pop in the fridge for 5 if you’re impatient like me).
And voila! You’ve just created the most adorable edible mummies this side of a pyramid. Wait until you see kids’ faces light up when they spot these on your dessert table, pure Halloween magic!
Tips for Perfect Mummy Fudge
After making dozens of batches (and yes, a few “mummy fails” along the way!), I’ve learned all the tricks to ensure your fudge turns out picture-perfect every time. Here are my hard-won secrets:
Smooth operator: If your almond bark drizzle is too thick and gloopy, don’t panic! Just stir in ½ teaspoon of coconut oil at a time until it flows smoothly from your piping bag. Too thin? Let it cool slightly, it thickens as it sits. I keep mine at the perfect “honey consistency” by working quickly and rewarming for just 10 seconds if needed.
Grainy fudge fix: That dreaded sandy texture happens when chocolate gets too hot. My grandma taught me to remove from heat when 10% unmelted bits remain, they’ll dissolve as you stir. If it’s already grainy? Quickly blend in 1 tablespoon hot milk and whisk vigorously. Not perfect, but saves the batch!
Eye placement pro tip: Pipe your almond bark eye dots bigger than you think, they shrink slightly when the candy eyes press in. And work one mummy at a time so the “glue” doesn’t set before you add eyes. Trust me, chasing runaway candy eyes is a Halloween horror story you don’t want!
Serving & Storing Mummy Fudge
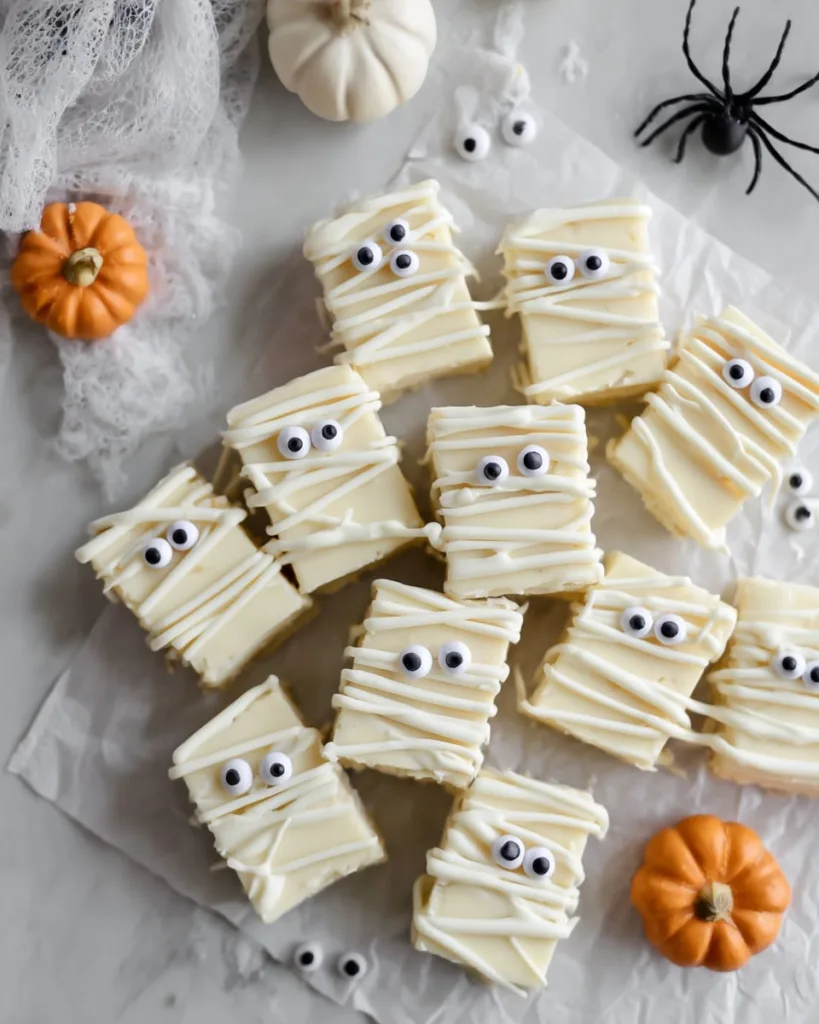
These little mummies deserve a spooktacular presentation! I love arranging them on a black platter, their white “bandages” pop against the dark background. For a haunted house vibe, prop some up against cupcake stands or small Halloween figurines. They look especially cute peeking out from behind mini tombstones or plastic spiders!
Storage is a breeze, just layer them between parchment in an airtight container. They’ll keep at room temp for 3 days (if they last that long!) or in the fridge for up to a week. The almond bark might sweat a little when chilled, so let them sit at room temperature for 10 minutes before serving.
Pro tip: Freeze undecorated fudge squares for up to 2 months, just thaw overnight in the fridge and add your mummy decorations the day of serving!

Mummy Fudge Variations
Half the fun of this recipe is making it your own! Here are some of my favorite ways to switch up these spooky treats:
- Spooky flavors: Swap vanilla for 1/2 tsp peppermint extract for “icy mummies,” or add 1 tsp orange extract for a creamsicle twist that screams Halloween!
- Spooky sprinkles: Before the drizzle sets, press in black sanding sugar for “dirty bandages” or edible glitter for magical mummies.
- Seasonal switch: Use green food coloring in the fudge and decorate with candy corn eyes for Frankenstein versions, perfect for October parties!
- Drizzle drama: Try alternating white and dark chocolate drizzles, or use colored candy melts for neon mummy wraps that glow under blacklight.
The possibilities are endless, just like my kids’ excitement when they see what new mummy creation we’re making each year!
Mummy Fudge Nutritional Info
Now, I won’t pretend these little mummies are health food, they’re pure Halloween joy in bite-sized form! Each piece runs about 180 calories, with that perfect balance of creamy sweetness. Keep in mind, nutritional values can shift depending on your exact ingredients, especially if you swap in different chocolates or toppings. But hey, it’s Halloween, if there’s ever a time to indulge in some sugary magic, this is it!
Mummy Fudge FAQs
Can I use regular white chocolate instead of almond bark?
Absolutely! While almond bark gives the cleanest snap for decorating, high-quality white chocolate works too, just add 1 tablespoon coconut oil per 12 oz to help it drizzle smoothly. The flavor might be richer, which I actually prefer! Avoid “white confectionery coating” though, it tends to be waxy.
How long does the fudge need to set before decorating?
Patience is key, I know it’s tempting to rush! The fudge needs at least 2 hours in the fridge (or 4 hours at room temp) to firm up properly. Trying to cut it too soon? Disaster! Trust me, I learned this the hard way when my first batch turned into “mummy mush.” Now I set mine overnight if I can, it slices like a dream.
What can I use if I can’t find candy eyes?
Get creative! Mini chocolate chips make adorable beady eyes, while round sprinkles give a cute dotted look. For a spookier vibe, pipe tiny skulls with melted dark chocolate. My nephew once used white chocolate chips with mini M&M pupils, totally weird but totally awesome!
Why is my almond bark drizzle cracking?
Ah, the dreaded “mummy breakage”! This happens when the fudge is too cold. Let squares sit at room temperature for 10 minutes before drizzling. If it still cracks, warm your almond bark slightly more; it should flow like honey off a spoon. And don’t worry, cracked bandages just make them look “authentically ancient!”
Why This Mummy Fudge Is the Best
This Mummy Fudge is the perfect blend of creamy, sweet, and spooky, making it one of the easiest and most festive treats you can whip up for Halloween. With simple ingredients and no baking required, it’s a recipe anyone can master. The fun mummy design adds a playful touch that kids will love, while the rich, melt-in-your-mouth flavor keeps adults coming back for more. Whether you’re preparing for a party, school event, or just a cozy Halloween night in, this fudge is guaranteed to impress.
Try this recipe at home and let me know how your fudge turned out in the comments below! And for even more spooky fun, don’t forget to follow me on Facebook, Instagram, and Pinterest.
More Halloween Recipes You’ll Love
If you loved this Mummy Fudge, you won’t want to miss these other spooky and delicious Halloween recipes. They’re simple, creative, and perfect for sharing:
Each one pairs perfectly with Mummy Fudge to create a Halloween dessert table that’s festive, fun, and unforgettable.
Print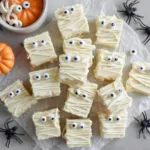
Mummy Fudge
- Total Time: 3 hours 15 minutes
- Yield: 16 pieces 1x
- Diet: Vegetarian
Description
This Mummy Fudge is a spooky-sweet Halloween treat that’s as fun to make as it is to eat. Creamy white chocolate fudge gets decorated with candy eyes and drizzled almond bark to create a wrapped mummy effect. It’s perfect for parties, school events, or just a fun night in with the kids.
Ingredients
- 2 cups white baking chips
- 20 oz white almond bark, divided
- 1 can sweetened condensed milk
- 1 teaspoon vanilla extract
- 1/8 teaspoon salt
- 32 candy eyes
Instructions
- Prepare the Pan: Line a 9×9-inch square baking pan with parchment paper, leaving an overhang to lift the fudge out easily.
- Make the Fudge Base: In a double boiler over medium heat, combine the white baking chips, 8 oz of almond bark, and sweetened condensed milk. Stir until mostly melted.
- Remove from heat and continue stirring until completely smooth.
- Stir in vanilla and salt.
- Chill the Fudge: Pour the mixture into the prepared pan and spread evenly.
- Refrigerate for 2 hours, or let set at room temperature for about 4 hours, until firm.
- Decorate the Mummies: Cut the fudge into 16 squares.
- Melt the remaining almond bark in the microwave in 20-second intervals, stirring until smooth.
- Transfer to a zip-top bag and snip a small corner.
- Add two dots on each square and press candy eyes in place.
- Drizzle almond bark back and forth across each piece to look like mummy bandages.
- Set and Serve: Let the fudge cool until the drizzle hardens. Serve immediately or package for Halloween gifts.
Notes
- Use high-quality white chocolate for best results.
- If the almond bark is too thick, add a teaspoon of coconut oil to thin it.
- Store fudge in an airtight container for up to a week.
- Prep Time: 15 minutes
- Cook Time: 0 minutes
- Category: Halloween
- Method: No-Bake
- Cuisine: American
Nutrition
- Serving Size: 1 piece
- Calories: 180
- Sugar: 20g
- Sodium: 40mg
- Fat: 8g
- Saturated Fat: 5g
- Unsaturated Fat: 2g
- Trans Fat: 0g
- Carbohydrates: 25g
- Fiber: 0g
- Protein: 2g
- Cholesterol: 5mg
Keywords: halloween fudge, mummy fudge, white chocolate fudge, easy fudge recipe, holiday treats


