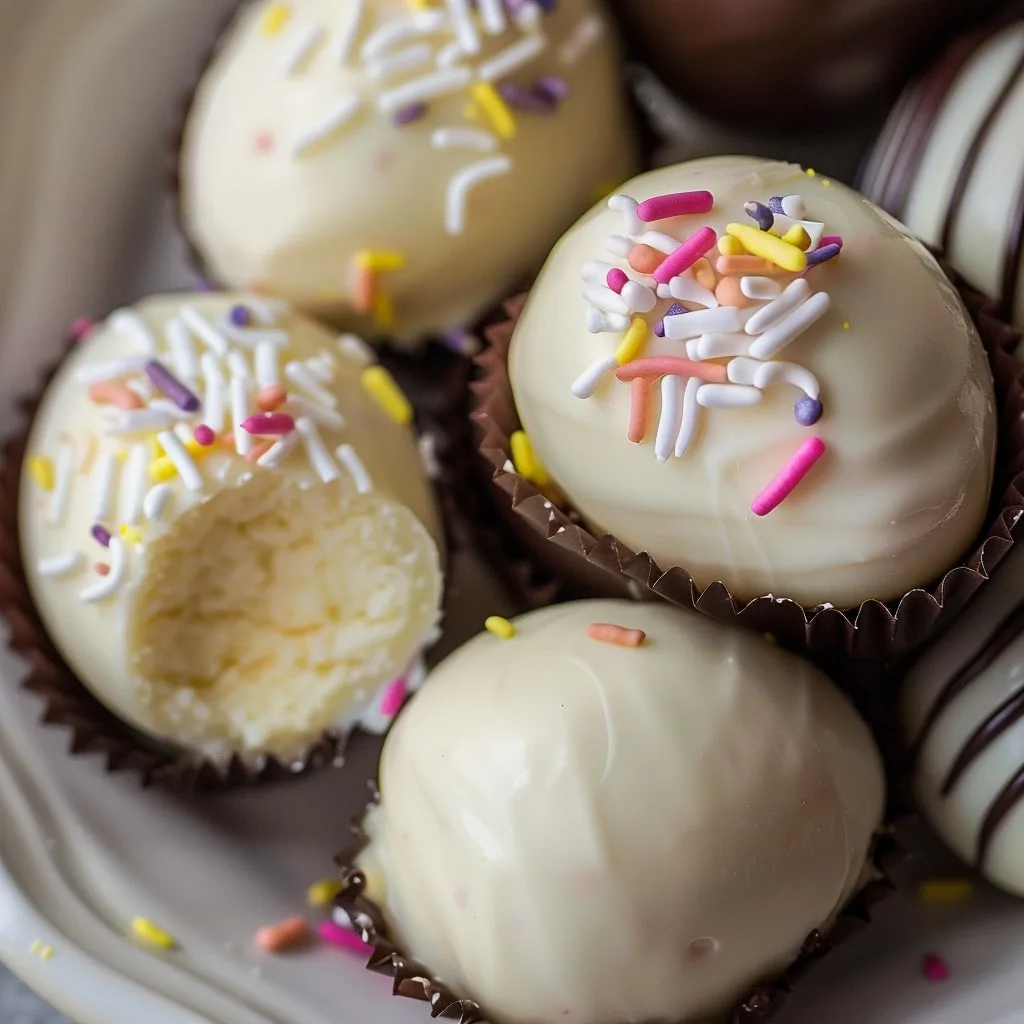
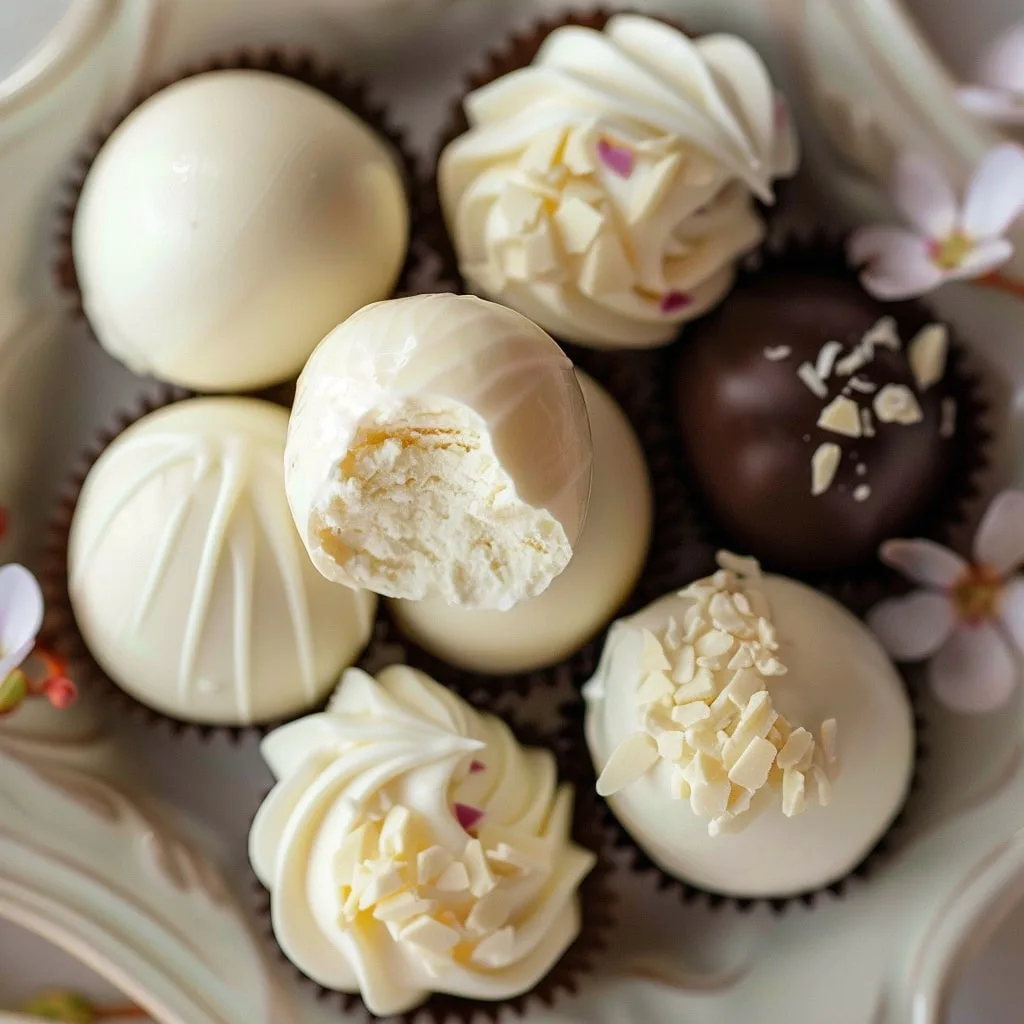
Easter just isn’t Easter in our house without homemade Chocolate Covered Easter Eggs. I still remember standing on a chair next to my mom as a kid, watching her shape that sweet, creamy filling into perfect little ovals before dunking them in glossy chocolate. Now I make them with my own kids every spring – it’s our favorite messy, delicious tradition!

What I love most about this recipe is how foolproof it is. You don’t need fancy equipment – just some basic ingredients and a little patience while the fillings chill. The best part? You can customize them endlessly! We usually make a batch of classic vanilla buttercream eggs, but my personal favorite is the coconut cream version – it tastes like a Mounds bar in egg form.
These treats always disappear fast at our Easter gatherings. There’s something magical about biting through that crisp chocolate shell to discover the sweet surprise inside. Whether you’re continuing a family tradition or starting a new one, these Chocolate Covered Easter Eggs are guaranteed to become a holiday favorite.
Why You’ll Love These Chocolate Covered Easter Eggs
Trust me, once you try making these at home, you’ll never go back to store-bought Easter candy again! Here’s why these little treats are absolutely irresistible:
- So easy even kids can help – No fancy skills needed, just mix, shape, and dip!
- Endless flavor possibilities – Switch up the fillings to match your family’s favorites (I’m partial to that peanut butter version myself).
- No oven required – Perfect for when your kitchen’s already overflowing with holiday baking.
- Makes the sweetest gifts – Package them in pretty boxes tied with ribbon for neighbors and teachers.
- The taste of childhood – That first bite takes me right back to my mom’s kitchen every time.
Seriously, the hardest part is waiting for the chocolate to set before sneaking one!
Ingredients for Chocolate Covered Easter Eggs
Here’s everything you’ll need to make the most irresistible homemade Easter candy. I’ve broken it down by filling type so you can mix and match – we almost always do at least two varieties! Pro tip: measure your powdered sugar by packing it lightly into the cup – that perfect texture makes all the difference.
- Vanilla Buttercream Filling:
- 4 oz (113g) cream cheese (softened)
- 1/4 cup (57g) butter (softened)
- 4 cups (480g) powdered sugar (packed)
- 1/2 tsp vanilla extract
- Funfetti Filling:
- Same as vanilla, plus:
- 1/2 tsp almond extract
- 1/4 cup (50g) rainbow sprinkles
- Coconut Cream Filling:
- 4 oz (113g) cream cheese
- 1 tbsp (14g) butter
- 3 cups (360g) powdered sugar
- 3/4 cup (54g) sweetened shredded coconut
- 1/4 tsp coconut extract
- Peanut Butter Filling:
- 3/4 cup (180g) creamy peanut butter
- 1/4 cup (57g) butter
- 1 1/2 cups (180g) powdered sugar
- For Coating:
- 8 oz (227g) chocolate (I prefer semi-sweet, but milk or dark works too)
- Extra sprinkles or coconut for decorating (optional)
See? Nothing complicated – just good, simple ingredients that come together to make something magical. Now let’s get mixing!
How to Make Chocolate Covered Easter Eggs
Okay, let’s dive into the fun part! Making these chocolate eggs is basically playing with edible playdough – just way tastier. I’ll walk you through each step so your treats turn out perfect every time.
Preparing the Fillings
First things first – get that cream cheese and butter nice and soft before you start. I usually leave mine out for about 30 minutes while I gather everything else. Here’s the magic method:
- Mix the base: Beat the cream cheese and butter together until they’re completely smooth and fluffy. No lumps allowed! I use my hand mixer on medium speed for about 2 minutes.
- Add the sweetness: Gradually mix in the powdered sugar about 1 cup at a time. The mixture will get thick – that’s perfect! For the vanilla and funfetti versions, add your extracts now.
- Special touches: If you’re making the coconut or funfetti fillings, gently fold in the extra goodies at the very end. The sprinkles or coconut should be evenly distributed but not crushed.
- Chill time: Cover the bowl and pop it in the fridge for at least an hour. You’ll know it’s ready when you can scoop some and it holds its shape without being sticky. Too soft? Add a bit more powdered sugar.
Shaping and Coating the Eggs
This is where the real fun begins! Just wait until you see those perfect little eggs take shape.
- Form the eggs: Use a teaspoon to scoop the chilled filling. Roll it between your palms to make a ball, then gently shape into an oval. Pro tip – lightly damp hands prevent sticking! Place them on a parchment-lined tray as you go.
- Second chill: This step is non-negotiable – freeze the shaped eggs for 2 hours. They need to be firm enough to handle the warm chocolate without melting.
- Melt the chocolate: Use a double boiler or microwave in 30-second bursts, stirring between each. You want it smooth and glossy, but not too hot – about 90°F is perfect if you’re using a thermometer.
- Dip away: Using two forks or candy tools, dip each chilled egg into the chocolate, letting excess drip off. Work quickly but carefully – the cold filling will start to firm the chocolate almost immediately.
- Finishing touches: If you’re adding sprinkles or coconut, do it right after dipping while the chocolate is still wet. Then transfer to clean parchment to set completely.
See? Not hard at all! The key is just taking your time with each step – especially those chill times. Now try not to eat them all before Easter morning!

Tips for Perfect Chocolate Covered Easter Eggs
After making these for years (and yes, having a few chocolate disasters along the way), here are my can’t-live-without tips for foolproof Easter eggs every time:
- Chill like you mean it – That second freeze is crucial! If your eggs feel at all soft, give them another 30 minutes. They should be firm enough to poke without leaving a dent.
- Chocolate temperature matters – Too hot and it’ll seize up, too cool and it gets clumpy. Dip your pinky in – it should feel warm but not burning. If it’s too thick, stir in a teaspoon of coconut oil.
- Work in small batches – Only take 4-5 eggs from the freezer at a time so they stay cold while you’re dipping. Warm filling = melty chocolate mess!
- Use the right tools – A fork works, but candy dipping tools (those little plastic sticks) make life so much easier for flipping eggs in the chocolate.
- Storage smarts – Keep finished eggs in an airtight container with parchment between layers. They’ll stay fresh for 2 weeks in the fridge… if they last that long!
Remember – even the “ugly” ones still taste amazing. My kids call those the “tester eggs”!
Variations for Chocolate Covered Easter Eggs
Oh, the possibilities! Once you’ve mastered the basic Chocolate Covered Easter Eggs, the real fun begins. Here are some of my favorite twists that’ll have your family begging for more:
- Mint Chocolate: Swap the vanilla extract for peppermint (start with 1/4 tsp – it’s strong!) and use dark chocolate for coating. Feels so fancy!
- Cookies & Cream: Fold in crushed Oreos to the vanilla filling – about 10 cookies does the trick. The kids go nuts for this one.
- Orange Dream: Add 1 tbsp orange zest and 1/2 tsp orange extract to the buttercream. Pair with dark chocolate – tastes just like those chocolate oranges!
- Nutty Buddy: Mix chopped toasted pecans or walnuts into the peanut butter filling. Extra crunch = extra delicious.
- Mocha Madness: Dissolve 1 tsp instant espresso powder into the butter before mixing for coffee lovers. Divine with milk chocolate.
The best part? You can mix and match coatings too – white chocolate on the coconut eggs, or colored candy melts for festive fun. Let your imagination run wild!
Storing and Serving Chocolate Covered Easter Eggs
Here’s the thing about these Chocolate Covered Easter Eggs – they never last long in our house! But when you need to stash some away (maybe hide them from sneaky little hands?), here’s how to keep them perfect:
Store them in an airtight container in the fridge with parchment paper between layers. They’ll stay fresh for up to 2 weeks this way – though ours rarely make it past Easter weekend! For serving, let them sit at room temperature for about 10 minutes first. That slight warmth makes the chocolate snap just right when you bite in.
Pro tip: If you’re gifting them, pack them in pretty cupcake liners inside a box. The recipients will think you bought them at some fancy chocolatier!
Chocolate Covered Easter Eggs FAQs
I get asked these questions every Easter – here are all the answers you need for perfect Chocolate Covered Easter Eggs!
Can I use dark chocolate instead of milk chocolate?
Absolutely! Dark chocolate is actually my secret weapon for grown-up versions. The bittersweet notes balance the sweet fillings beautifully. Just be careful with the melting temperature – dark chocolate can seize up faster than milk chocolate if overheated.
How far in advance can I make these?
The fillings can be made up to 3 days ahead (keep refrigerated), and finished eggs stay fresh for 2 weeks in the fridge. But honestly? They’re best within the first 5 days when the textures are perfect. Freezing works too – just thaw overnight in the fridge.
Why do my eggs keep cracking when I dip them?
This usually means they weren’t chilled enough before dipping. The filling needs to be rock-solid cold so the temperature shock from the warm chocolate doesn’t cause cracks. Try freezing them an extra hour next time!
Can I make these dairy-free?
You bet! Use vegan cream cheese and butter substitutes, and check your chocolate labels. The coconut version is naturally the easiest to adapt – just swap in dairy-free chocolate coating.
Still have questions? Drop them in the comments – I’m happy to help troubleshoot your Easter candy adventures!
Nutritional Information
Just so you know what you’re indulging in (not that it stops me from eating three at a time!), here’s the scoop on these Chocolate Covered Easter Eggs. Keep in mind these are estimates – your exact numbers will vary based on fillings and chocolate type. Per candy (based on vanilla buttercream version):
- Calories: 120
- Fat: 6g (3g saturated)
- Sugar: 15g
- Protein: 1g
The peanut butter version packs a bit more protein, while the coconut adds extra fiber. Everything in moderation… except maybe on Easter!
Share Your Chocolate Covered Easter Eggs
I’d love to see your chocolate egg creations! Snap a photo and tag me on Instagram – nothing makes me happier than seeing families carrying on this sweet tradition. Leave a comment below too if you tried any fun variations (I’m always looking for new ideas!). Happy Easter baking!
Print
Chocolate Covered Easter Eggs
- Total Time: 3 hours 30 minutes
- Yield: 40 candies 1x
- Diet: Vegetarian
Description
A simple recipe for homemade Chocolate Covered Easter Eggs with various filling options.
Ingredients
Vanilla Buttercream Filling:
- 4 oz (113g) cream cheese
- 1/4 cup (57g) butter
- 4 cups (480g) powdered sugar
- 1/2 tsp vanilla extract
Funfetti Filling:
- 4 oz (113g) cream cheese
- 1/4 cup (57g) butter
- 4 cups (480g) powdered sugar
- 1/2 tsp vanilla extract
- 1/2 tsp almond extract
- 1/4 cup (50g) sprinkles
Coconut Cream Filling:
- 4 oz (113g) cream cheese
- 1 tbsp (14g) butter
- 3 cups (360g) powdered sugar
- 3/4 cup (54g) shredded coconut
- 1/4 tsp coconut extract
Peanut Butter Filling:
- 3/4 cup (180g) peanut butter
- 1/4 cup (57g) butter
- 1 1/2 cups (180g) powdered sugar
Coating:
- 8 oz (227g) chocolate
- extra sprinkles or coconut (optional)
Instructions
- Beat cream cheese and butter until smooth.
- Add powdered sugar and extracts, then mix well.
- Chill fillings for 1 hour.
- Shape into balls or egg shapes using a teaspoon.
- Chill shaped fillings for 2 hours.
- Melt chocolate and dip chilled fillings.
- Add sprinkles or coconut if desired before chocolate sets.
Notes
- Keep fillings chilled for easier shaping.
- Use quality chocolate for best results.
- Store in the refrigerator to maintain freshness.
- Prep Time: 30 minutes
- Cook Time: 0 minutes
- Category: Dessert
- Method: No-Bake
- Cuisine: American
Nutrition
- Serving Size: 1 candy
- Calories: 120
- Sugar: 15g
- Sodium: 25mg
- Fat: 6g
- Saturated Fat: 3g
- Unsaturated Fat: 2g
- Trans Fat: 0g
- Carbohydrates: 16g
- Fiber: 0g
- Protein: 1g
- Cholesterol: 10mg
Keywords: chocolate covered easter eggs, homemade candy, no-bake dessert


