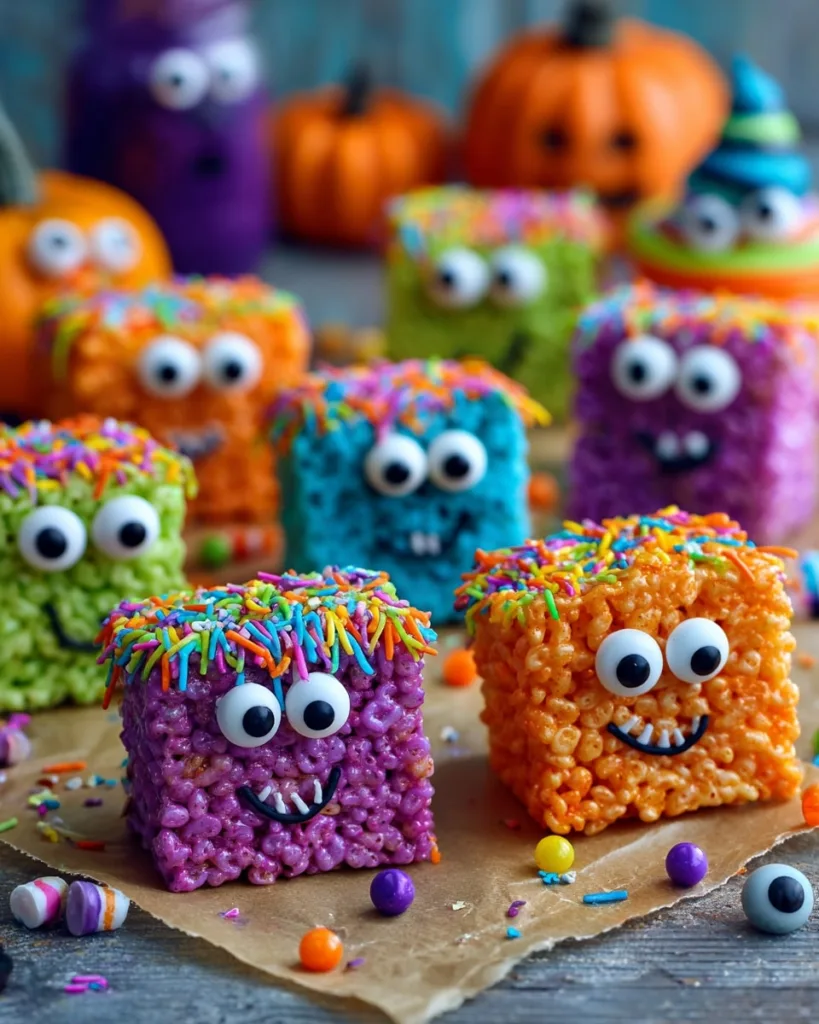
Halloween in our house means two things: costumes that take way too long to put together, and Rice Krispie Treat Monsters that disappear way too quickly! I swear, these little guys are the biggest hit every single year, even with the picky eaters who turn their noses up at anything “healthy-looking.”
It all started when my youngest insisted we needed “monster snacks” for her preschool party. Of course, we were scrambling at 9 PM the night before (parenting pro tip: never agree to volunteer for snack duty without checking your calendar first). That’s when I remembered the magic of Rice Krispie treats – they come together in minutes, and with some colorful candy melts and googly eyes? Instant monster magic.
Now it’s our Halloween tradition. The kids go nuts picking out which candy eyes and sprinkle “hair” to use, and I love that I don’t have to turn on the oven. These Rice Krispie Treat Monsters are seriously foolproof – even if your marshmallow melting skills are questionable (been there!). Just wait till you see how excited your little monsters get when they see these staring back at them from the treat table.
Table of Contents
Why You’ll Love These Rice Krispie Treat Monsters
These adorable monsters aren’t just cute – they’re downright addictive to make! Here’s why they’ve become our go-to Halloween treat:
- 5-minute active time (seriously, melt-press-decorate-done!)
- No baking required – perfect for hot October days
- Endless customization with different candy colors and silly faces
- Kids can decorate – mine love creating “personalities” for each monster
- Always a crowd-pleaser at parties (I’ve seen adults sneak seconds!)
The best part? You probably have most ingredients in your pantry already – just add imagination!
Ingredients for Rice Krispie Treat Monsters
Here’s what you’ll need to make about a dozen of these adorably creepy creatures (trust me, they multiply fast once the kids start decorating!):
- 3 tablespoons unsalted butter – the real stuff only, please! Margarine makes the treats too soft
- 10 ounces mini marshmallows – about 5½ cups if you’re measuring by volume (the minis melt faster than big ones)
- 5 cups crispy rice cereal – I use the name brand because it stays crunchier, but store brand works in a pinch
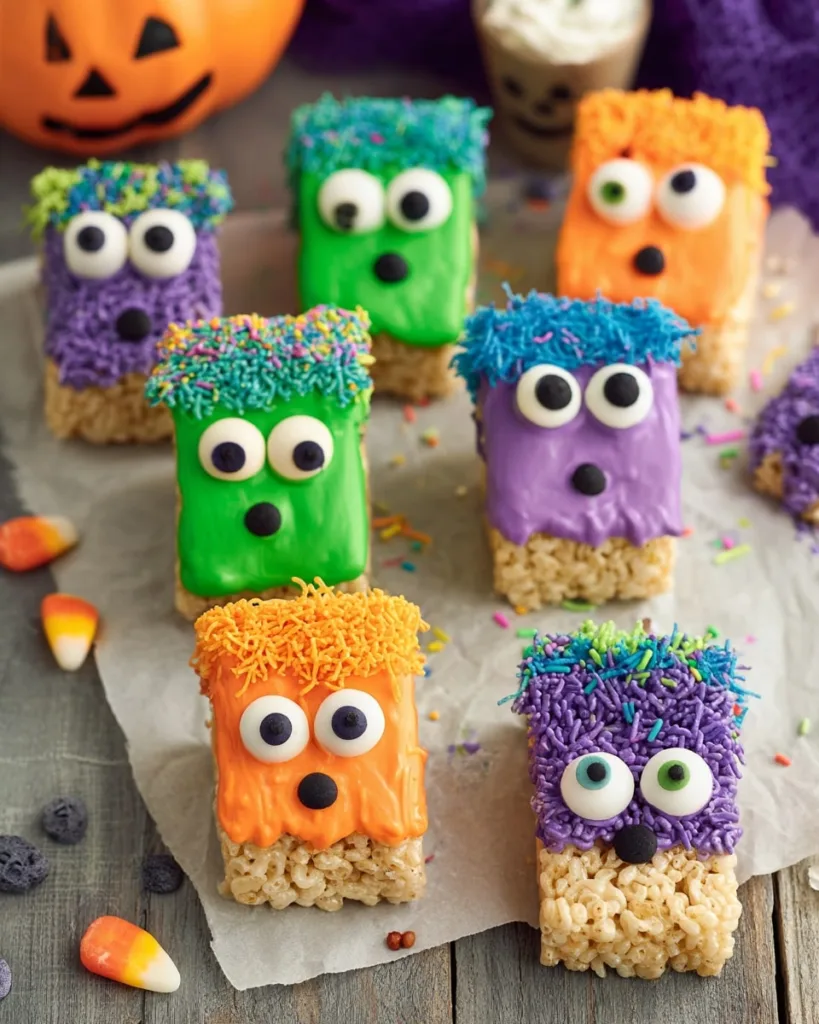
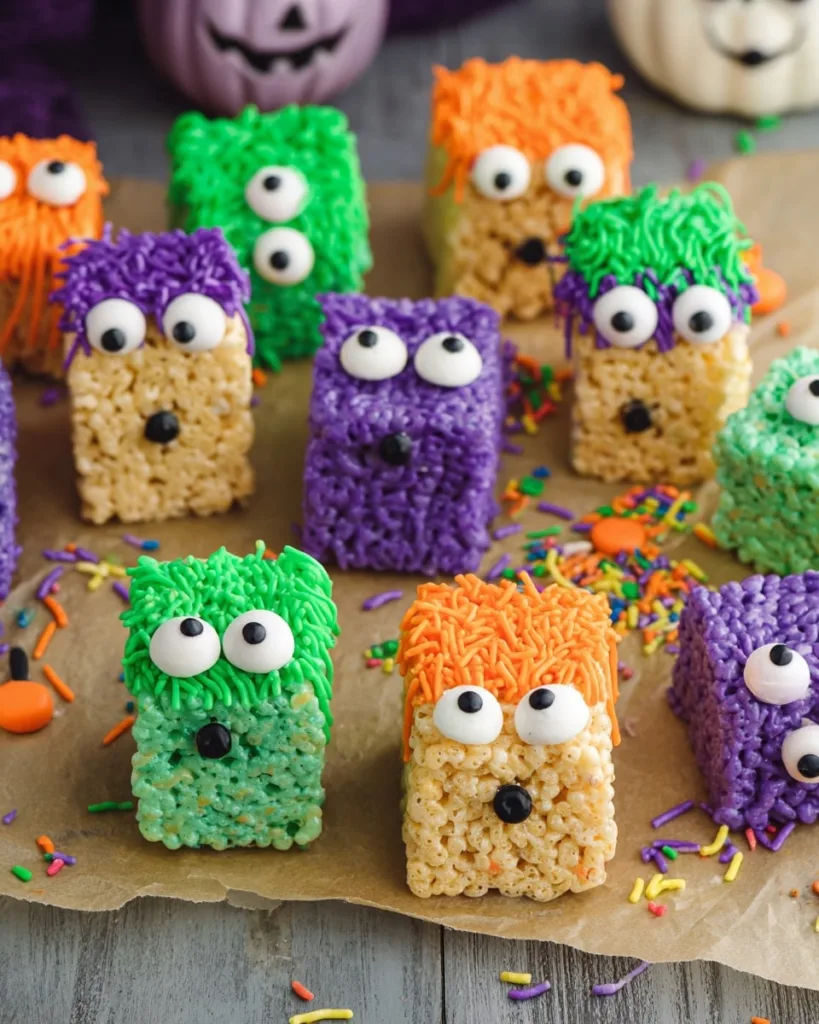
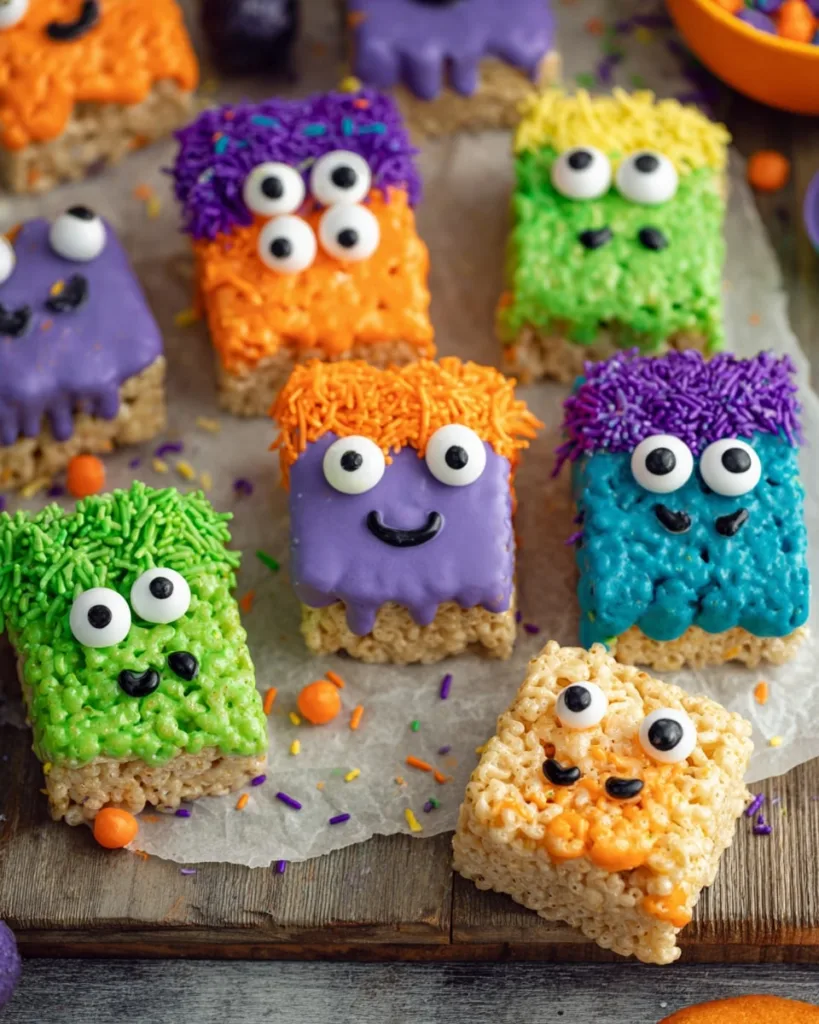
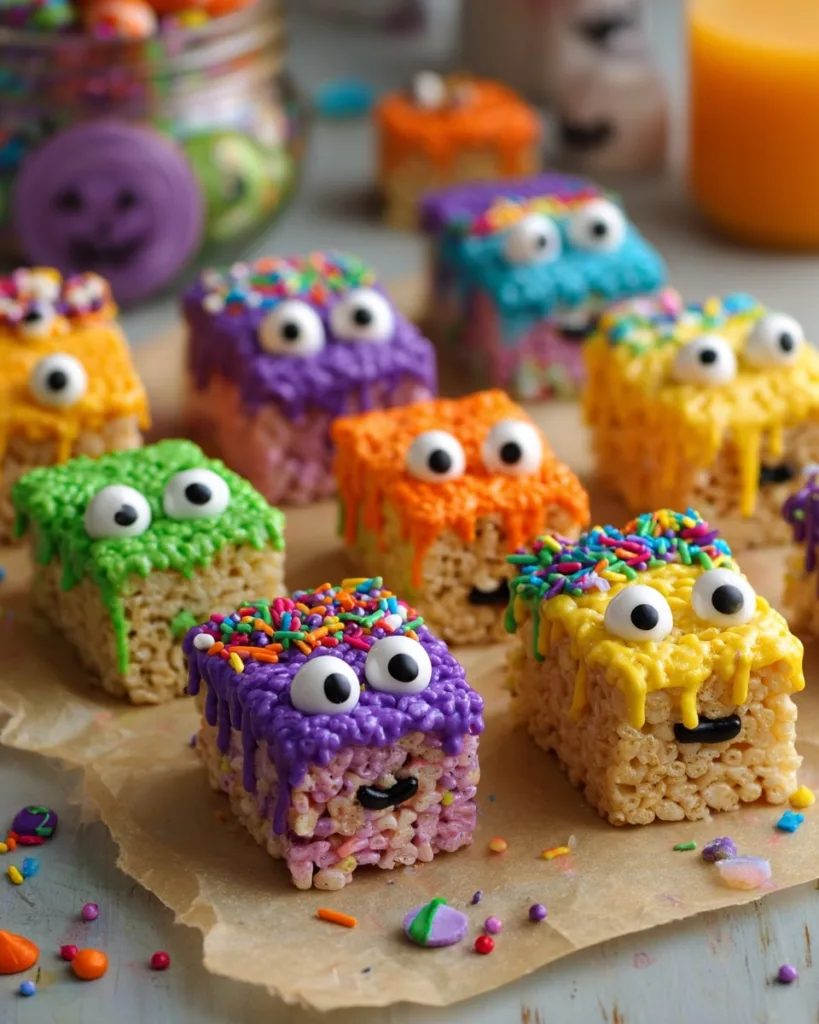
- 2 cups candy melts – pick monster colors like green, purple, or orange (Wilton brand holds its shape best)
- Assorted candy eyes – the bigger and googlier, the better! We use about 2-3 per monster
- 3 tablespoons sprinkles – jimmies work best for “hair,” but nonpareils add fun texture too
Pro tip: Double the batch if you’re making these for a class party – they disappear faster than ghosts at sunrise!
Equipment You’ll Need
Here’s the short list of kitchen tools that’ll make these Rice Krispie Treat Monsters a breeze to create (no fancy gadgets required!):
- Large pot – big enough to stir in all that cereal without making a mess (I use my 3-quart saucepan)
- 9×9-inch baking pan – for perfectly thick treats (an 8×8 works too if that’s what you’ve got)
- Parchment paper – lifesaver for easy removal and cleanup (wax paper sticks – learn from my mistakes!)
- Butter knife – for smoothing the candy coating (the dull edge works better than you’d think)
- Silicone spatula – trust me, you want one for scraping every last bit of marshmallow goodness
That’s it! Well, aside from spoons for sampling the marshmallow mixture – purely for quality control, of course.

Step-by-Step Instructions for Rice Krispie Treat Monsters
Alright, let’s make some monster magic happen! I’ve made these so many times I could probably do it in my sleep (and honestly, I almost have during those late-night school project panic moments). Follow these steps and you’ll have a whole squad of colorful creatures ready to party!
Melting the Butter and Marshmallows
First things first – melt that butter in your largest pot over low heat. I can’t stress the low heat enough – crank it up and those marshmallows will scorch faster than a vampire in sunlight. Once the butter’s melted (about 2 minutes), dump in all those mini marshmallows.
Now here’s my secret: stir constantly with your silicone spatula. At first it’ll look like nothing’s happening, then suddenly – bam! – you’ve got a smooth, glossy pool of marshmallow goodness. This takes about 5 minutes total. Remove from heat the second it’s fully melted – residual heat will keep it liquid while you work.
Mixing in the Cereal
Time for the crispy rice! Dump it all in at once and start folding gently. I like to use a sort of cutting motion with my spatula to coat every single piece without crushing the cereal. Work quickly before the marshmallow starts to set – you want everything evenly coated but not smashed to bits.
Here’s a pro tip: if the mixture seems too sticky, let it cool for just 30 seconds before mixing more. The marshmallow firms up slightly and becomes easier to work with. But don’t wait too long or you’ll end up with clumpy monsters!
Shaping and Cooling
Transfer your sticky masterpiece to your parchment-lined pan. Now comes the fun part – pressing it in! I use slightly damp hands (just run them under water and shake off excess) to press the mixture firmly into every corner. You want it packed tight so your monsters hold their shape when cut.
Let it cool at room temperature for about 40 minutes – no cheating with the fridge! Cooling slowly prevents condensation that can make your treats soggy. Test readiness by gently pressing the center – it should spring back slightly when ready to cut.
Decorating Your Monsters
Now for the transformation! Cut your slab into rectangles (I get about 12 from a 9×9 pan), then melt your candy melts according to package directions. Here’s where the real creativity begins!
Dip each rectangle halfway into the melted candy, using your butter knife to smooth the coating. Immediately add eyes and sprinkles – you’ve got about 90 seconds before the candy sets. Let the kids go wild making silly faces! Pro tip: place decorated treats on fresh parchment – the first batch always sticks to my counter if I forget.
Let them set completely (about 45 minutes) before serving. The hardest part? Keeping little hands away until they’re ready!
Tips for Perfect Rice Krispie Treat Monsters
After making probably hundreds of these little guys over the years (and yes, eating my fair share of “test” monsters), I’ve picked up some tricks that take them from good to monster-mash-worthy every single time:
- Parchment is your best friend – Line both the pan AND your decorating surface. Nothing ruins the fun faster than a perfectly decorated monster stuck to the counter.
- Temperature matters – If your marshmallow mixture cools too much while mixing, pop the pot back on low heat for 10-15 seconds to loosen it up again.
- Customize your colors – Mix candy melt colors in separate bowls for multi-colored monsters. My kids love doing “rainbow dip” with stripes of different hues!
- The sprinkle rule – Add sprinkles IMMEDIATELY after dipping – like within 30 seconds. They won’t stick once the candy starts setting.
- Storage smarts – Keep in an airtight container with parchment between layers. They’ll stay fresh for 3 days… if they last that long!
- Emergency fix – If your coating cracks, just melt a tiny bit more candy and “glue” pieces back together. The eyes hide all sins!
One last piece of advice? Make extra marshmallow mixture – it’s the perfect “glue” for attaching any decorations that fall off. Plus, it gives you an excuse to lick the spoon… not that I’d know anything about that!
Variations for Rice Krispie Treat Monsters
Once you’ve mastered the basic monster look, the fun really begins! Here are some of our favorite ways to mix things up when we make these treats year after year (because let’s be honest – you’ll get requests to make them again!):
- Monster mash-up – Use black candy melts and pipe white chocolate “stitches” to create Frankenstein monsters
- Vampire vibes – Red candy coating with white chocolate fangs and those adorable mini marshmallow teeth
- Mummy madness – Drizzle white candy melts in zig-zags and use mini chocolate chips for eyes peeking through bandages
- Spooky sprinkles – Mix in Halloween-themed sprinkles right into the Rice Krispie mixture for colorful “innards”
- Glow-in-the-dark ghosts – Dip fully in white candy melts and attach mini chocolate chip eyes (they glow under black lights!)
For non-Halloween occasions, try pastel colors with heart sprinkles for Valentine monsters, or red/green coating with holly sprinkles for Christmas creatures. Honestly, once you start playing with the concept, you’ll see monster potential everywhere – my daughter once made “homework monsters” with notebook-paper print sprinkles for her teacher!
Serving and Storing Rice Krispie Treat Monsters
I know the hardest part is waiting to dig in, but trust me – that 45-minute set time makes all the difference! The candy coating needs to fully harden so your monsters keep their adorable faces intact (learned this the hard way when my first batch turned into one-eyed blobs).
For serving, I love arranging them on a platter with little signs like “Monster Buffet” or “Beware of Treats!” The kids get such a kick out of picking which silly face they want to eat first. Pro tip: bring extras to parties – these disappear faster than you can say “trick or treat!”
Storage is simple: just pop them in an airtight container with parchment between layers. They’ll stay fresh at room temperature for up to 3 days (if they last that long!). Whatever you do, don’t refrigerate – the moisture makes the cereal lose its crunch faster than a zombie loses limbs.
One last secret: these actually taste even better the next day! The flavors meld together, and the candy coating gets that perfect crisp-yet-chewy texture. Not that I’ve ever had any left over to test that theory…
Nutritional Information
Okay, let’s be real for a second – we’re not making these Rice Krispie Treat Monsters because they’re health food! But since inquiring minds want to know, here’s the general nutritional picture (with the understanding that values will vary based on the specific brands of ingredients you use):
Each monster treat clocks in at around 195 calories, with most coming from sugars (about 15g per treat). You’re looking at 5g of fat (that butter and candy coating doing its thing), and minimal protein (1g) – though my kids swear the candy eyes add “superpowers.” They’re vegetarian-friendly, but definitely not gluten-free unless you use GF cereal.
Important note: These estimates can swing wildly depending on:
- How thick you cut your treats
- How generous you are with the candy coating
- Whether you go wild with the sprinkles (we always do!)
- The specific brands of marshmallows and cereal you use
My philosophy? These are special occasion treats meant for fun, not everyday snacks. And honestly? Watching kids giggle as they create monster faces is way more nourishing than any vitamin! But if you’re counting macros strictly, maybe just admire them as edible art instead.
FAQs About Rice Krispie Treat Monsters
Can I make these ahead of time?
Absolutely! These hold up great if you need to prep in advance. Make the undecorated Rice Krispie squares up to 2 days before, store them in an airtight container at room temp, then dip and decorate the day of your event. The candy coating actually stays crisper when applied fresh.
What if I can’t find candy melts?
No panic! White chocolate chips mixed with 1 teaspoon vegetable oil per cup work in a pinch (melt at 50% power in 30-second bursts). For color, stir in gel food coloring after melting. Just know the texture will be slightly softer than candy melts.
Any allergy-friendly swaps?
For nut allergies: all ingredients are naturally nut-free (just check labels). For dairy-free: use vegan butter and dairy-free chocolate. Gluten-free? Swap in your favorite GF crispy rice cereal. Egg-free? You’re already golden – no eggs here!
Help! My marshmallow mixture is too sticky!
Been there! If it’s sticking to everything, let it cool for 2-3 minutes before pressing into the pan. Lightly wet your hands or spray your spatula with cooking spray to prevent sticking. Worst case? Add 1/4 cup extra cereal to stiffen it up.
Can I freeze these?
Technically yes, but I don’t recommend it. The cereal loses its satisfying crunch when thawed, and the candy coating can get weepy. They’re so quick to make fresh, it’s really not worth the freezer space!
Get Your Spooky On with These Monster Treats!
And there you have it – the easiest and most adorable Halloween treat on the block! This Rice Krispie Treat Monsters recipe is a go-to for so many reasons: it requires no baking, comes together in minutes, and is the perfect spooky activity to get the kids involved in the kitchen. The best part is how customizable they are; let your little monsters’ creativity run wild with different colors and candy eyeballs to create a truly unique and ghoulishly good snack. Whether you’re prepping for a Halloween party, a monster-themed birthday, or just a fun afternoon treat, this recipe guarantees sweet and spooky success every time.
We can’t wait to see your monstrous creations! If you make these Rice Krispie Treat Monsters, be sure to leave a comment below and let us know how they turned out.
For more spooktacular recipes and festive ideas, be sure to follow along on Facebook, Instagram, and Pinterest
More Halloween Recipes You’ll Love
Print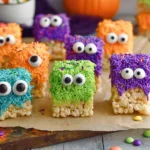
Rice Krispie Treat Monsters
- Total Time: 1 hour 45 minutes
- Yield: 12 treats 1x
- Diet: Vegetarian
Description
Colorful Rice Krispie treat monsters are a fun and easy Halloween dessert. Perfect for kids’ parties, school events, or a festive family treat.
Ingredients
- 3 tablespoons unsalted butter
- 10 ounces mini marshmallows
- 5 cups crispy rice cereal
- 2 cups candy melts (any color)
- Assorted candy eyes
- 3 tablespoons sprinkles
Instructions
- In a large pot over medium-low heat, melt the butter.
- Add mini marshmallows and stir until smooth. Remove from heat.
- Stir in crispy rice cereal until evenly coated.
- Press mixture into a parchment-lined 9×9-inch pan. Let cool for about 40 minutes.
- Cut into rectangles.
- Melt candy melts according to package directions.
- Dip each Rice Krispie rectangle halfway into the melted candy, spreading evenly with a butter knife if needed. Place on parchment paper.
- While the coating is still soft, press on candy eyes and add sprinkles to create monster hair.
- Let treats set for about 45 minutes before serving.
Notes
- Use parchment paper for easy cleanup.
- Store in an airtight container for up to 3 days.
- Customize with different candy melt colors.
- Prep Time: 20 minutes
- Cook Time: 5 minutes
- Category: Halloween
- Method: Stovetop
- Cuisine: American
Nutrition
- Serving Size: 1 treat
- Calories: 195
- Sugar: 15g
- Sodium: 75mg
- Fat: 5g
- Saturated Fat: 3g
- Unsaturated Fat: 2g
- Trans Fat: 0g
- Carbohydrates: 35g
- Fiber: 0g
- Protein: 1g
- Cholesterol: 10mg
Keywords: Rice Krispie Treat Monsters, Halloween dessert, kids treats


