This Halloween Pie is the ultimate dessert for your next spooky fall gathering. It gives a thrilling twist to a classic recipe by pairing a flaky crust with a rich fruit filling. You will love how easily this halloween cherry pie comes together.
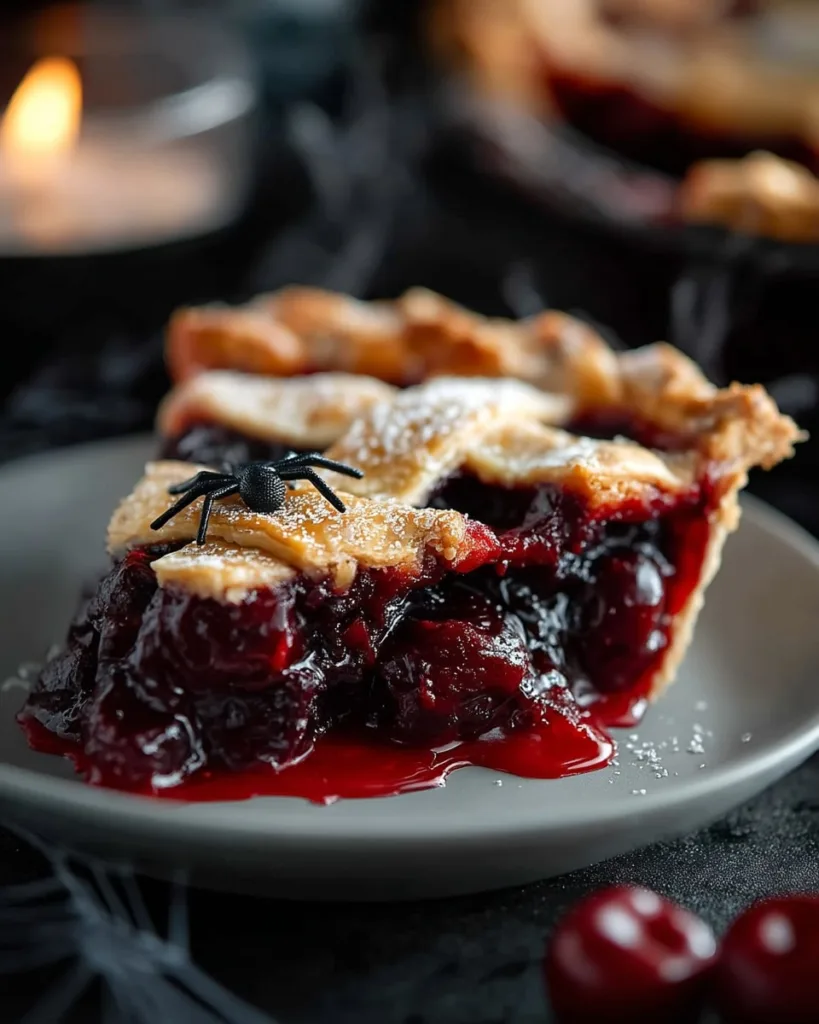
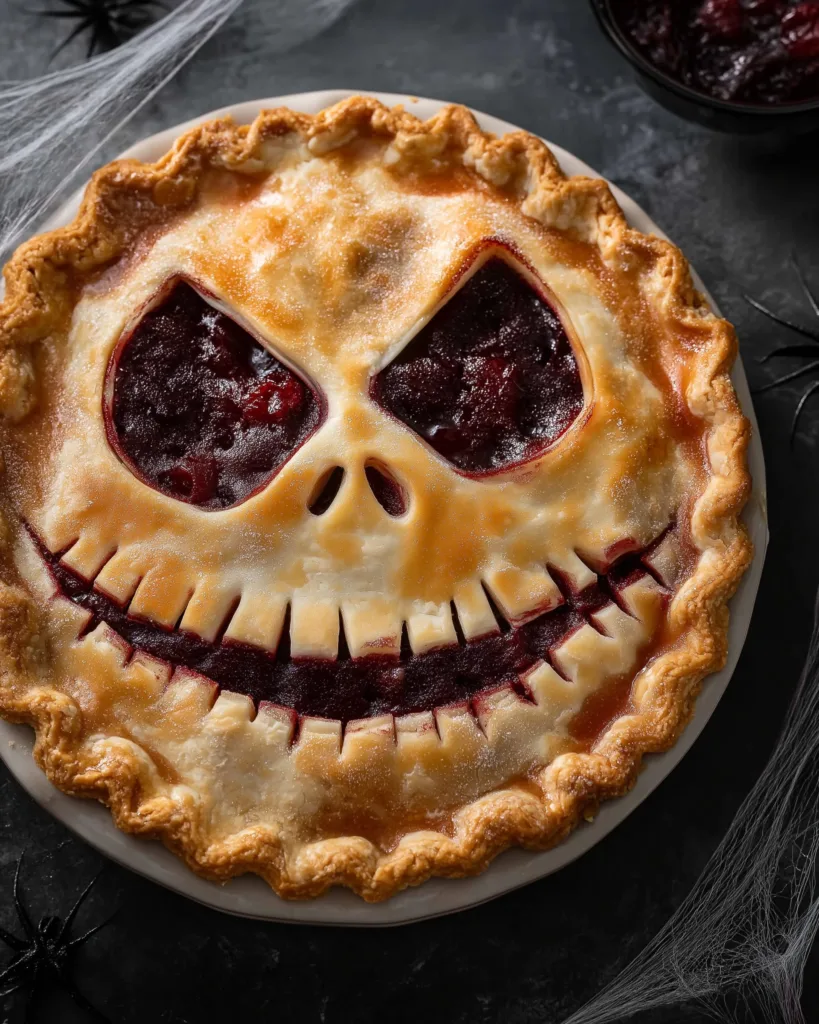
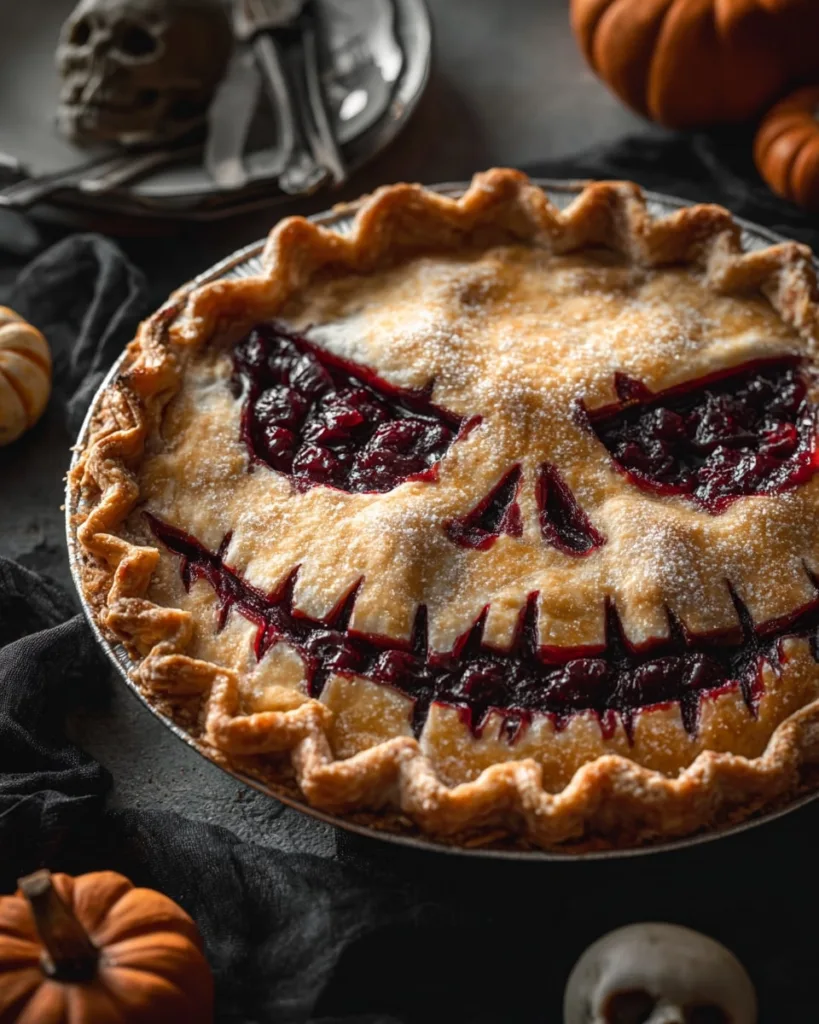
The magic happens when the deep red cherry filling oozes through a creepy Jack Skellington face. It looks like a scary cherry pie but tastes absolutely amazing. People always enjoy this fun dessert as a centerpiece for their easy Halloween party food ideas during October feasts.
I bake this special treat every year when the autumn air turns crisp. My kids rush to the kitchen to help me carve the spooky smile into the dough. It creates wonderful memories and yields the most delicious halloween face pie you will ever eat.
Table of Contents
Why You’ll Love This Spooky Halloween Pie
You absolutely need this Spooky Halloween Pie in your baking lineup this year. It brings so much fun to your holiday table without adding stress to your busy schedule.
Here are a few reasons this dessert will become your new favorite tradition:
- Minimal prep time: You only need twenty minutes to get this scary cherry pie ready for the oven. This gives you plenty of extra time to decorate and enjoy the party with your friends.
- Super simple ingredients: We keep things incredibly easy by using store-bought refrigerated pie dough. You skip the messy kitchen clean-up and still get a perfectly flaky, delicious crust every single time.
- Show-stopping centerpiece: A creepy face pie always grabs everyone’s attention on the holiday dessert table. Your guests will marvel at the spooky design before rushing back for a second slice.
- Creative and fun: You can carve a classic skeleton smile or make a completely unique halloween face pie. It feels just like carving a pumpkin but tastes so much sweeter.
Pair this stunning masterpiece with some homemade ghost cookies for the ultimate autumn dessert spread. Your friends will definitely ask you for the recipe before they leave.
Ingredients You’ll Need
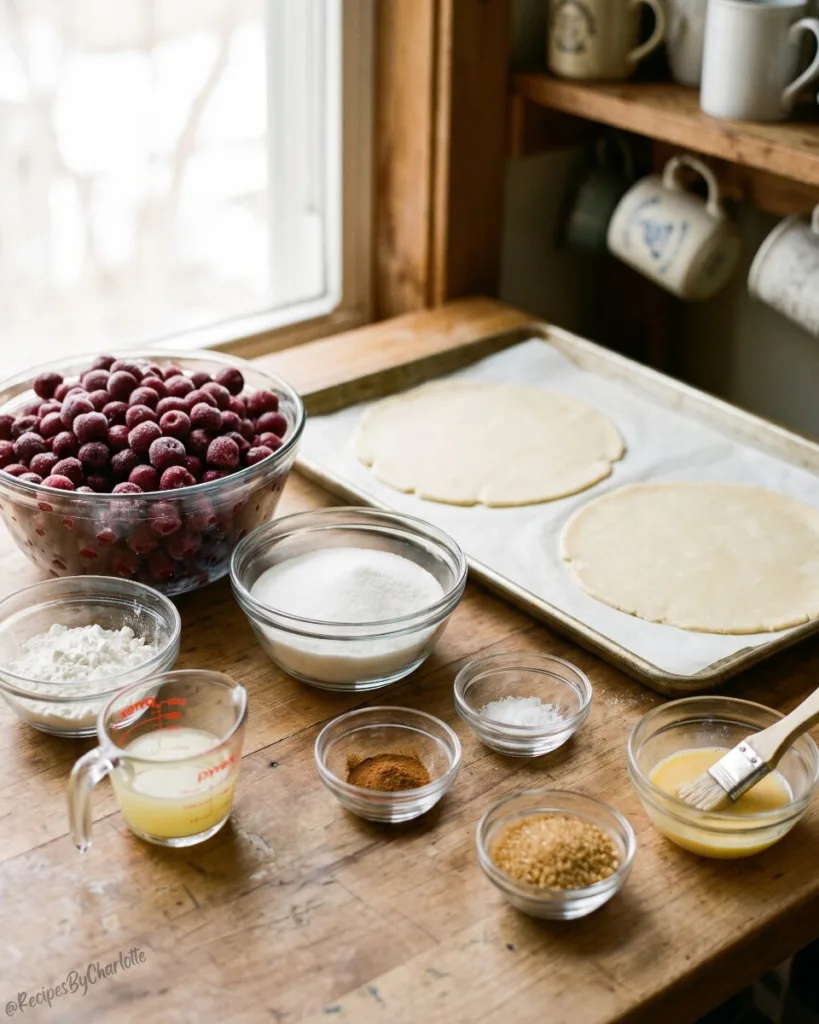
Let’s gather the simple items you need for this delicious Halloween Pie recipe. You probably already have most of these baking staples right in your pantry.
- Frozen dark cherries (32 oz): We use frozen, pitted dark cherries because they create that perfectly spooky, “bloody” look when baked.
- Granulated sugar (1 cup): This adds just the right amount of sweetness to the tart fruit.
- Cornstarch (1/3 cup): This acts as your secret baking weapon. It is absolutely vital for thickening the sweet filling so your pie stays firm.
- Fresh lemon juice (1 squeeze): A splash of bright citrus balances the rich flavors beautifully.
- Spices: You need one teaspoon of ground cinnamon and one teaspoon of fine sea salt to enhance the filling.
- Refrigerated pie dough (2 sheets): Store-bought dough saves you precious time and guarantees a wonderfully flaky crust.
- Egg and milk: Mix one egg with a tablespoon of milk to create a quick egg wash. This gives your baked crust a gorgeous golden shine.
- Demerara sugar: Sprinkle a generous handful over the top crust for a wonderful crunchy texture.
You can easily find all these everyday items at your local grocery store. Grab everything you need and let us start making this fun treat!
How to Make a Halloween Pie
Are you ready to create a masterpiece? Baking this creepy Halloween Pie is actually incredibly easy and fun. If you can handle a classic brown butter pumpkin pie, you will master this recipe effortlessly.
You might think carving a face into pastry requires special artistic skills, but it truly doesn’t. We break the whole process down into simple, manageable steps just for you. Let us dive right into creating your very own halloween face pie.
Preparing the Cherry Filling
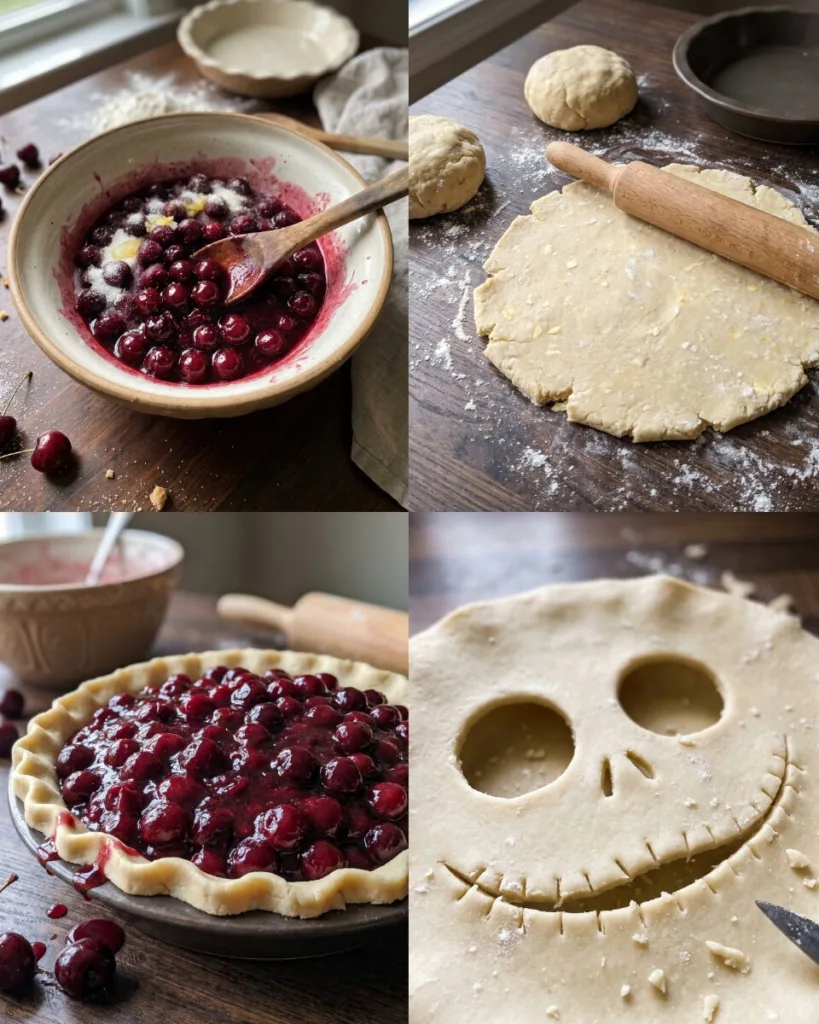
Start by preheating your oven to 400 degrees Fahrenheit. Grab a large saucepan and toss in your cherries, sugar, cornstarch, lemon juice, cinnamon, and salt. Stir everything together until the dry ingredients coat the fruit perfectly.
Cook this delicious mixture over medium heat. You need to stir it often so the sugar doesn’t stick to the bottom of your pan. Watch closely as the cherries thaw and the shiny liquid thickens into a rich syrup.
Here is the most important secret for a perfect scary cherry pie. You must set the pan aside and let the filling cool slightly. Pouring boiling hot fruit into your raw dough will melt the butter in the crust and make it terribly soggy.
Carving the Halloween Pie Crust Face
While your filling cools, roll out your first sheet of pie dough into a 10-inch circle. Place it gently into an 8-inch pie dish and pour your cooled cherry mixture right into the center.
Now, unroll your second sheet of dough to make the creepy face pie design. Use a sharp knife or a small round cookie cutter to carve out two large eye holes. Cut two small, angled slits in the center for a skeletal nose.
Then, slice a wide, crooked smile across the bottom and add tiny vertical cuts to look like spooky stitches. Carefully drape this decorated crust over your filled pie and press the edges together with a fork. Brush the dough with your egg wash, sprinkle with Demerara sugar, and bake for 45 to 50 minutes.
Pro Tips for the Best Halloween Pie
Let me share a few of my favorite baking secrets so your dessert turns out perfectly on the very first try.
- Protect the crust: Keep a close eye on your crust while it bakes for those 50 minutes. If you notice the edges browning too fast, gently cover them with a ring of aluminum foil. This protects the delicate dough while the center finishes cooking.
- Let it rest: You must let the pie cool completely before you slice into it. The hot cherry filling needs plenty of time to set up properly. If you cut it too soon, the beautiful red syrup will run everywhere and create a messy puddle.
- Keep the dough cold: Make sure your pie dough stays very cold before you carve it. Warm dough tears easily and loses its spooky shape in the hot oven. Keep the pastry sheets in the fridge until the exact moment you need them.
These simple tricks guarantee a stunning dessert every single time. If you love perfectly baked pastry, you should also try my classic homemade blueberry pie next!
Recipe Variations and Twists
You can easily customize this creepy Halloween Pie to match your favorite fruit flavors. I love experimenting with different fillings to surprise my friends every year. Here are a few creative alternatives you can try:
- Spooky Blueberries: Swap out the dark cherries for sweet blueberries. The cooked berries create a dark purple hue that looks hauntingly beautiful bubbling out of your halloween face pie.
- Classic Apple Cinnamon: Fill your crust with warm, spiced apples instead. This gives you a traditional fall flavor profile while keeping the fun, scary look. If you love this flavor, you should definitely check out my apple pie cheesecake tacos too.
- Mixed Berry Blend: Combine raspberries and blackberries for a mysterious, dark filling. It tastes incredibly fresh and keeps that classic bloody appearance intact.
Have fun playing with these tasty twists! You really can’t go wrong with any of these delicious combinations.
How to Store Your Halloween Pie
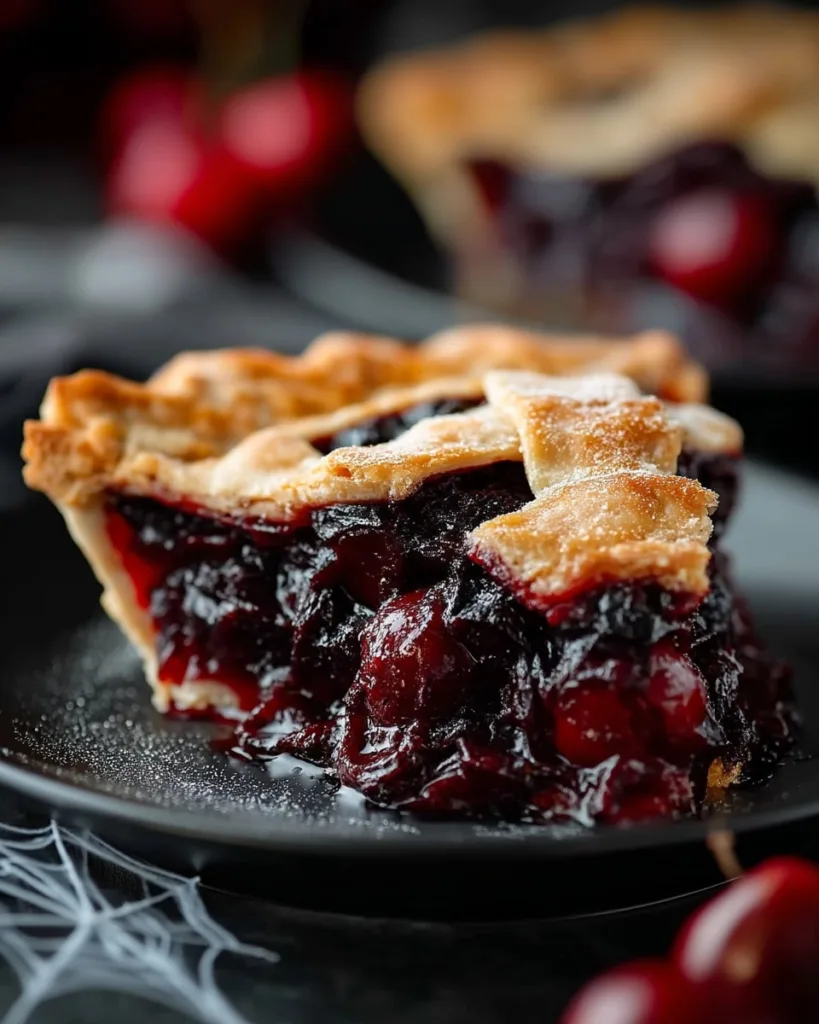
You will probably eat this delicious Halloween Pie quickly, but you might have a few leftovers. Just wrap the dish tightly with plastic wrap or aluminum foil. You can safely keep the slices in your refrigerator for up to three days.
Do you want to prep your scary cherry pie early for a big party? You can easily freeze the fully assembled, unbaked pie for longer storage. Wrap the entire dish twice with plastic wrap and foil before putting it in your freezer.
When you feel ready to bake, just place the frozen pie directly into your hot oven. You will need to add about twenty extra minutes to your baking time. If you need more party food prep ideas, check out this amazing make ahead breakfast casserole to save time the morning after your spooky event.
FAQs About Halloween Pie
Can I use fresh cherries instead of frozen?
Yes, you can absolutely use fresh cherries for this recipe. Just make sure you pit them thoroughly before cooking the sweet filling. Fresh cherries taste amazing, but frozen ones are usually much easier to find in October.
How do I get my crust shiny?
You need to brush the top dough with a simple egg wash made of one beaten egg and a little milk. After brushing it on, sprinkle Demerara sugar over the surface before baking. This simple combination creates a gorgeous golden shine and a wonderful crunch.
Why did my pie filling run everywhere?
Your filling likely ran because it didn’t cool completely before baking. You must let the cherry and cornstarch mixture cool down so the thickening agents can properly activate. Always wait for the baked dessert to cool entirely before you slice it!
How do you make a scary Halloween pie?
You make a scary pie by carving a spooky face into the top crust of a traditional fruit pastry. Dark red fillings like cherry or mixed berry look like oozing blood when they bubble up through the carved eyes and mouth. It is a very simple technique that yields thrilling results for your party guests.
What is the unhealthiest pie to eat?
Pecan pie usually ranks as the heaviest option because bakers load it with corn syrup, sugar, and butter. If you want a truly decadent treat, a slice of rich pecan pie cake will definitely satisfy your sweetest cravings. However, we believe every dessert is perfectly fine to enjoy in moderation during the holidays!
What is a Halloween dessert?
A Halloween dessert is any fun, festive treat decorated to look spooky, creepy, or magical for the autumn season. People often bake themed items like witch hat Halloween cookies or graveyard puddings to celebrate the holiday. These recipes focus heavily on rich fall flavors and highly creative visual designs.
How to make creepy pie?
You can easily make a creepy pie by using a sharp knife to cut jagged shapes, stitches, or monster faces into your top pastry dough. You can even mix a little red food coloring with corn syrup to paint extra “blood” on the baked crust. It just takes a little imagination to transform a regular recipe into a spooky masterpiece.
More Spooky Treats You Will Love
Keep the spooky fun going with my favorite holiday treats. These easy desserts will look absolutely fantastic next to your new favorite pie!
- Try making this rich mummy fudge for a wonderfully sweet and bite-sized chocolate thrill.
- Bake a batch of zombie brain cupcakes to easily spook and delight all your party guests.
- Slice into a gooey vampire poke cake for an incredibly moist and bloody-looking red dessert.
- Serve these fun ghost jello shots to get the adults laughing and celebrating all night long.
Grab your favorite mixing bowls and start baking today. Your family will adore every single one of these festive autumn creations!
Get Ready to Bake Your Spooky Halloween Pie
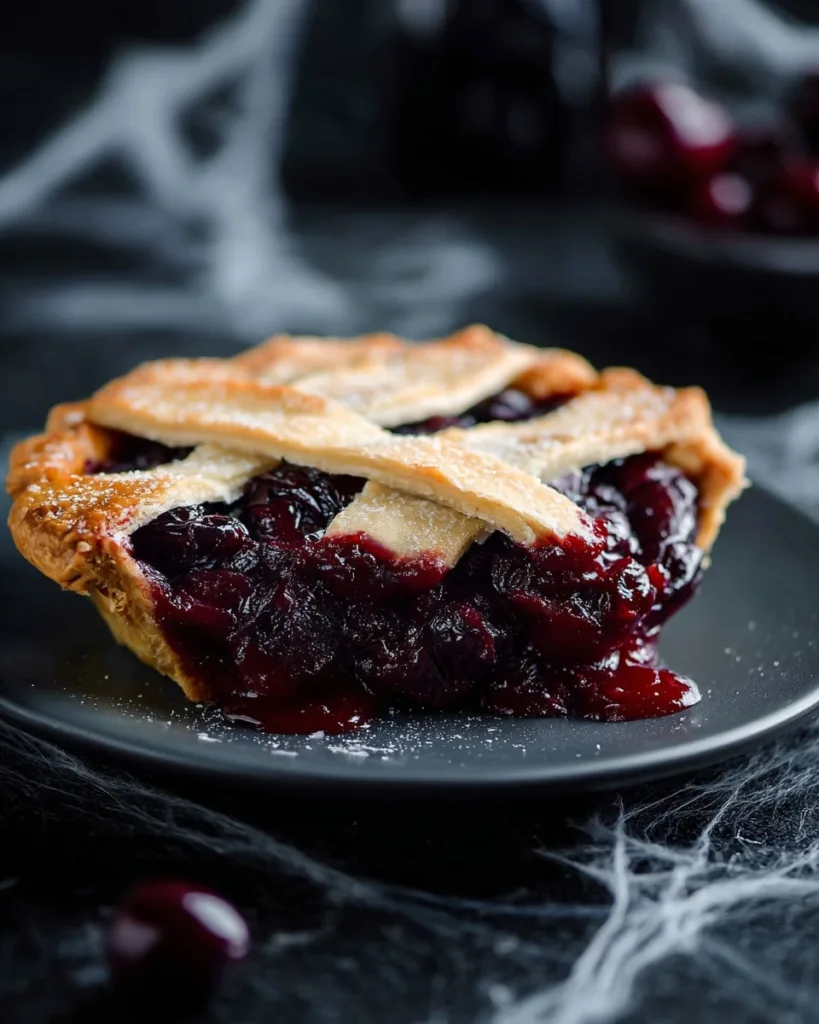
This delicious Halloween Pie will absolutely steal the spotlight at your next autumn gathering. You get a perfectly flaky crust and a creepy cherry filling without spending hours in the kitchen. Grab your rolling pin and try making this festive treat today.
If you need more inspiration for your holiday menu, browse through our favorite comforting meals and sweet treats to build the perfect feast. I would love to hear from you. Please leave a comment below and tell me how your spooky pastry face turned out!
Are you looking for more visual recipe inspiration? Come hang out with me on Pinterest for endless baking ideas and mouthwatering food photos. Pin this recipe to your favorite fall board so you never lose it.
Print
Halloween Pie
- Total Time: 1 hour 10 minutes
- Yield: 8 servings 1x
- Diet: Vegetarian
Description
This Halloween pie is a spooky twist on a classic cherry pie. With a deep red cherry filling and a Jack Skellington-inspired pie crust face, it’s a show-stopping dessert for fall gatherings and Halloween parties.
Ingredients
- 32 oz frozen dark cherries, pitted
- 1 cup granulated sugar
- 1/3 cup cornstarch
- 1 squeeze fresh lemon juice
- 1 teaspoon ground cinnamon
- 1 teaspoon finely ground sea salt
- 2 sheets refrigerated pie dough
- 1 egg + 1 tablespoon milk (for egg wash)
- Demerara sugar, for sprinkling
Instructions
- Preheat oven to 400°F.
- In a large saucepan, combine cherries, sugar, cornstarch, cinnamon, salt, and lemon juice. Stir to coat the cherries.
- Cook over medium heat, stirring often, until the cherries are thawed and the mixture thickens. Set aside to cool slightly.
- Roll out one sheet of pie dough into a 10-inch circle. Place it in an 8-inch pie dish, letting the edges hang over slightly.
- Pour the cherry mixture into the pie shell and spread evenly.
- Roll out the second sheet of dough into a 10-inch circle.
- Cut out two round eye holes, two small slits for the nose, and a wide, crooked smile to resemble Jack Skellington’s face.
- Gently place the dough over the filled pie.
- Press the top and bottom crust edges together, then crimp with a fork to seal.
- Brush the top with egg wash and sprinkle with Demerara sugar for crunch and shine.
- Bake on the middle rack for 45–50 minutes, until the crust is golden brown.
- Allow to cool before serving so the filling can set.
Notes
- Use a sharp knife or cookie cutter for clean edges on the Jack Skellington face.
- Let the pie cool completely before slicing to prevent runny filling.
- Store leftovers in the refrigerator for up to 3 days.
- Prep Time: 20 minutes
- Cook Time: 50 minutes
- Category: Halloween
- Method: Baking
- Cuisine: American
Nutrition
- Serving Size: 1 slice
- Calories: 320
- Sugar: 28g
- Sodium: 290mg
- Fat: 12g
- Saturated Fat: 5g
- Unsaturated Fat: 6g
- Trans Fat: 0g
- Carbohydrates: 52g
- Fiber: 2g
- Protein: 3g
- Cholesterol: 30mg
Keywords: Halloween pie, cherry pie, Jack Skellington pie, spooky dessert, holiday baking


