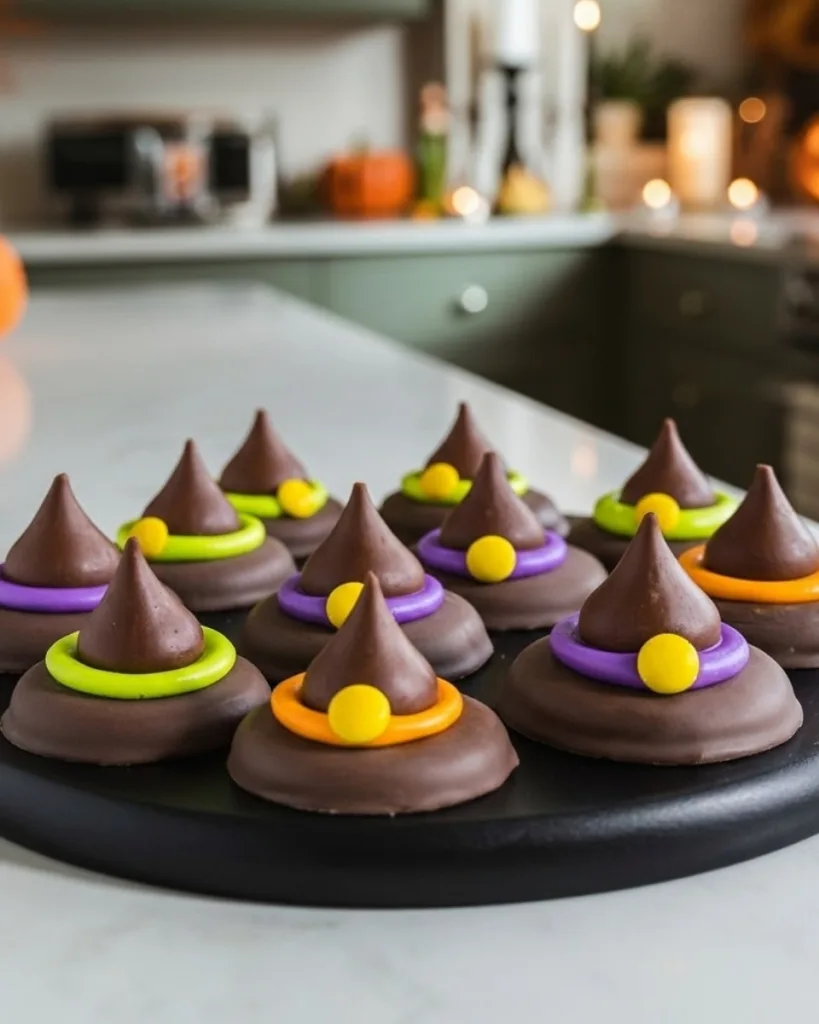
Every Halloween, my kitchen transforms into a magical (and slightly messy) witch’s workshop, thanks to these irresistible Witch Hat Halloween Cookies! I still remember the first time my niece squealed with delight when we pressed those chocolate kisses into swirls of purple frosting, suddenly, ordinary cookies became tiny, edible witch hats. That’s the spell these treats cast: they’re equal parts delicious and adorable, with a chocolatey cookie base, creamy buttercream crowns, and a candy buckle that even the pickiest little goblins can’t resist.
What I love most is how forgiving this recipe is, whether you’re a seasoned baker or just starting out. The dough comes together in minutes, and the decorating? Pure Halloween fun. Last year, my neighbor’s kids went wild experimenting with neon green and orange frosting, turning our batch into a psychedelic coven of hats.
These cookies are perfect for party favors, classroom treats, or just a cozy night of spooky storytelling with a plate of sweets. Trust me, once you try them, they’ll become a Halloween tradition faster than you can say “double, double, toil and trouble!”
Table of Contents
Why You’ll Love These Witch Hat Halloween Cookies
These cookies aren’t just treats, they’re tiny edible magic tricks that disappear way too fast! Here’s why they’ll cast a spell on you:
- Super simple to make: The dough whips up in one bowl, no fancy equipment needed
- Kid-approved creativity: Little hands love piping swirls and adding candy buckles
- Rich chocolate base: Soft, fudgy cookies that taste amazing even without the decorations
- Instant Halloween vibes: They look impressive but take half the effort of fussy sugar cookies
- Endless decorating fun: Try different frosting colors to match your spooky theme
Seriously, watching these witch hats come to life is half the fun, and eating them? That’s the best kind of trick AND treat!
Ingredients for Witch Hat Halloween Cookies
Gathering ingredients for these magical cookies feels like assembling a witch’s potion, but way tastier! Here’s everything you’ll need, separated into the cookie base, frosting, and those adorable finishing touches.
Pro tip: Set everything out before starting, trust me, you don’t want to realize your butter’s still rock-hard when the kids are already bouncing with decorating excitement!
- For the Cookies:
- 1 cup (2 sticks) unsalted butter, softened (leave out 30 minutes beforehand)
- 1 cup (200g) granulated sugar
- 1/2 cup (100g) packed light brown sugar (press it firmly into your measuring cup)
- 2 large eggs, room temperature (cold eggs make the batter seize up, I learned this the hard way!)
- 1 teaspoon pure vanilla extract (the good stuff makes all the difference)
- 2 cups (240g) all-purpose flour (spoon and level, don’t scoop!)
- 3/4 cup (70g) unsweetened cocoa powder (Dutch-processed gives deeper color)
- 1 teaspoon baking soda
- 1/2 teaspoon kosher salt
- For the Frosting:
- 1/2 cup (1 stick) unsalted butter, softened
- 3 cups (330g) powdered sugar, sifted (lumps ruin piping perfection!)
- 2-3 tablespoons whole milk (add slowly, you can always add more)
- 1 teaspoon pure vanilla extract
- Neon food coloring in purple, green, or orange (gel colors won’t water down your frosting)
- For Assembly:
- 24 Hershey’s Kisses, unwrapped (the foil removal is my kids’ favorite “job”)
- 24 mini M&M’s in orange or yellow (for that perfect witch hat buckle)
See? No eye of newt or toe of frog required, just pantry staples transformed into something spooktacular!
How to Make Witch Hat Halloween Cookies
Ready to whip up some cookie magic? These witch hats come together in three simple acts: baking the chocolatey base, whipping up the colorful frosting, and assembling our spooky little masterpieces. I’ll walk you through each step, just follow along and don’t worry if your first few hats look a bit “artistic.” Mine totally did the first time!
Baking the Cookies
First, preheat your oven to 350°F and line two baking sheets with parchment paper (no sticking disasters here!). Now, let’s make that dough:
- In a large bowl, cream together the softened butter, granulated sugar, and brown sugar for about 2 minutes until it’s light and fluffy. This is where the magic starts, proper creaming makes the cookies tender!
- Beat in the eggs one at a time, then add the vanilla. The mixture should look smooth and glossy.
- In another bowl, whisk together the flour, cocoa powder, baking soda, and salt. Gradually add this to the wet ingredients, mixing just until combined, overmixing makes tough cookies, and we want these babies soft!
- Roll tablespoon-sized portions of dough into balls, then place them 2 inches apart on your baking sheets. Gently flatten each ball with your palm to about 1/4-inch thick discs (they’ll puff up while baking).
- Bake for 8-10 minutes until the edges look set but the centers still appear slightly soft. They’ll firm up as they cool, I promise! Let them rest on the baking sheets for 2 minutes before transferring to wire racks to cool completely.
Decorating the Witch Hats
Now for the fun part, turning these cookies into proper witch hats! Here’s how we do it:
- Make the frosting: Beat the softened butter until smooth, then gradually add the sifted powdered sugar, vanilla, and milk. Start with 2 tablespoons of milk, you can always add more if needed. The frosting should be thick but pipeable.
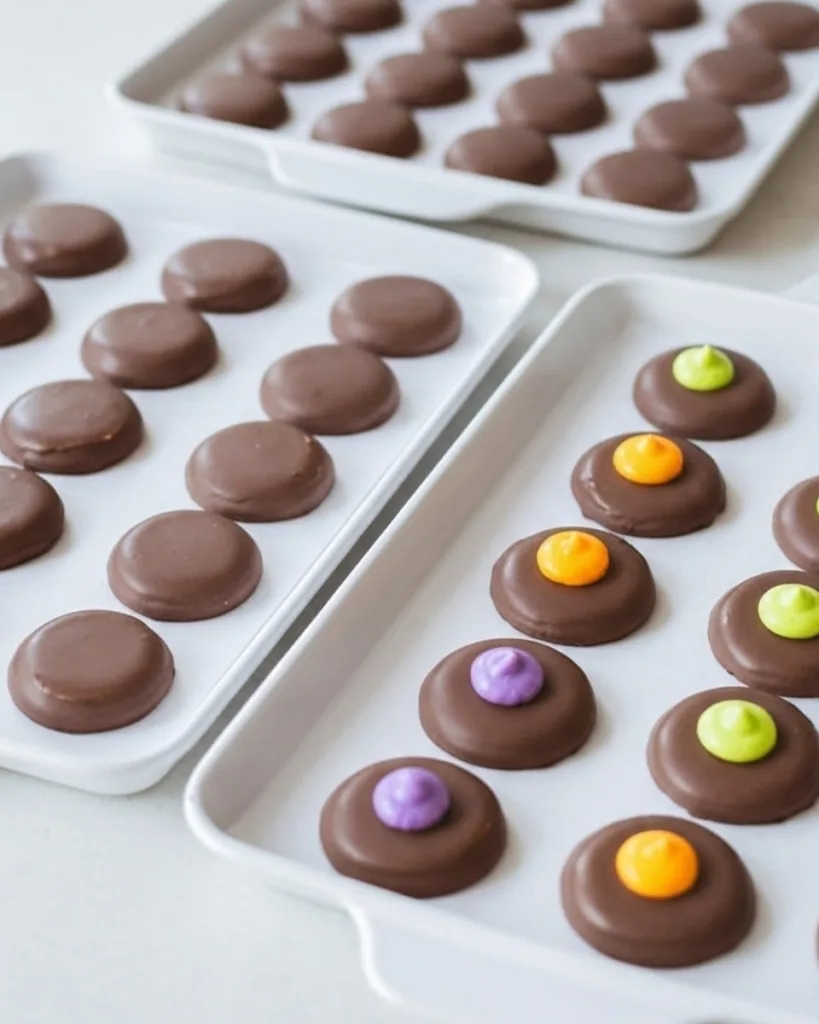
- Divide the frosting into small bowls and tint with food coloring. I like using gel colors because they give vibrant hues without thinning the frosting. Transfer each color to piping bags or zip-top bags with a corner snipped off.
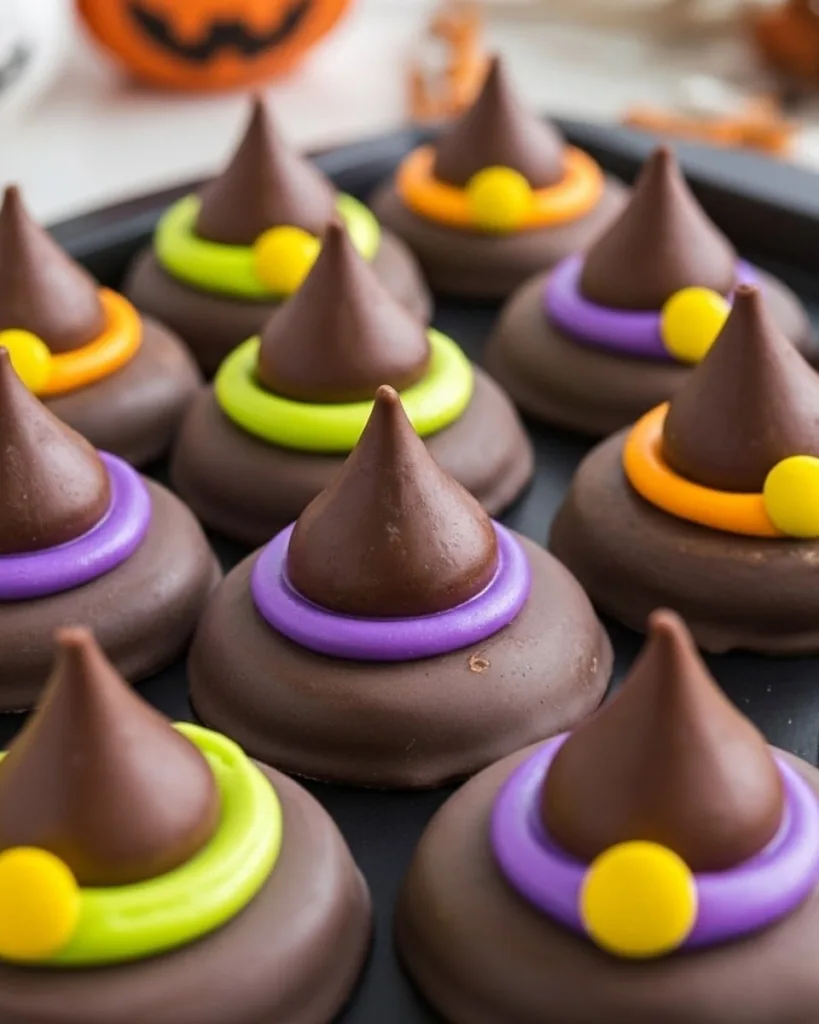
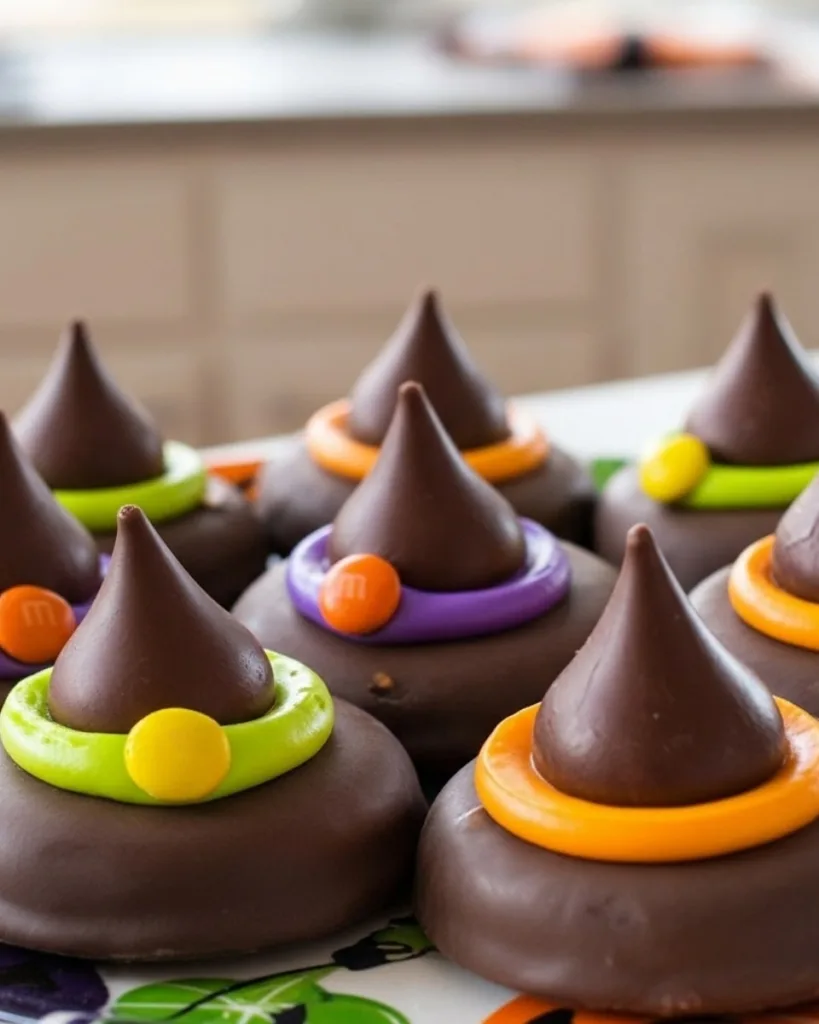
- Pipe a small mound of frosting in the center of each cooled cookie, about the size of a quarter. Gently press a Hershey’s Kiss upside down into the frosting so it spreads into a perfect hat brim. Hold it for a few seconds to set.
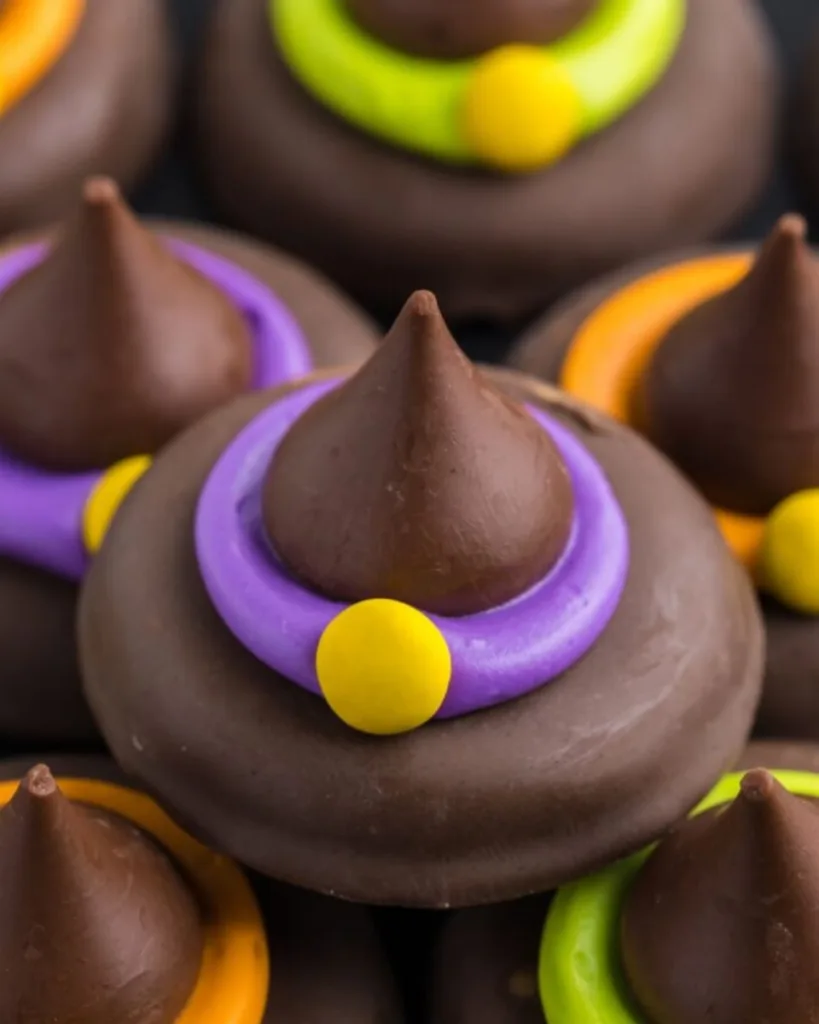
- Immediately add a mini M&M as the buckle before the frosting sets. Let your witch hats sit for about 20 minutes so the frosting firms up before serving.
See? Even if your piping isn’t perfect, those chocolate kisses hide a multitude of sins. The most important thing is to have fun with it, my first batch looked like a witch’s laundry day, but they still tasted amazing!
Tips for Perfect Witch Hat Halloween Cookies
After making these witch hats more times than I can count (and learning from all my messy mistakes!), here are my foolproof tricks for cookie success:
- Gel food coloring is your best friend: Liquid dyes make frosting runny, but gels give you those vibrant Halloween colors without sacrificing texture.
- Flatten dough discs evenly: Use the bottom of a glass dipped in sugar to press uniform circles, no lopsided hats here!
- Underbake slightly: Pull cookies when centers look slightly underdone for that perfect fudgy texture as they cool.
- Freeze unfrosted cookies: Bake ahead and store in freezer bags up to a month, just decorate before serving.
- Let frosting set: Wait 20 minutes after decorating so kisses don’t slide off when stacking.
Remember: even “imperfect” witch hats taste delicious, the charm is in their homemade spookiness!
Ingredient Substitutions & Variations
No witches were harmed in the making of these cookies, but feel free to tweak the recipe to suit your coven! Here are my favorite easy swaps:
- Gluten-free? Use a 1:1 gluten-free flour blend (I like King Arthur’s) instead of all-purpose, just add an extra tablespoon of milk if the dough feels dry.
- Out of vanilla? Try almond extract for a subtle twist, or use orange extract with the chocolate for a spooky Terry’s Chocolate Orange vibe.
- No Hershey’s Kisses? Mini peanut butter cups or Rolos work beautifully, just press them upside down into the frosting.
- Buckling under pressure? Use candy corn tips, yellow sprinkles, or even piped frosting dots as alternative hat decorations.
The beauty of these witch hats? They’re practically spell-proof, almost any variation turns out delicious!
Storing and Serving Witch Hat Halloween Cookies
Here’s the spell to keep your Witch Hat Halloween Cookies fresh and fabulous:
- Store them in an airtight container at room temperature for up to 3 days (if they last that long!).
- Layer them between sheets of parchment paper so the frosting doesn’t stick.
- The cookies actually taste best the next day, the chocolate flavor deepens while the frosting stays dreamy soft.
- No refrigeration needed, unless your kitchen feels like a sauna.
Pro tip: hide a few in the back of the cupboard so you’re not caught empty-handed when trick-or-treaters come knocking!
Nutritional Information
Here’s the spellbook fine print on these magical treats, each Witch Hat Halloween Cookie contains about 220 calories. The nutrition values are estimates (since brands vary), but you’re looking at a delicious mix of chocolatey carbs, creamy fats, and just enough sugar to power your broomstick! Remember, all treats in moderation, unless it’s Halloween, then all bets are off!
Witch Hat Halloween Cookies FAQs
Can I freeze these cookies?
Absolutely! Freeze unfrosted cookies in an airtight container for up to 1 month. Thaw at room temperature before decorating. Frosted cookies can be frozen too, but the Kisses might get condensation spots, still tasty though!
Help, my frosting is too runny!
No panic! Just add more sifted powdered sugar, a tablespoon at a time, until it holds its shape. If it’s really loose, pop it in the fridge for 10 minutes to firm up the butter.
Can I make these ahead of time?
You bet! Bake the cookies up to 3 days early and store them in an airtight container. Frost them the day you plan to serve for freshest results, the colors stay vibrant too.
Why did my chocolate kisses melt?
This happens if the cookies or frosting are still warm when assembling. Let everything cool completely. I wait until the cookies are room temp and the frosting is slightly stiff to the touch.
No piping bags, now what?
Zip-top bags with a tiny corner snipped off work perfectly! Or smear frosting with a butter knife and call them “rustic witch hats”, they’ll still disappear just as fast.
More Halloween Recipes You’ll Love
If you enjoyed these Witch Hat Halloween Cookies, you’ll love these other fun Halloween recipes that are just as festive and easy to make:
Each recipe brings spooky charm and delicious flavor to your Halloween menu, making them the perfect companions to your witch hat cookies.
Why These Witch Hat Halloween Cookies Are the Best
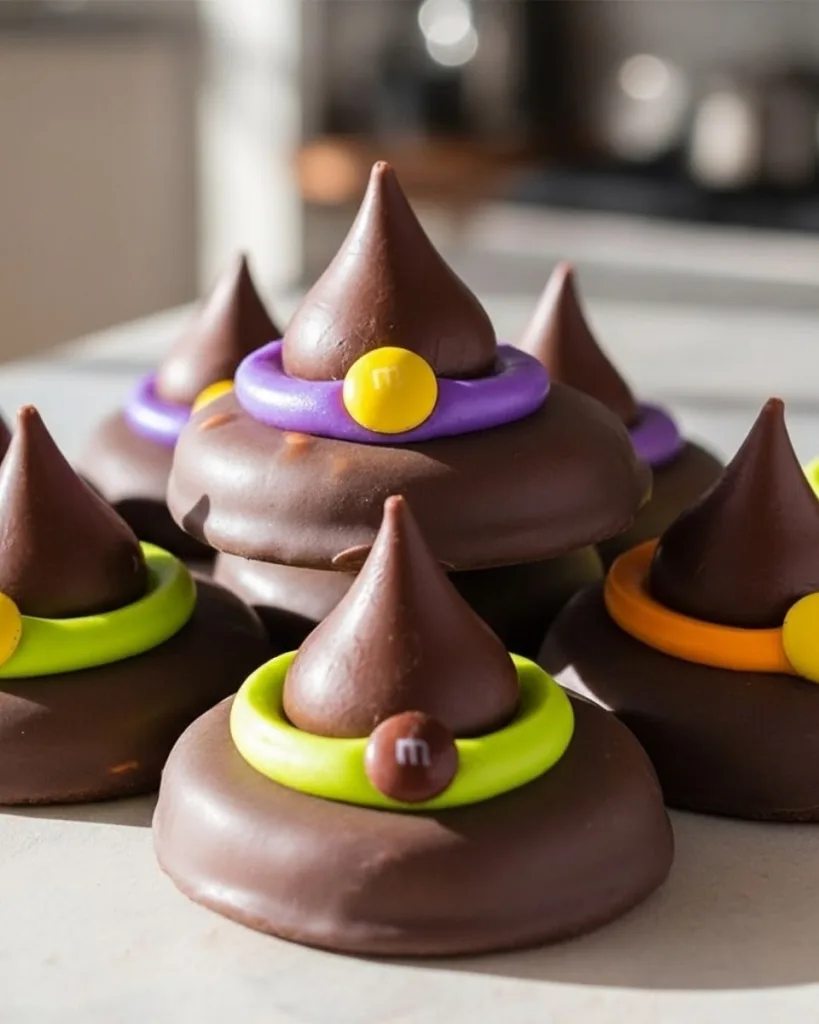
These Witch Hat Halloween Cookies are the ultimate no-bake treat, quick, easy, and perfect for festive fun. With just a few simple ingredients like fudge-covered cookies, frosting, and Hershey’s Kisses, you can whip up a spooky snack in minutes. They’re a hit with kids and adults alike, making them a great choice for classroom parties, bake sales, or Halloween movie nights. Plus, they double as edible décor for your Halloween dessert table.
If you’re looking for a fun and family-friendly recipe that’s equal parts creative and delicious, this is it! Try these cookies at home and let me know how they turn out in the comments. Don’t forget to follow me on Facebook, Instagram, and Pinterest for more spooky recipe inspiration.
PrintWitch Hat Halloween Cookies
- Total Time: 30 minutes
- Yield: 24 cookies 1x
- Diet: Vegetarian
Description
These Witch Hat Halloween Cookies are a spooky homemade treat that’s just as fun to make as it is to eat. A batch of soft, chocolatey cookies is topped with creamy buttercream frosting and a chocolate kiss, decorated to look like little witch hats. They’re perfect for parties, bake sales, or baking with the kids.
Ingredients
- For the Cookies:
- 1 cup (2 sticks) unsalted butter, softened
- 1 cup (200 g) granulated sugar
- 1/2 cup (100 g) packed light brown sugar
- 2 large eggs, room temperature
- 1 teaspoon pure vanilla extract
- 2 cups (240 g) all-purpose flour
- 3/4 cup (70 g) unsweetened cocoa powder
- 1 teaspoon baking soda
- 1/2 teaspoon kosher salt
- For the Frosting:
- 1/2 cup (1 stick) unsalted butter, softened
- 3 cups (330 g) powdered sugar, sifted
- 2–3 tablespoons whole milk
- 1 teaspoon pure vanilla extract
- Neon food coloring (purple, green, or orange)
- For Assembly:
- 24 Hershey’s Kisses, unwrapped
- 24 mini M&M’s (orange or yellow for the buckle)
Instructions
- Preheat oven to 350°F. Line two baking sheets with parchment paper.
- In a large bowl, cream butter, granulated sugar, and brown sugar until light and fluffy, about 2 minutes. Add eggs and vanilla, mixing until smooth.
- In another bowl, whisk flour, cocoa powder, baking soda, and salt. Gradually add dry ingredients to the wet mixture, mixing just until combined.
- Scoop tablespoon-sized portions of dough, roll into balls, and place 2 inches apart on prepared sheets. Flatten slightly with the palm of your hand to form discs.
- Bake 8–10 minutes, until cookies are set around the edges but soft in the center. Cool completely on wire racks before decorating.
- Make the frosting: Beat butter until smooth. Add powdered sugar, vanilla, and milk, beating until fluffy. Divide into small bowls and tint with food coloring. Transfer each color to a piping bag or zip-top bag with the corner snipped.
- Pipe a small mound of colored frosting in the center of each cookie. Gently press a chocolate kiss into the frosting so that it spreads into a ring around the base.
- Add one mini M&M to the “hatband” of frosting as a buckle. Let cookies sit at room temperature for 20 minutes to set before serving.
Notes
- Store cookies in an airtight container for up to 3 days.
- For a smoother frosting, sift the powdered sugar before mixing.
- Use gel food coloring for more vibrant colors.
- Prep Time: 20 minutes
- Cook Time: 10 minutes
- Category: Halloween
- Method: Baking
- Cuisine: American
Nutrition
- Serving Size: 1 cookie
- Calories: 220 kcal
- Sugar: 18 g
- Sodium: 85 mg
- Fat: 10 g
- Saturated Fat: 6 g
- Unsaturated Fat: 3 g
- Trans Fat: 0 g
- Carbohydrates: 30 g
- Fiber: 1 g
- Protein: 2 g
- Cholesterol: 30 mg
Keywords: Witch Hat Halloween Cookies, Halloween treats, chocolate cookies, buttercream frosting, Halloween baking


